
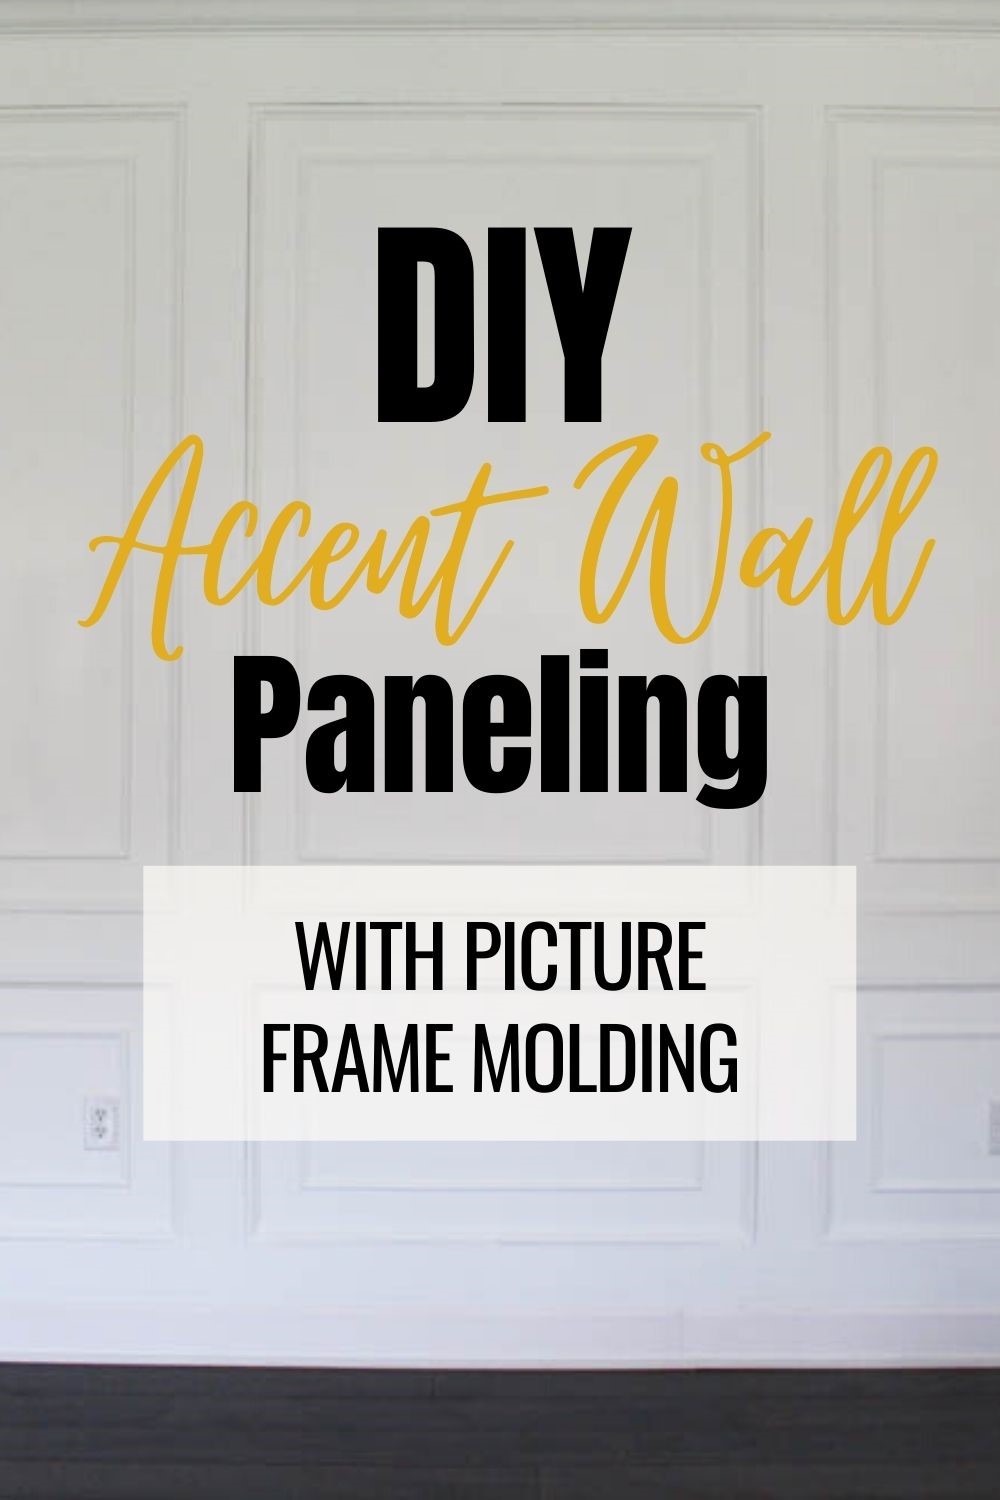
Accent wall paneling is a great way to instantly upscale any room in your home. Today I will be sharing our DIY wall paneling with picture frame moldings. We did this for our dining room accent wall and I am so happy with how it turned out! Take a look!

Today’s blog post is a full step-by-step tutorial on how to DIY this accent wall.
NOTE: Links to materials and tools will also be linked below.
BONUS! Scroll down for the full video on this DIY paneled wall to see exactly how we did it!
WALL PANELS
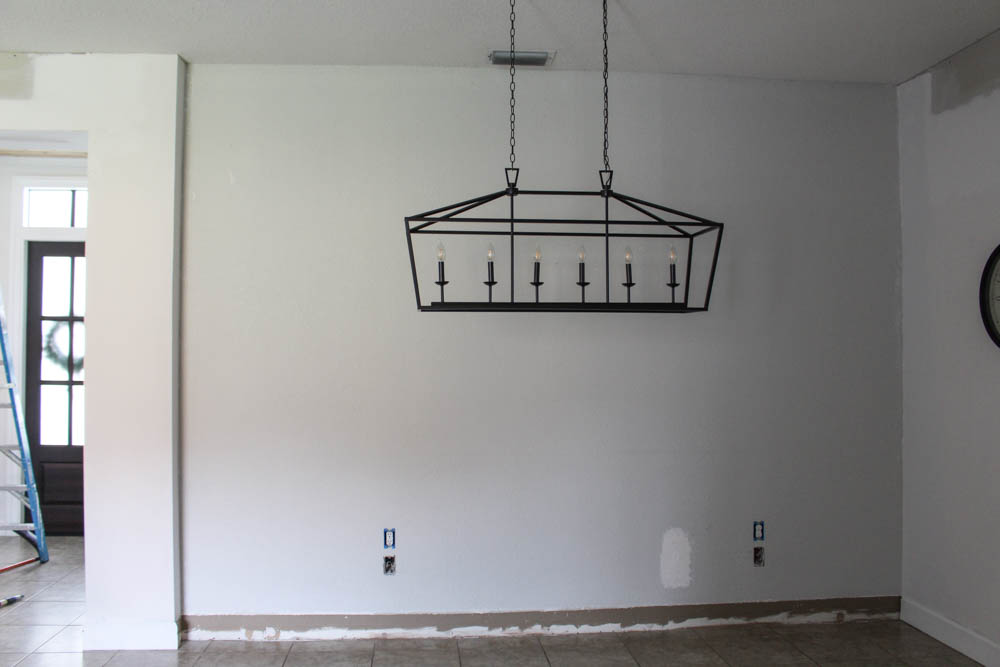
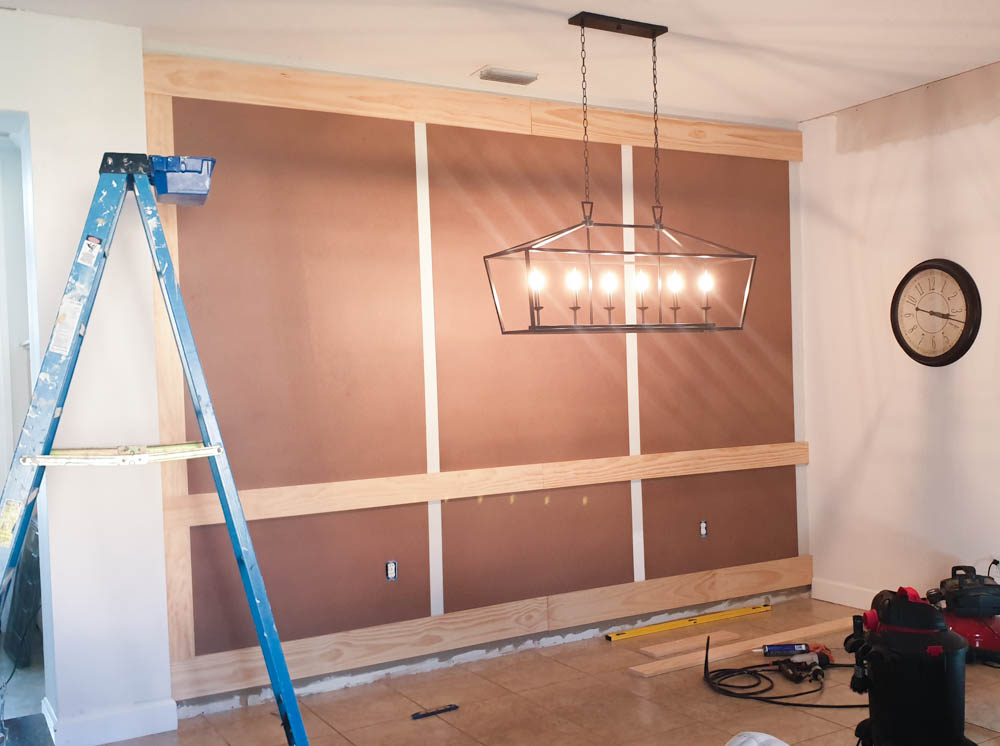
We had texture on this wall so it was absolutely necessary to cover it up with wall panels. But even if your walls are smooth I still recommend doing this step. It gives the wall a beautiful wood-paneled look and feel, which adds to the character.
FIGURE OUT YOUR DESIGN FIRST
It does take careful planning to know where to place your backboard. We had to strategically place the wall panels where the boards would cover the seams.
You also need to take into account that the wall panels are 4×8′. So, measure the size of your wall and see how many wall panels you will need to fill it in and if it will create an even pattern for your boards once placed at the seams.
Our wall is about 10′ high by 13′ long.
If your wall is longer than 13′ you could have four panels instead of three.
If your wall is less than 13′ you could make the end panels narrower and leave the middle at 4′ wide. Again, it’s all about working with what you have.
The height of the top and bottom panel sizes have more flexibility. We decided to make the bottom panels about the same height as our front door paneling. Which then determined the size of the top panels.
NOTE: Don’t worry if there are small gaps along the sides because the boards will cover that as well.
Once you measure and figure it out it’s time to start cutting!
INSTALLING THE WALL PANELS
If your wall panels will not be flush against the wall you need to mark a line where they will go. This will help you when it’s time to start placing your wall panels.
We used a saw guide for our circular saw to cut the wall panels.
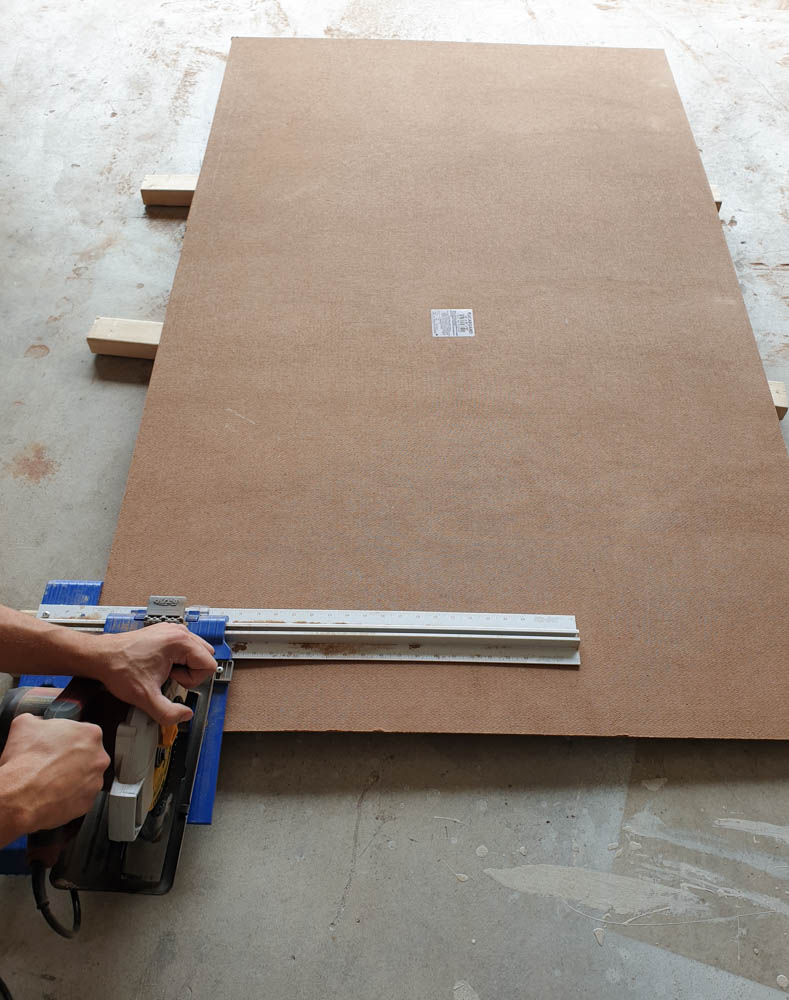
Make sure to cut holes in your wall panels for any outlets you might have on the wall.

Then apply wood glue on the back of the panels and nail them in with a BRAD nailer.
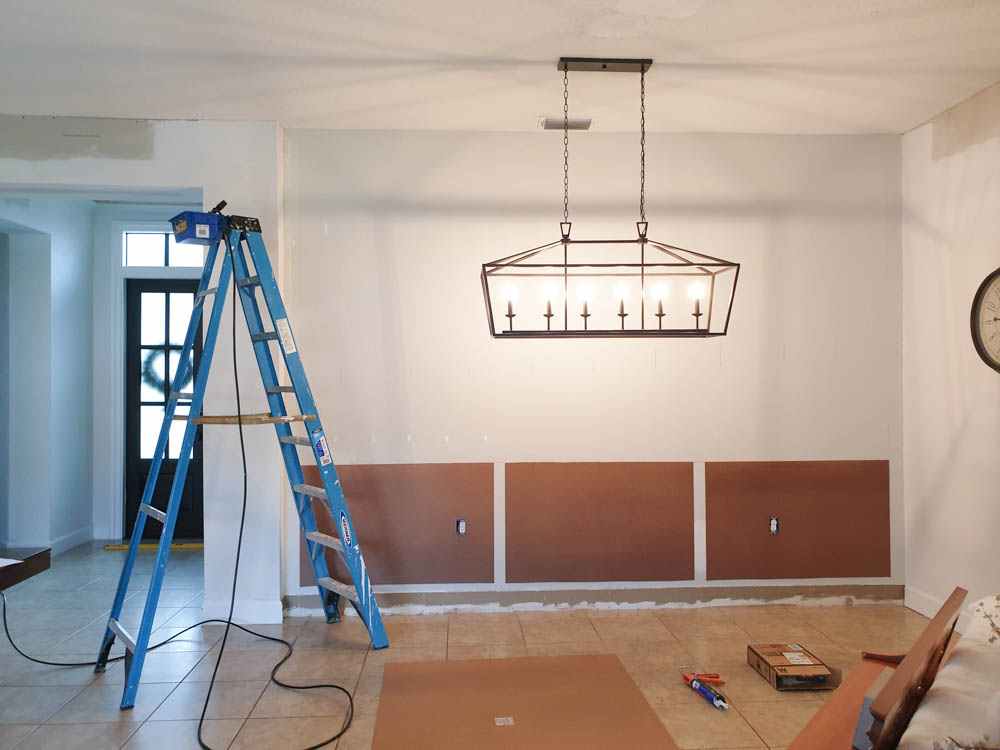
Have someone help with the larger pieces of wall panels since they are pretty heavy to carry above you.
BOARDS
Once all of your wall panels are in place it’s time to install your boards.
I recommend getting good-quality pine wood. Straight boards without knots are super important for this DIY project!
We used 1×6″ and 1×8″ boards for this DIY accent wall. You can see their exact placement below.
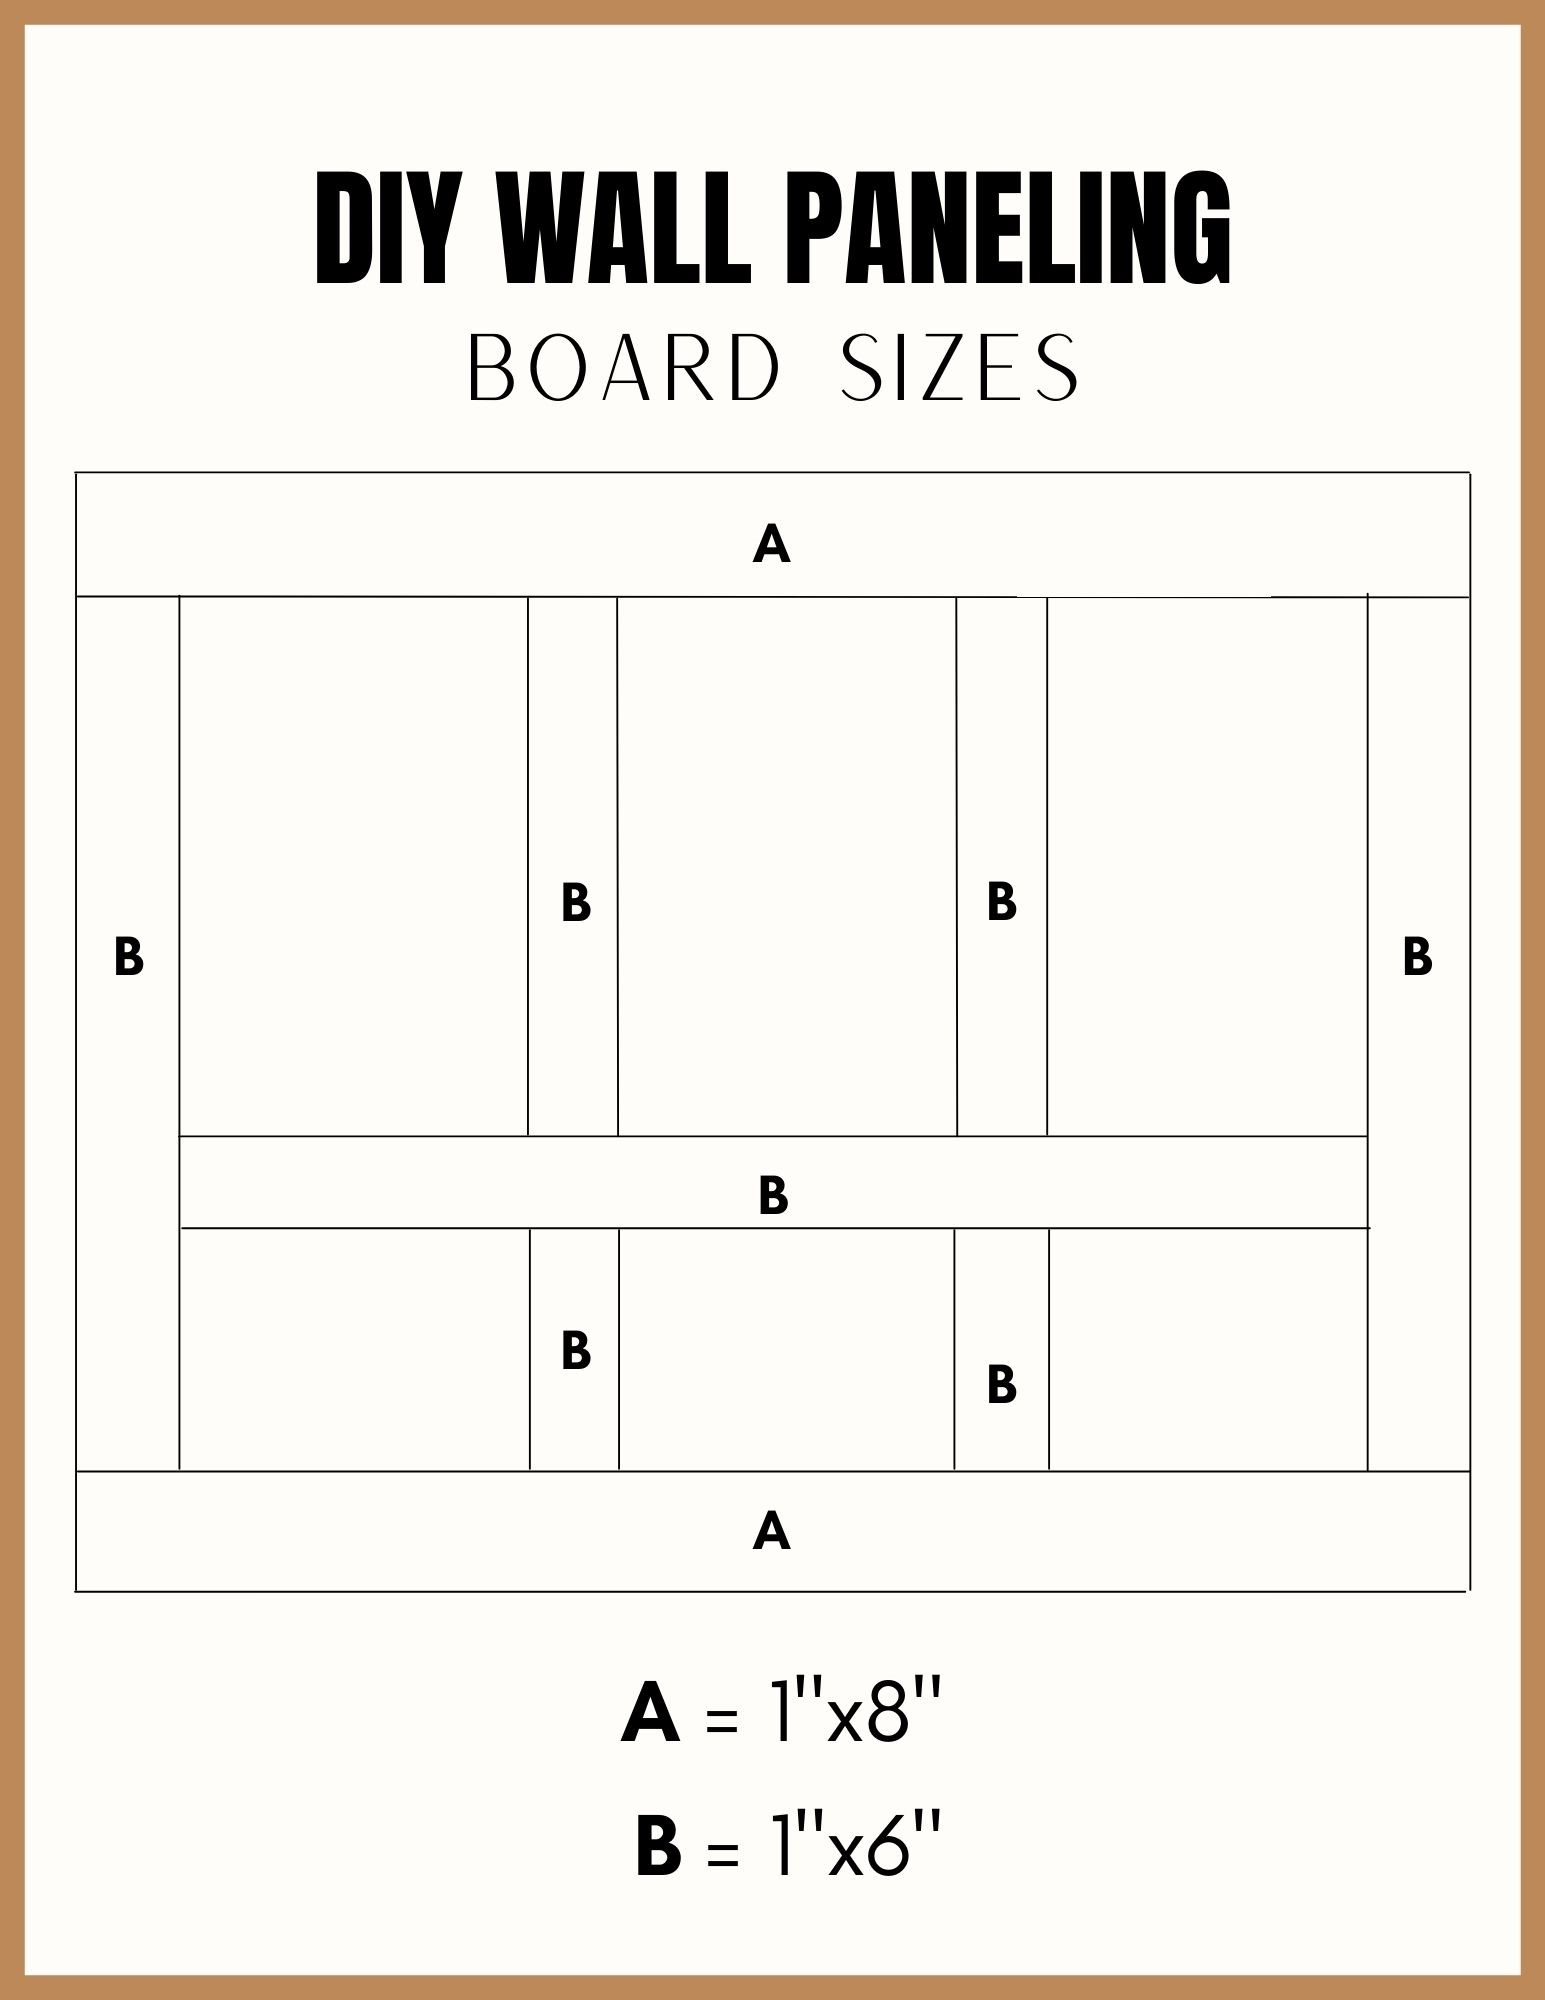
The 1×8″ boards are placed on the top and bottom because our crown molding and baseboards will go over them and cover some of the board. Below you will find the spacing measurements we used as well.

First, we installed the 1×8″ boards. And then all of the 1×6″ boards by gluing and nailing them onto the wall panels.
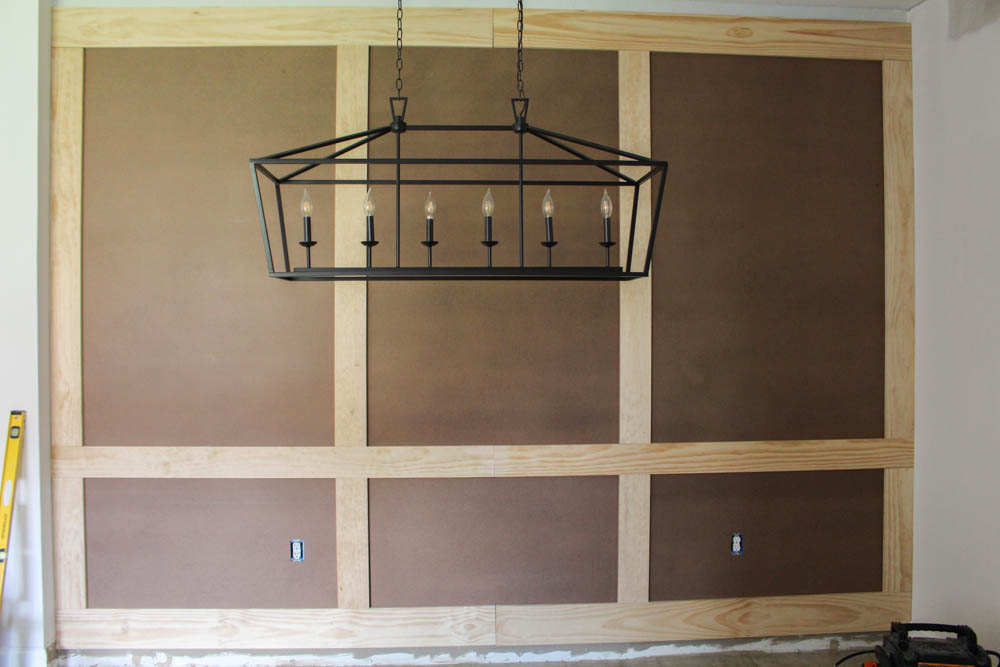
As you can see the boards covered up all the seams nicely!
INNER MOULDINGS
Adding molding along the boards will enhance their look even more.
We chose this molding for the inner corners of the boards.
Measure and cut your moldings at 45-degree angles. Then glue and nail them along the inner corners of your boards.

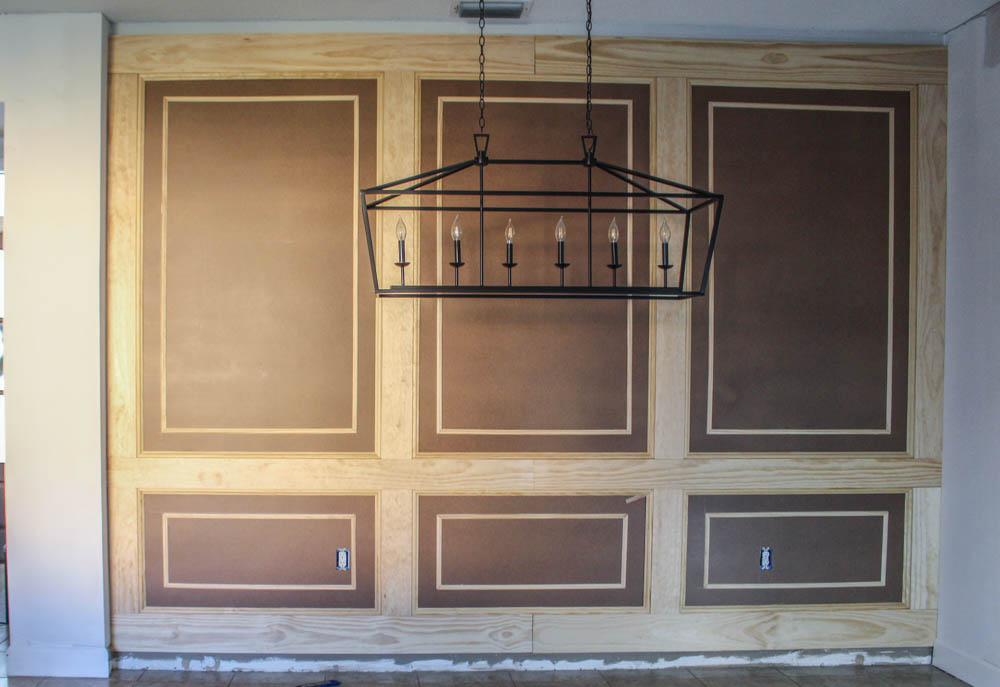
Once you install all of the inner moldings you are ready for the picture frame molding!
PICTURE FRAME MOLDINGS
What is known as picture frame molding is becoming very popular. You might see it by itself on a plain wall or combined with other moldings as we are doing. Picture frame molding instantly adds a traditional and sophisticated character to your home.
Before we even put the inner moldings along the boards, we drew lines exactly where we wanted the picture frame moldings to go.

To do this we cut a piece of wood as a template to quickly and easily draw along the boards.
Then we cut the molding to size at 45-degree angles. And glued and nailed them onto the wall as well.
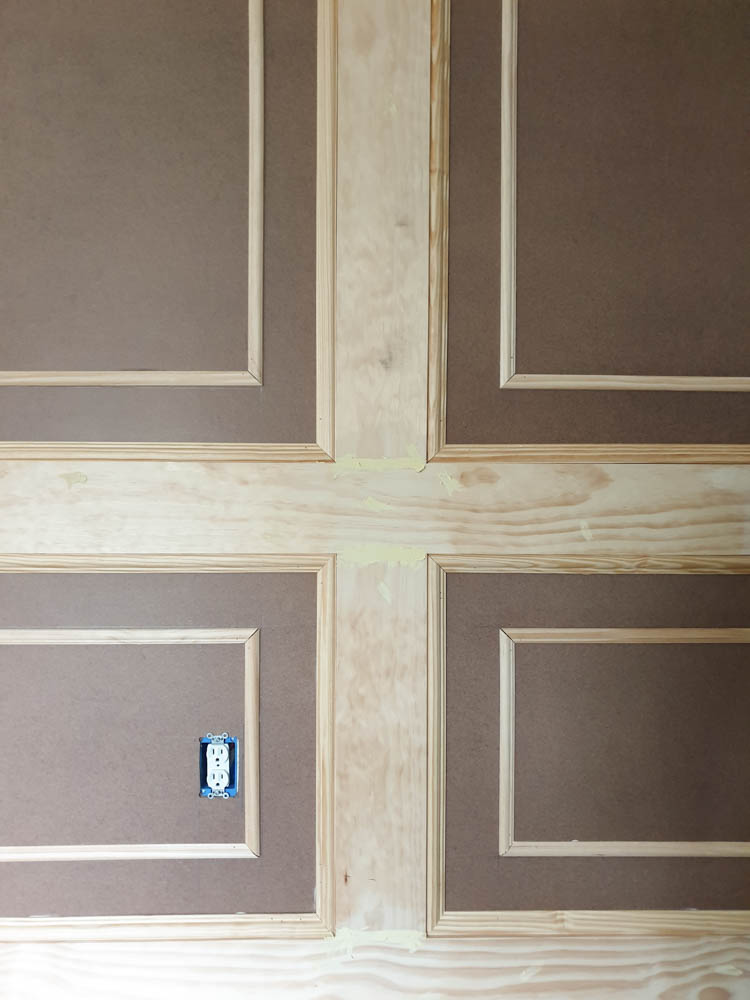
We chose a slightly smaller molding than the ones we put along the boards. But they are both very similar in shape.
CROWN MOLDING AND BASEBOARDS
Crown molding makes walls instantly look high-end. An accent wall like this requires it even more so!
Our accent wall is about 13 feet long. So we couldn’t get away with one piece of crown molding.
To join the two pieces of crown molding we cut them at 45-degree angles so that the ends would line up nicely.
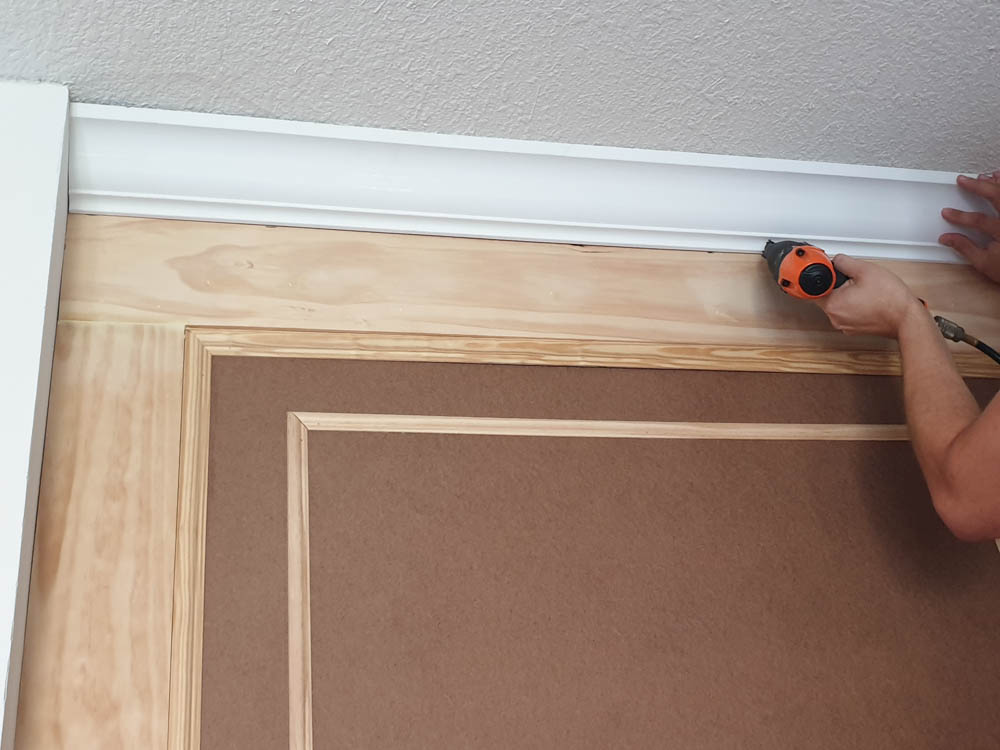
Once we nailed it onto the wall and ceiling, it left a good amount of the board exposed which is exactly what we wanted.
And the same goes for the baseboards!
This is why it’s important to place your boards a couple of inches off from the ceiling and floor (and to get larger boards for the top and bottom). So that the boards you installed don’t look a lot smaller than the others once the crown molding and baseboards are placed above them!
SANDING
After you have all the wall panels in place you can start sanding them down to a nice smooth finish.
First, you want to sand the seams where the wood boards meet to get them to be as flush as possible.
Then apply wood filler to all of the seams and nail holes. This wood filler is convenient because it goes on pink and turns color as it dries.

Once the wood filler was completely dry we sanded it down with 60 grit sandpaper (you may use 80 grit as well).
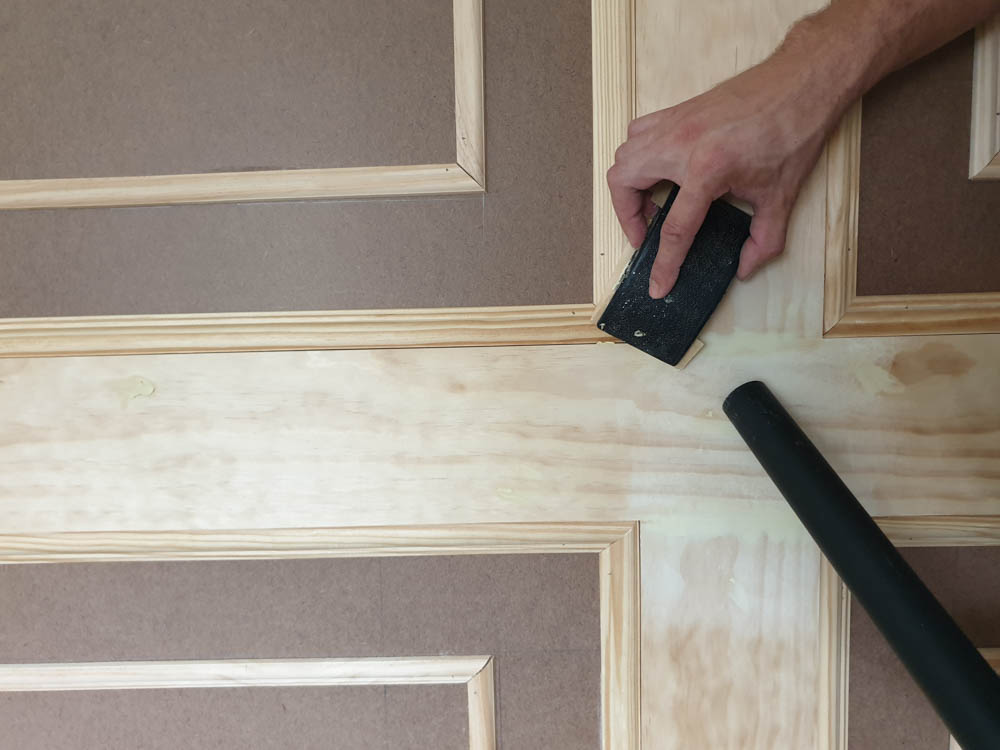
Always make sure to wipe off all the dust on the surfaces before continuing on to the next step.
CAULK
For this DIY wall paneling project, we decided to caulk before painting.
We wanted the finish to look as seamless as possible, and we figured that this might help give it an even better outcome in the end.
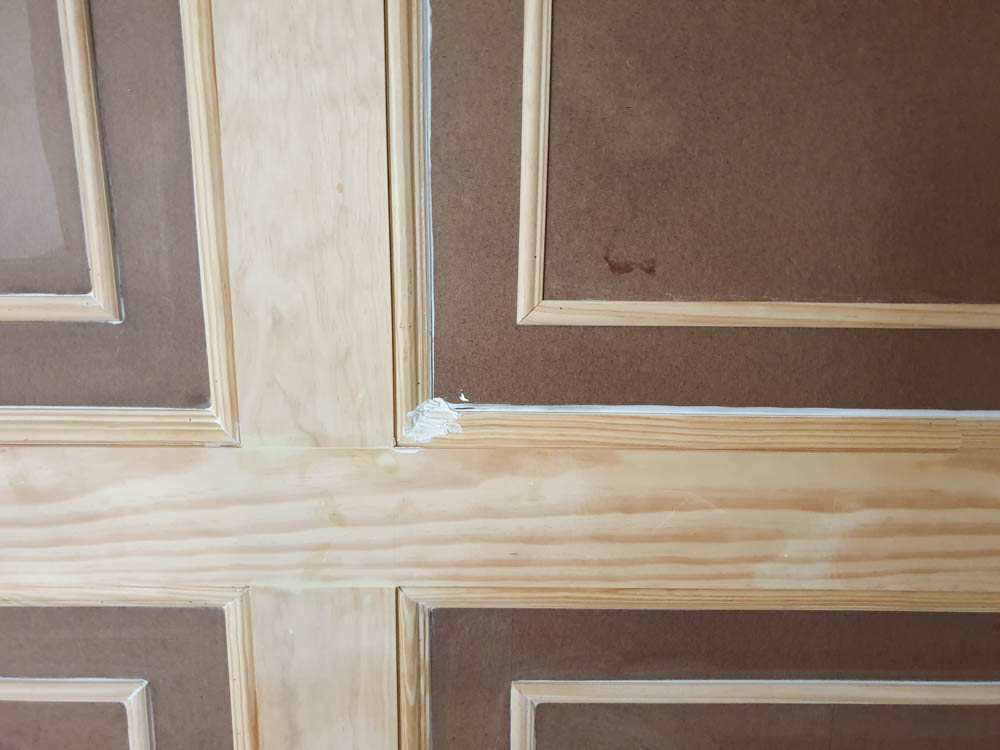
Remember to caulk the crown molding and baseboard as well.

Regardless of when you decide to do it, just make sure you don’t skip this step!
PAINT
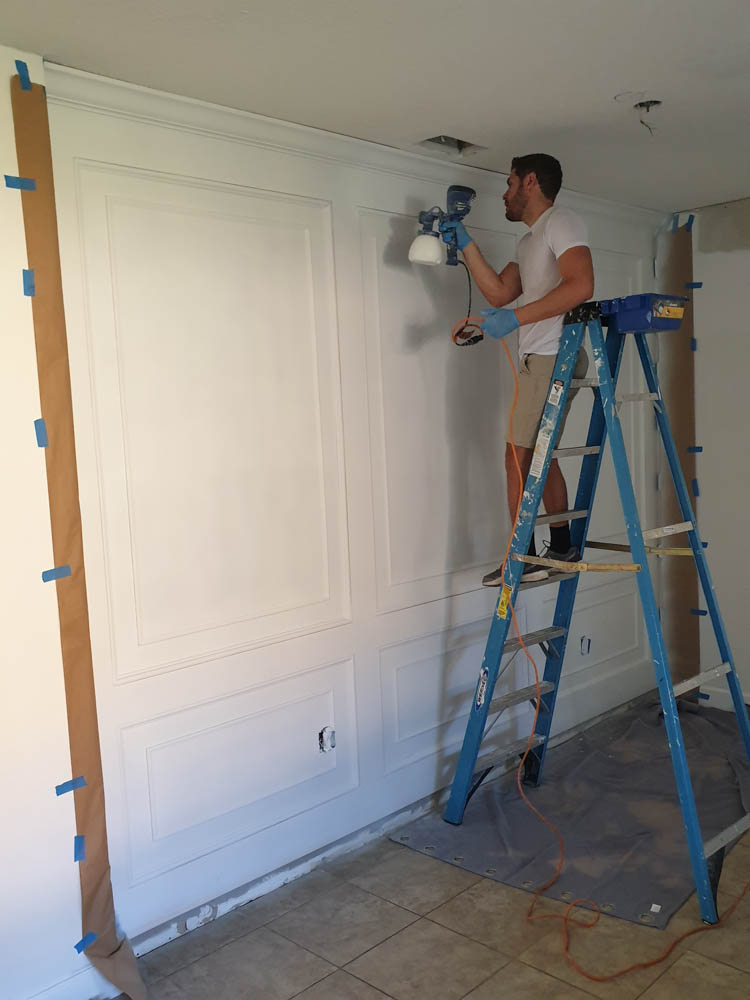
I highly suggest using a spray gun to paint your paneled walls. The finish on projects like these is just as important as the work itself, if not more so!
You could have a beautiful wall but brush strokes can seriously botch it.
NOTE: Check out my DIY Faux Fireplace Built-In and my DIY Board And Batten Entryway Wall.
PREPPING
But before you get to painting, you need to prep!
Prepping for spray painting takes a bit longer but then the painting itself goes so fast that you still finish in half the time!
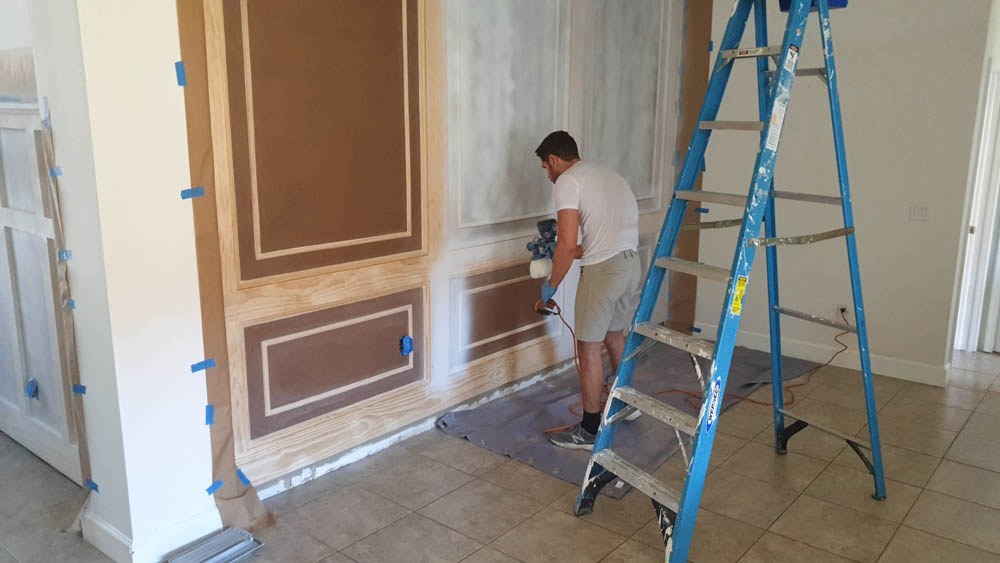
Make sure to remove or cover all of your furniture COMPLETELY. Place drop cloths on the floor all around the area you will be working. Cover the walls next to the one you are spraying with kraft paper. And in this case, the ceiling as well.
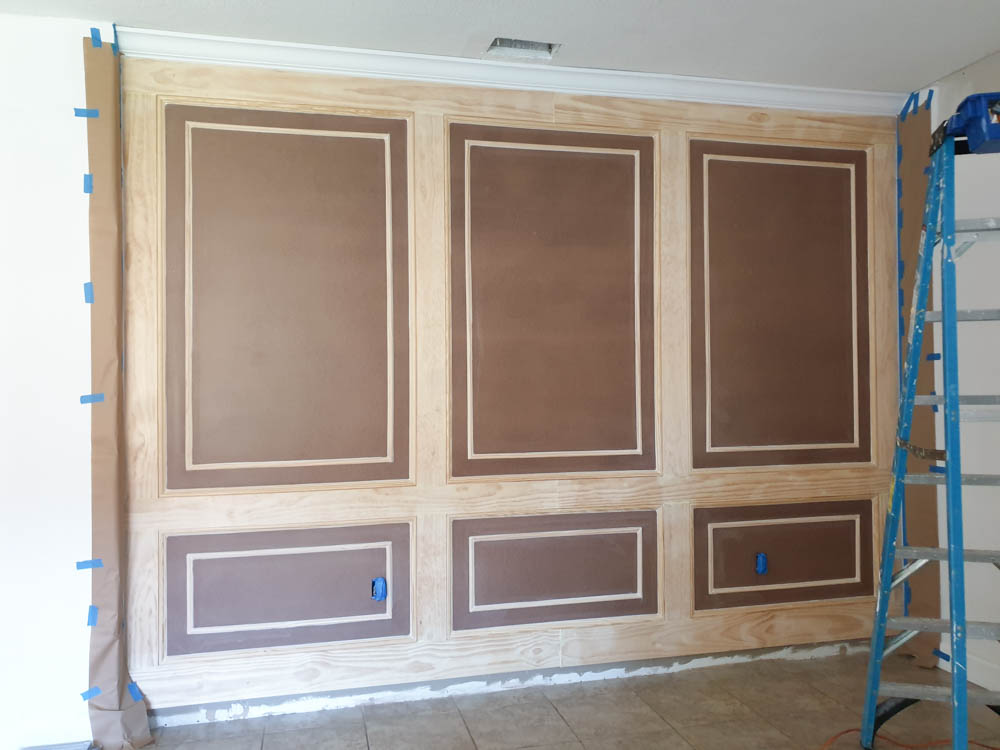
As you’ll notice, we did not go above and beyond to prep for painting because pretty much everything around this wall was to be repaired or replaced.
We got new flooring, skim coated the ceiling, and painted the walls after this project. So it was okay if a little paint went awry. Which it did, but mainly on the floor.
This is why I reiterate how important prepping for spray painting is!
PAINTING
We have used this spray gun for 3 projects now and we LOVE it!
First, we gave the wall panels 2 coats of primer. This primer dries within 30 minutes so we were able to get them done fast.

Afterward, we lightly sanded all of the surfaces and wiped them down using these tack cloths.
We used the same cabinet paint that was used on our DIY Faux Fireplace Built-In and our DIY Board And Batten Entryway Wall.
It amazes me how much paint is saved using a spray gun! One gallon of this white cabinet paint has been enough to cover all of the projects mentioned above, including this one!
After the first coat of cabinet paint, we sanded all the surfaces once more.

Always make sure to wipe away the mess with a tack cloth!

After the second coat of white paint, this DIY paneled wall was DONE!

DIY WALL PANELING VIDEO
If you’ve been wanting to add picture frame molding to some of your walls, this added paneling will certainly take your project to a whole new level!
Let me know what you think in the comments below!
PIN IT FOR LATER! DIY Wall Paneling With Picture Frame Molding
Links To All Of The Products Used:
Materials
Tools
Surface And Paint
You May Also Like


moltbook
Pretty! This was a really wonderful post. Thanks for supplying this information.
10 . Feb . 2026koreanviagra
Really informative article. Awesome.
08 . Apr . 2025ice water hack
Respect to post author, some fantastic info .
08 . Feb . 2025geek bar vape
Major thankies for the article.Really thank you!
03 . Feb . 2025Latex hood
I think this is a real great blog post.Really thank you! Really Great.
03 . Feb . 2025Francis Eppinette
Great information. Lucky me I ran across your site by chance (stumbleupon). I’ve book-marked it for later!
18 . Jul . 2023Lisy
I am so glad you found this post helpful!
25 . Jul . 2023