
If you are looking for a beautiful accent piece in your backyard that also allows you to relax and enjoy the view, then a DIY outdoor pergola swing might be just the thing you need!
We started working on our backyard last year and we have made a lot of progress. From planting trees to building a retaining wall along the side of the house to adding pavers for our circular firepit area. And I gotta say, it’s looking amazing so far! But we wanted another relaxing spot near the firepit where people can sit and relax. This DIY pergola swing was the perfect addition to this backyard area.

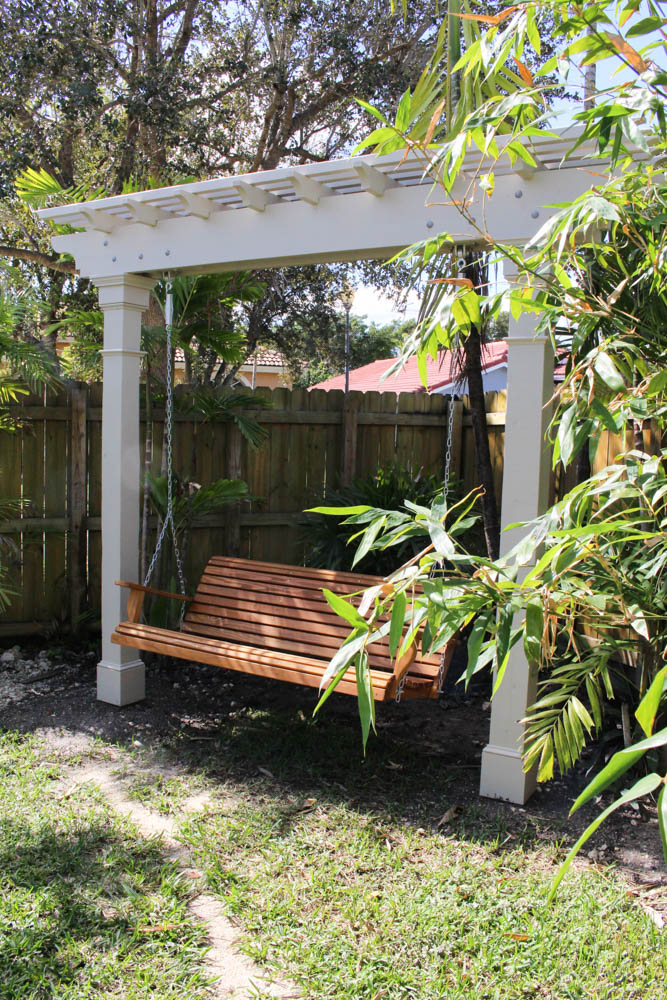
We have created a unique design that we feel suits our style. It’s a mix between a farmhouse style and a traditional style. But whatever your style is, you can still benefit from this DIY pergola swing tutorial.
The best part is that this project is very cost-effective! Costing us less than 1K yet looking like a million bucks! So without further ado let’s get into the tutorial!
NOTE: You will find a list of all products, tools, and materials linked at the bottom of this post for your convenience.
1. DESIGN
You can go with a more basic pergola swing design. But we wanted to add more detail and bulkiness to our pergola swing so we came up with this design.
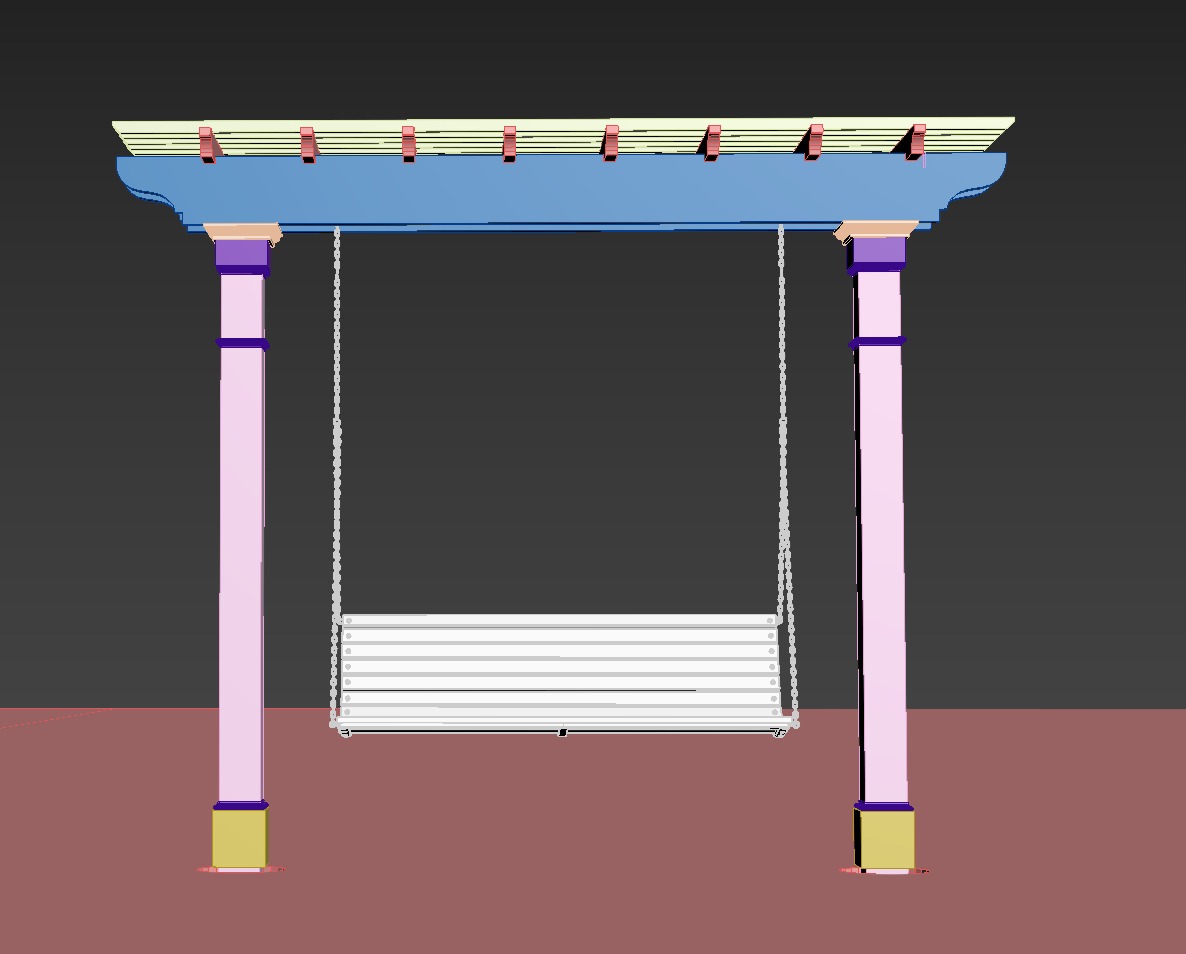

As you can see we have a unique design for the top beams as well as the joists on top. We even added slats on top of the joists for extra pop! We also added trims on the top and bottom of the post for extra detail.
Here are the measurements for our DIY pergola swing.
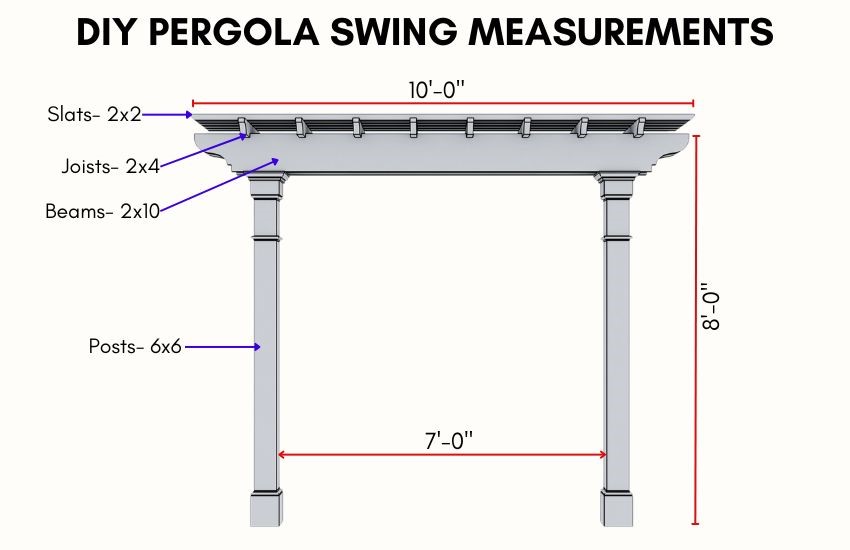

Whether you copy this design to the T or use it to get ideas, make sure your design is complete with the correct measurements for your space. For example, if you like this design but are working with a smaller area then you can use this design to create a smaller pergola and get a 1-2 seater swing instead.
2. DESICIONS DESICIONS DESICIONS
Before you get started on your project there are a few things that you will need to decide. They may seem obvious but they are critical for the longevity of your pergola swing.
WHERE TO PLACE YOUR PERGOLA SWING
Since you will have to dig deep for a sturdy structure (about 2 feet deep), you need to make sure that there aren’t any critical lines running through your yard. Contact your utilities before digging so that they can come and outline any possible utilities running through the area where you want to place your pergola swing.
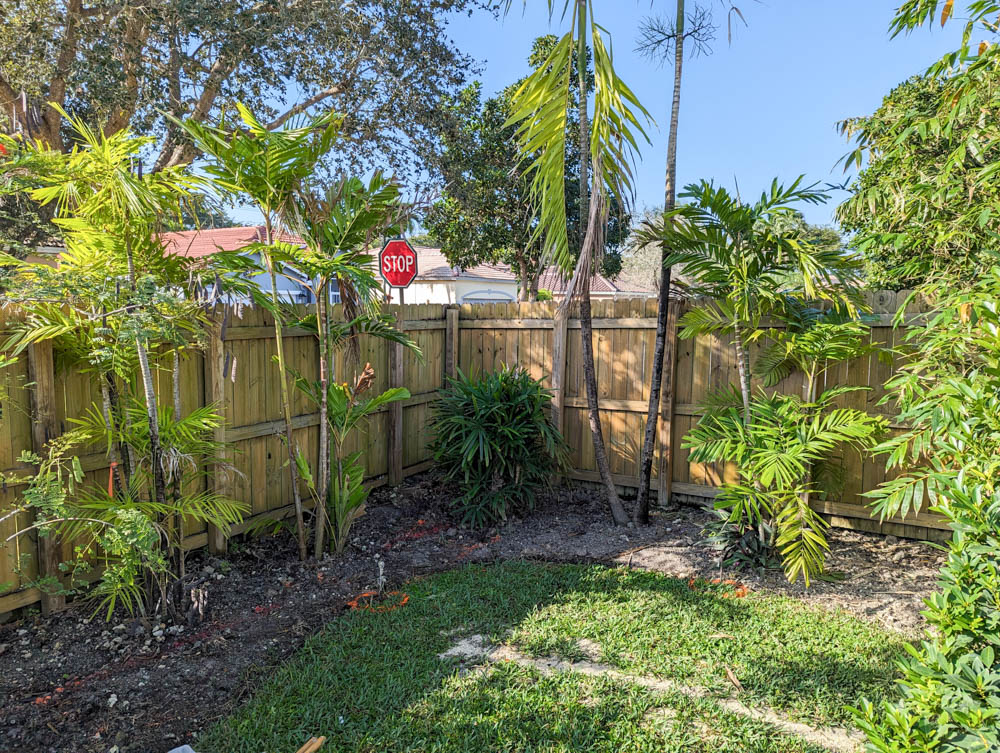
We had a utility line going right through our desired location. But since we were working with a tight spot to begin with, we decided to dig just a few inches off to the right.
LUMBER
Deciding on what kind of wood you will use is also important. It may depend on whether you want a pretty grain to show through a stain of your choice. You also need to consider what types of wood do well in outdoor areas. Your budget will also need to come into consideration when selecting what wood you want.
We were mainly considering cedar or cypress vs pressure-treated wood.
After going back and forth we ended up going with pressure-treated wood for our DIY pergola swing project. It was a lot more economical plus the stain we wanted would cover the grain anyway.
NOTE: We technically did use a stain but it is a Solid Color Stain so it looks like paint and covers the grain completely.
3. CUTTING AND SANDING
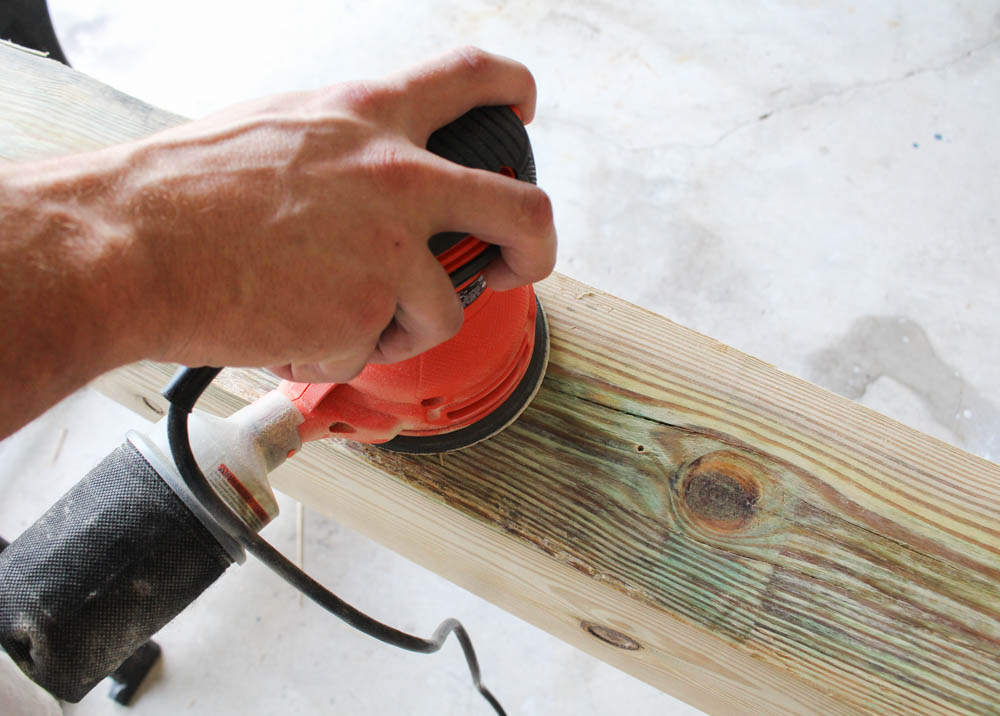
Once you bought all of your lumbar and have all of the appropriate tools you are ready to start making your cuts!
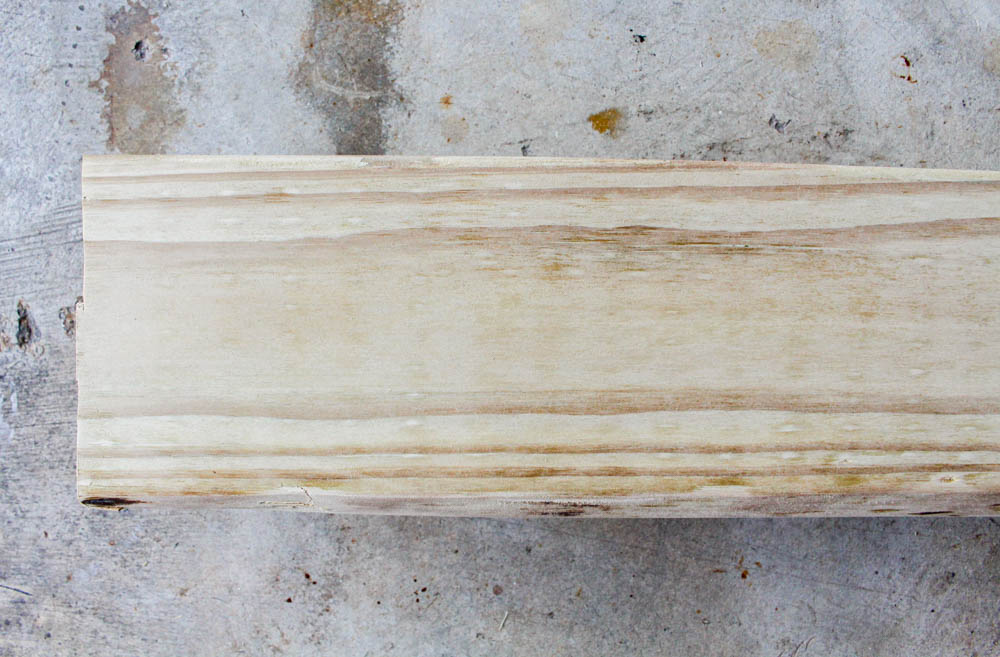
First, cut the posts to length using a circular saw and sand it smooth. If you are using pressure-treated wood like we did then you will need to give the posts a thorough sanding to remove any imperfections or mildew. Our posts went from having a greenish tint to a very light sandy color after we sanded it!
Now on to the trickier part, the detailed cuts for the beams, joists, and slats.
NOTE: Lowes didn’t have pressured-treated 2×2 for the slats so we got more 2×4’s and cut them in half (length-wise) to make our own 2×2.
First, cut the piece of wood to length.
Then we hand drew a template for the beams, joists, and slats and traced it onto the wood.
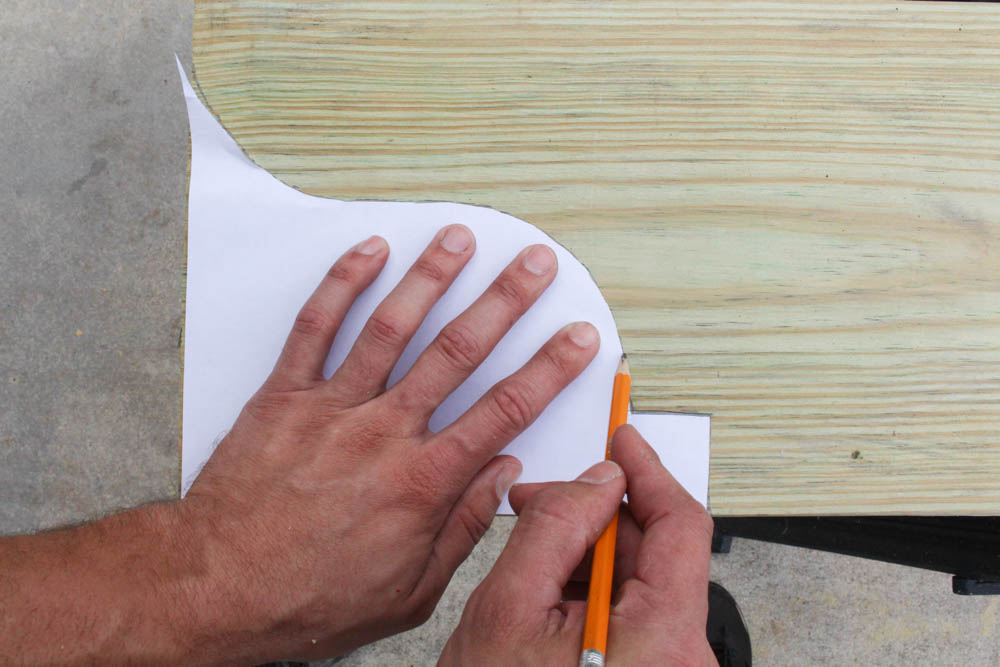
We used a jigsaw to cut along the traced lines and sanded it smooth.
Then we cut out the notches on the joists where they meet the beams.
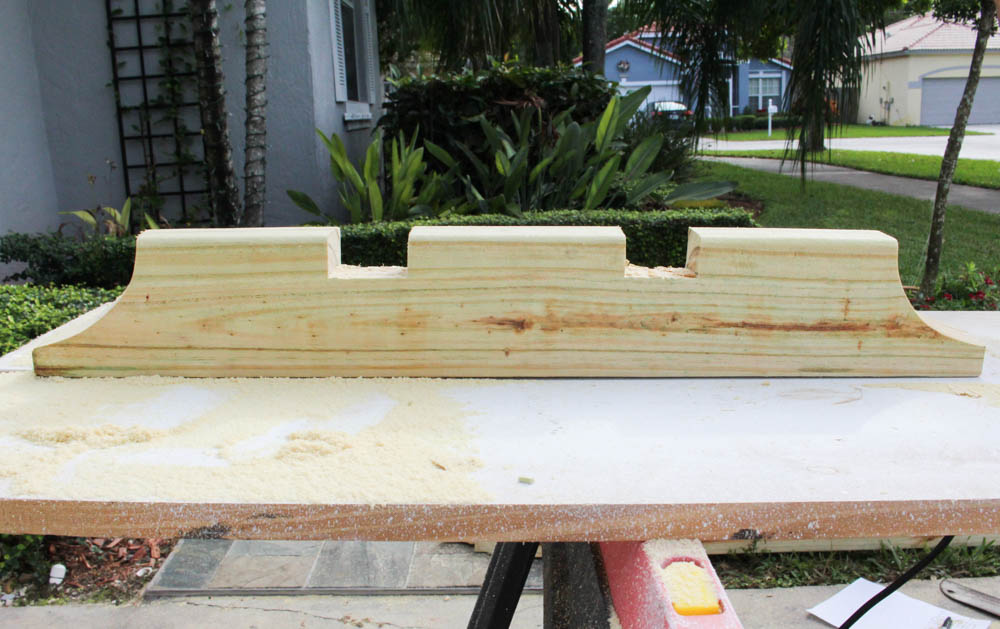
To make sure you cut the notches correctly place the 6×6 post in between the 2 beams. Then center one of the joists over it and mark where they meet the beams. Copy that onto the rest of the joists and cut the notches about 1.5″ deep.
We used the leftover 6×6 posts to place between the beams for the swing to hang from. You can cut them about a foot in length and then decide if you need to cut them a bit smaller once it’s time to place them between the beams.
4. PAINT/STAIN
Deciding whether you want to paint or stain your pergola and swing is totally up to you. Painting usually gives maximum protection for wood, especially since it’s outdoors.
But after doing some research on outdoor stains we realized that some can provide just as much protection as paint.
We used this Solid Color Acrylic Stain and Sealer for the pergola in the color Cape Cod Gray.
As you can see it looks like paint, not a stain.
Use an angled brush to paint all the wood pieces before assembling the pergola. We ended up giving it two coats.
We bought a natural, unfinished cypress swing so that we could paint/stain it the same color as the pergola. But to bring out the beautiful grain of the cypress wood and to add a pop of color and interest to our pergola swing we decided to stain it brown.

We ended up using this water-based polyurethane outdoor wood sealant in the color Light Brown. And let me tell you, this stuff is amazing! It repels water very well. After it rains, the bench is dry within minutes!
To stain the bench we used a paint spray gun.
NOTE: Always use a protective mask when spray painting!
The directions suggest that you apply the stain in the shade or out of direct sunlight so we hung the bench in our garage and applied 2 coats of stain. We let it dry in there for over a day and then assembled it.
5. DIGGING AND CONCRETE
The holes for your posts need to be between 2′ to 2.5″ deep with about a 12″ diameter. Keep in mind that the ground is often uneven and may slope just an inch or two. So you may need to add or remove some dirt or rock to make the holes the same depth, therefore making the posts level with each other.
How can you tell if the posts are level with each other?
Mark two long sticks at the same height, let’s say 3’6″. Place a nail into the marks you made and place the sticks in the center of each hole. Tie a string from one nail to the other and check to see if the string is level with a line level. If not then add or remove dirt on on the holes to make them level.
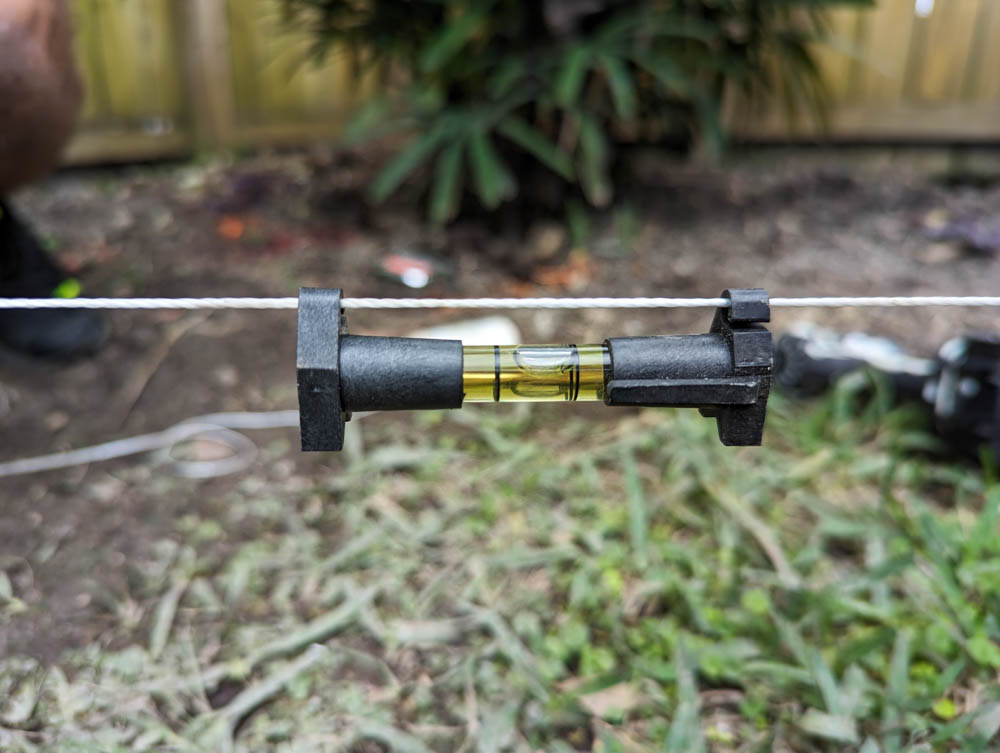
Now it’s time to bring in the posts! Have someone help you as these are heavy! When digging your holes you may have dug a little off to the sides so make sure your posts are the correct distance apart after you place them in. You also need to make the posts completely level with a post level. And finally, you will need to make sure they are facing the same way. To do this you can place a long piece of wood on the front face of both posts and turn the posts until both are completely flush with the stick.

To keep your posts level and facing the correct way while you add concrete you can temporarily nail pieces of wood to anchor the posts and keep them in place. Once the concrete is dry and the posts are cemented into the ground you can remove the pieces of wood and add filler to cover the nail holes.
NOTE: We used about 5 bags of concrete mix on each hole.
6. ASSEMBLE AND INSTALL
Now it’s time to assemble your DIY pergola swing! You will need someone to help you install the beams on the posts. Once our beams were centered and leveled we used screws to hold them in place.
We attached 2 10″carriage bolts through the beams for maximum hold, using a 1/2 drill bit. We decided to leave the other screws in as well and painted over them to hide them. But don’t paint the carriage bolts, that’s just tacky.
We cut the extra 6×6 posts leftover and placed them in between the beams on either end for the swing to hang from. Two carriage bolts were used to secure those in place as well.

Next, it’s time to place the joists! We spaced them equally apart over the beams (on the notches we already cut) and attached them to the beams with exterior screws.
Finally, we spaced out the slats onto to joists and screwed them in using the same exterior screws.
Now that the pergola was completely assembled it was time to embellish it a bit with some trim work!
7. ADD TRIM
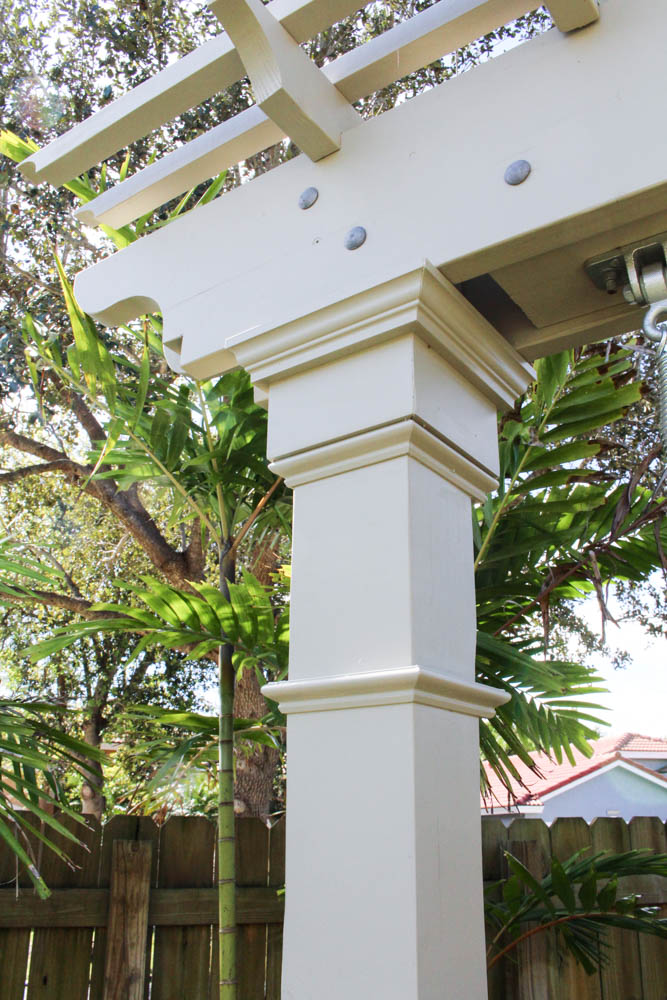
Adding trim to the pergola made a huge impact in my opinion. It gave the posts more thickness and it gave the pergola a sophisticated look.
Getting PVC trim is CRUCIAL as you want it to be durable outdoors! We used this 8″ board for the baseboard, and this 6″ board for the top. Then we attached this crown molding on top of the 6″ board. Finally, used this molding underneath the 6″ board, a few inches down from there and on top of the baseboard.

We attached all of the trim with these stainless steel nails which are also great for outdoor use.
Once the trims were placed we caulked the seams and filled in the nail holes with caulk as well.
Then I went ahead and painted the trim. Honestly, the pop of white was so pretty that we were tempted to leave the trim white. But ultimately we decided to match the trim color with the pergola for a more subtle yet beautiful and elegant look. We applied two coats of that same CAPE COD Gray color and I absolutely LOVE how it turned out!
8. ATTACH SWING
The swing that we purchased didn’t bring hangers so we got these swing hangers from Amazon. We attached the hangers to the 6×6 in between the beams. The lag bolts provided with the hangers are sturdy but we wanted something stronger to hold them in place so we used 5/16″ carriage bolts, using a 5/16 drill bit.
Then we attached these swing springs to add a little bounce to the swing. That way it won’t be stiff when you sit down on it.
Finally, we attached the bench swing with the chains provided.
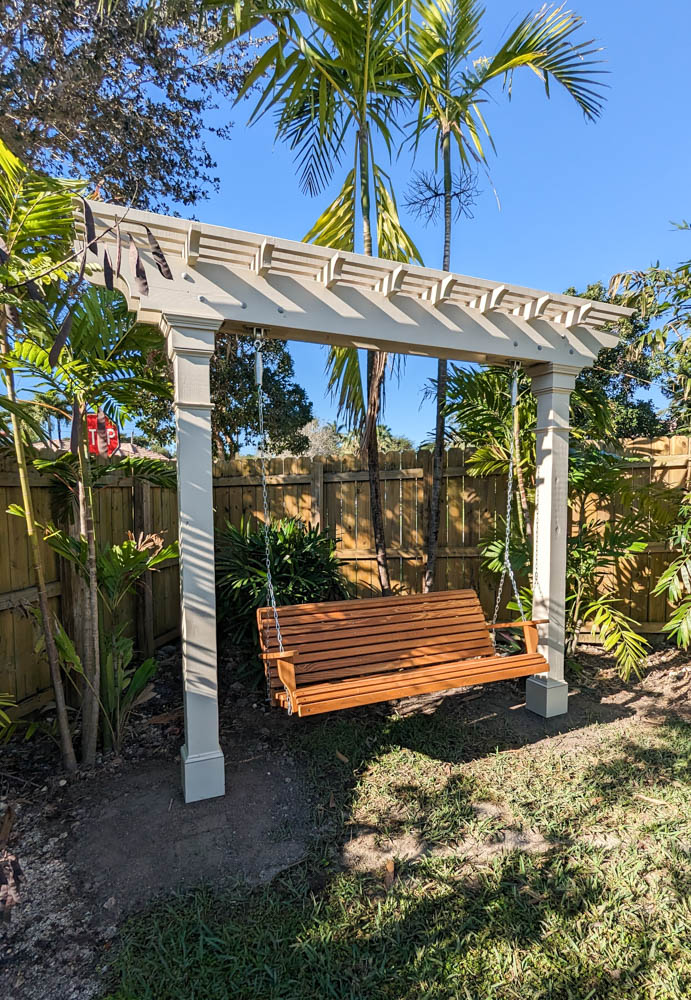
This bench is about 5 feet long and can accommodate up to 3 adults. We have two boys ages 7 and 9 and they are able to squeeze in with us for now.
We couldn’t be more happy with how this DIY pergola swing turned out. It is our favorite spot to hang out now. We’ve enjoyed our morning cup of coffee here, as well as afternoon drinks. We’ve had friends and family over and they love swinging on the bench and enjoying the view. I can see this being a favorite spot for years to come. Needless to say, this is one of my favorite projects so far!
PIN IT FOR LATER – DIY Pergola Swing
I hope you found this DIY pergola swing tutorial helpful. If you have any questions please feel free to leave me a comment below and I will get back to you!
ALL TOOLS AND MATERIALS USED FOR THIS PROJECT
6×6 Posts
2×10 For Beams
2×4 for Joists
2×2 For Slats
Circular Saw
Jig Saw
Sander
Sanding Discs
Solid Stain in Cape Cod Gray
Light Brown Stain For Bench
Spray Gun
Protective Mask
Angled Paint Brush
Level
Line Level
Post Level
Speed Square
1/2″x10″ Carriage Bolts
Washers
Nuts
1/2″ Drill Bit
Exterior Screws
8″ Board
6″ Board
Trim Moulding
Crown Moulding
Stainless Steel Nails
Brad Nailer
Swing Hangers
Swing Springs
5/16″ x10″ Carriage Bolts For Swing Hangers
5/16 Drill Bit
Swing Bench
You May Also Like

Leave A Comment