
If you are about to undertake a kitchen renovation project then you need all of the information you can get. And that includes learning from others’ mistakes!
This post is as much about what you SHOULD DO as what you SHOULDN’T DO when doing a complete kitchen renovation!
1. DON’T ASSUME
When planning your kitchen renovation project and coming up with a design you need to be as detailed as possible.
We did a completely custom kitchen design. And we thoroughly explained it to our kitchen cabinet guy.
But we didn’t go over some minor details because we assumed they were obvious.
WHAT I LEARNED
DON’T ASSUME ANYTHING!
Things I thought were obvious were not.
Sometimes you can be so detailed with the BIG things that the little things can get overlooked.
For example, my design called for a TALL pull-out cabinet door for the garbage cans. Which I got! But the system that we got to go inside the cabinet was for small garbage cans.
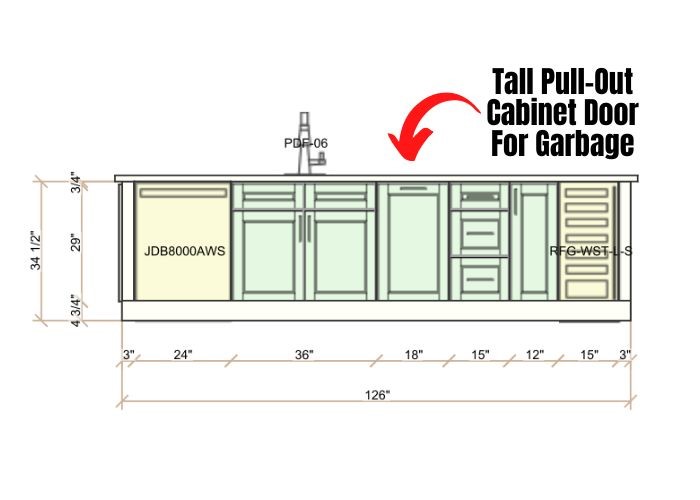
Having large garbage cans was super important to me. So I had to scramble last minute and get another pull-out cabinet door system that held large garbage cans. And they were nice enough to come back and install them for me.
In conclusion, GO OVER EVERYTHING. Even the things you think are obvious! And don’t worry about sounding picky or annoying. This is a big project that you are spending a lot of money on and it needs to be done right!
At the end of the day, everyone will be happy if you are all on the same page and there are no surprises!
2. HAVE EVERYTHING READY
Before you even start your kitchen renovation project you want to have everything ready.
And by that I mean you want to have everything ordered and DELIVERED and ready to install.
Because of the pandemic and shortages, this was not possible for us.
If this is your situation then I sympathize. It’s not easy!
We had ordered a microwave oven combo at Brandsmart 8 months prior to our kitchen renovation project but it was still on backorder and I couldn’t keep waiting.
WHAT I LEARNED
If you do a Special Order then they might not let you cancel the order. The only way to do this is to let enough time pass and complain that you cannot wait any longer.
Thankfully I was able to cancel and find other similar appliances at Home Depot. This was a miracle in itself because there was NOTHING available!
So instead of getting the combo, I got a separate built-in microwave and built-in oven that was available and delivered as scheduled. It did take about 2 months for delivery but it was delivered ON THE EXACT DAY they said it would.
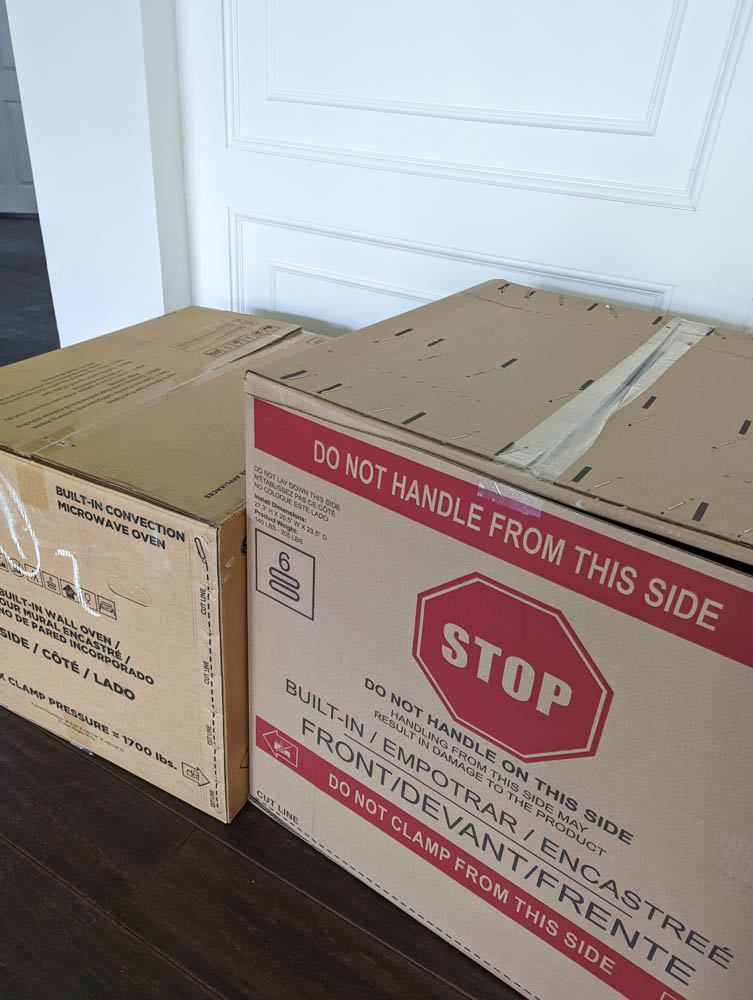
Our built-in microwave and oven got here during the end kitchen renovation project but we were able to finish the kitchen on time!
There is still a HUGE shortage of kitchen appliances right now.
So if you are looking for appliances, I highly recommend Home Depot. There is no guessing when it comes to delivery!
3. THE MESS AND CLEAN UP
Demo work is a messy job. And if you are demolishing the entire kitchen then you will have A LOT OF MESS!
Here are some tips to PREPARE for the mess and SAVE YOU from bringing that mess into other rooms in your home.
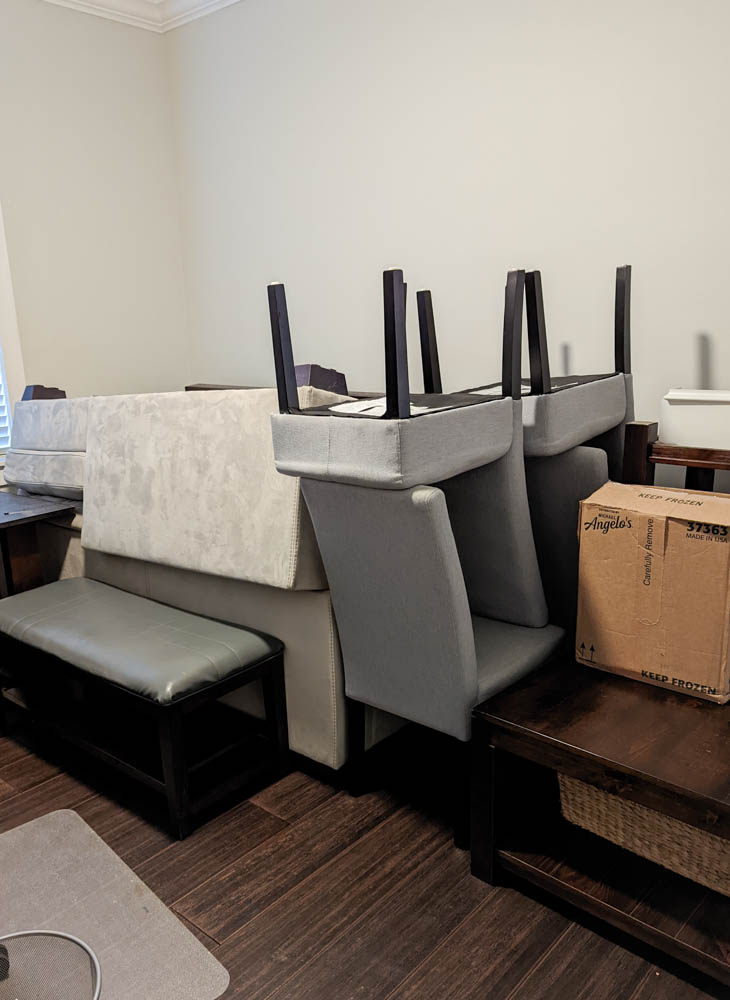
Remove everything from the living area that is open to the kitchen. Furniture, decorations, art, etc. We were able to place everything in the office. You can also store it in the garage or rental space.
If you can’t remove big furniture, cover it up with plastic. Also, cover up any built-ins or accent walls with plastic!

Shut all the doors in your home. Place towels or drop clothes under them to keep the spaces air-tight. This includes bedrooms, bathrooms, closets, laundry, etc.
Turn the AC off during the ENTIRE dusty process. This will prevent the dust to travel into the rooms through the AC vents. Once no more dust is being created and you are ready to start putting your new kitchen in, you can turn the AC back on. This can mean days, even weeks, depending on the amount of work.
Don’t walk into the rooms with dirty shoes. Leave your dirty shoes at the door. This will help to not bring the dust in.
Have a portable fan(s) at door or window openings FACING OUT of the home. This helps the dust move out through these openings.

Some of these tips may seem drastic to you. Such as not turning on the AC. But that is the MOST IMPORTANT FACTOR in keeping the rest of your home dust-free! We stayed at my mom’s during this time which was helpful. If you are renovating during winter then you might be able to stay home.
Otherwise, get ready to find dust in every single nook and cranny of your home. Let me tell you, that is no fun! You will be cleaning that for MONTHS to come!
Thankfully we did all of these steps and our bedrooms were kept cleaner than I could have ever imagined! But one thing I would have done differently was cleaning up!
WHAT I WOULD DO DIFFERENTLY
Don’t bother doing a DEEP cleaning until all of the messy work is done. I am telling you this from personal experience! Just because demo work is done doesn’t mean the mess is over!


You will have plumbing, electrical, and who knows what else going on right after which will most likely also create a lot of dust!
By all means, sweep and vacuum every day (a shop vac is best for construction clean-up). But don’t waste your time deep cleaning because you will have to do it all over again.
This was extremely depressing for me after deep cleaning twice and realizing there was still more dust happening a few days later when we had the ceiling skim coated! I was in a dark place!
NOTE: I have a Full Guide To Skim Coating Your Walls (or ceiling in this case) here.
Just as important as preparing your home for the mess is preparing yourself mentally for dealing with the mess.
In fact, I have a whole post about How To Survive A Home Renovation And Overcome The Mess!
Just know that this is a temporary situation. And realize that it will probably get worse before it gets better!
4. DEBRIS REMOVAL
If you are gutting out the entire kitchen you might be wondering how you’re going to dispose of it all.
To save a bit of money and for the added convenience we used the Bagster Dumpster In A Bag from Waste Management. This bag holds up to 3,300 lbs. But the best part is that a Waste Management team member will come and pick it up right out of your driveway!

All you need to do is schedule a pickup and they will come within 3 days. There is a cost for pickup which varies. Our cost was about $200.00.
This is a good option if you don’t have A LOT of debris.
We gutted our entire kitchen, a wall, and flooring for the entire living area!

Somehow we got away with only using 2 bags instead of 3. Mind you, we also used our regular BULK trash pickup days for some of the debris.
Each Bagster bag was picked up the next day which was convenient.
NOTE: Pickup fees apply per bag. Even if you have them ready to pick up at the same time. The second pickup was discounted though.
WHAT I REALIZED
If you do have a lot of debris as we did, you might want to consider using a dumpster rental near you.
I don’t regret getting the Bagster bags but I could have at least checked to see what the cost of a dumpster rental would have been.
It might be cheaper to rent a dumpster than to have 3 or more Bagster pickups. And the convenience of a dumpster is that you can leave it in one spot and not worry about it until you are done with demolition.
Again, it depends on how much debris you have. At the end of the day, see which method is more convenient for you.
5. THE DETAILS
When it comes to the last details and finishing touches, be realistic about it so that you know what to expect!

Everything takes TIME to install. The sink and faucet, the plumbing for it, the dishwasher, the cooktop, the built-in microwave and oven, the range hood vent and ductwork, installing the pendants and lighting, setting up the under cabinet lighting, setting up the electrical for the kitchen island.
The list goes on and on!
WHAT I REALIZED
They sound easy enough but you have to take the time to learn how to do it and do it right! And there are ALWAYS unforeseen difficulties!
So be realistic about the details and plan accordingly, especially if you are trying to finish the project by a specific date!
6. COUNTERTOPS AND BACKSPLASH
If you are getting a slab of quartz, granite, marble, etc make sure the slab is BIG enough!

Whether you are getting a slab for your countertops, backsplash, or both! You don’t want to “cut it close!”
We thought the slabs we picked were big enough until we spoke to the countertop guy. The slab of quartz we fell in love with was not going to be big enough once he made his cuts.
He could cut them in a way that they would fit together by attaching pieces. But it meant having seams, which we were adamantly against! We wanted a full slab across for a smooth and seamless finish.
WHAT I WOULD DO DIFFERENTLY
If I could do it again I would talk to the countertop guy ahead of time to figure out the actual length of the slab needed.
Instead, we had to scramble last minute to find a bigger quartz slab. And it wasn’t the same design we initially wanted with large veins across.
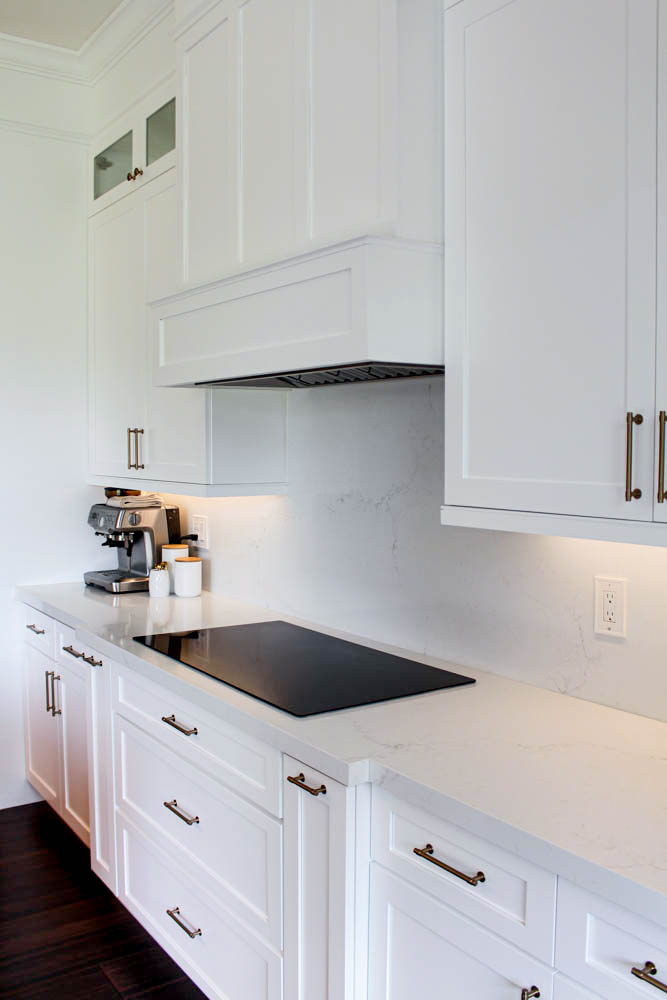
In the end, I am still happy with the decision we made because even though I didn’t get my bold veins, I got a seamless look. And honestly, the subtle veins that we picked have really grown on me!
But it’s little things like this that you don’t think about. Especially if you’ve never been through a kitchen renovation project before!
PIN IT FOR LATER – 6 Kitchen Renovation Project Mistakes

There will always be some bumps along the way, that’s inevitable.
But I hope you can learn from my mistakes! And I hope your kitchen renovation process is as smooth as possible!
Let me know in the comments below if you found these tips helpful!
And stay tuned to see my full kitchen reveal and my top must-haves for any kitchen design!
You May Also Like


Nancy
I know this is old, but I am curious about the built in/pullout trash containers. I have read housekeepers hate them, they can get really dirty in there and they’re very difficult to clean.
We are preparing to completely gut and have a remodeler redo our kitchen. We can do demo, we have our appliances and we will be living here and it’s HOT in Boise. I just keep thinking this Christmas should be really fun.
21 . Mar . 2024Lisy
I have not had any such issues with mine. The one I got (which I linked) is super easy to clean. It contains two 13 gallon waste baskets. I use one for garbage and one for plastics. The only thing is that I have to remove the front basket in order to take out the back one, but it’s honestly not a big deal. I absolutely LOVE this pull-out cabinet and it allows me to have these taller trash cans since it goes all the way to the top (no drawer above it). I would definitely recommend it! I hope this helps! Good luck with your kitchen remodel!
22 . Mar . 2024Oscar
Where did you get your cabinets?
30 . Aug . 2023Lisy
Hi! I got my kitchen cabinets from a local business in my town. They are the best in my opinion! Sometimes it pays off to go to the “little guys.” They were able to do all of the customizations I wanted for a fraction of the price that bigger companies quoted us!
07 . Sep . 2023Julie M
We are just finishing our kitchen renovation and I can attest that the points you made are spot on. Great article and beautful kitchen.
28 . Aug . 2023Lisy
Thank you so much Julie! If you know you know, right?! So worth it in the end though!
28 . Aug . 2023Suzanne
Thanks for the info. What is the material in your decorative cabinet panels up top? We’re looking to do this but don’t want them to be see through. Yours look translucent – can you see what is behind the doors? Would love to know what material these are. Thanks!
03 . Aug . 2023Lisy
It’s just glass. It may look that way because it’s so high up. I can definitely see what’s inside the cabinets. I like to put pretty serveware up there.
16 . Aug . 2023Lish
This is super useful. I am planning to Reno my kitchen and I am opting to stay in. Difficult days!
08 . Jul . 2023Lisy
Thanks! I am glad you found this helpful! Difficult days but soooo worth it in the end!
14 . Jul . 2023Shaun
Thank you so much, I found them to be extremely helpful and insightful and look forward to your full reno reveal..
17 . Apr . 2023Lisy
Thank you so much! You can see the reveal here along with my top 8 kitchen design must-haves!
19 . Apr . 2023Britney Jones
After reading your post I’m actually really glad that I just had a cabinet refacing company take care of my cabinets! My kitchen looks amazing and I didn’t have to worry about the cleanup. Props to you for renovating your kitchen yourself!
27 . Feb . 2023Lisy
Thanks Britney! Sometimes that is the best way to go! Unfortunately, our kitchen was beyond repair!
04 . Mar . 2023Felicia
I love how you structured this post. It is super informative and is one I’ll be revisiting!
07 . Jul . 2022Lisy
Thank you so much! I am so glad you found this post helpful! Good luck with your renovation!
08 . Jul . 2022