
If you are planning a DIY built-in faux fireplace for your home, you need to know a few crucial factors in your design strategy! From why you should consider an electric fireplace, to what fireplace insert to get, to what materials you should use, and even where to build your fireplace built-in!
I will cover all of that here. Plus I have also linked all the tools and materials used for this project. So make sure to scroll all the way down!
BONUS: Click here for all of the dimensions listed for you on the next post plus videos to show the process!
But first, let’s get into a few basic yet crucial factors to consider BEFORE starting your own DIY faux fireplace built-in.
Why A Faux Fireplace?
We live in South Florida where wood and gas-burning fireplaces are not a thing. If you want heat down here you just have to open your doors and you are in a heatwave about 90% of the year!
So a faux fireplace was the obvious choice for us!
But if you live in a colder climate, where you get to enjoy the 4 seasons… you should still consider a faux fireplace!
More and more people are realizing the convenience of NOT having to clean their fireplace and are opting for electric fireplaces!
Plus there’s the expense of purchasing logs or gas. Not to mention the risks of a fire!
Having a faux fireplace solves all of these problems!
And you can still enjoy a warm and cozy night by turning on the built-in heater that most electric fireplaces have!
Our Faux Fireplace Insert
When searching for an electric fireplace insert there were a few things we knew we wanted.
We wanted the fire effect to look realistic but we didn’t want to spend a fortune.
We also wanted the faux brick in the background to look as realistic as possible.
Finally, we wanted the fireplace to have a squarish shape for a more authentic fireplace look.
This electric fireplace checked off all of our wants and more!
This fireplace has very beautiful fire effects that you could interchange as you want with your remote. It goes from a large fire to a barely visible kind of dying-out fire effect, which I LOVE!

It also has two different crackling sound effects for an even more realistic effect! Plus you can adjust the volume on it as well!
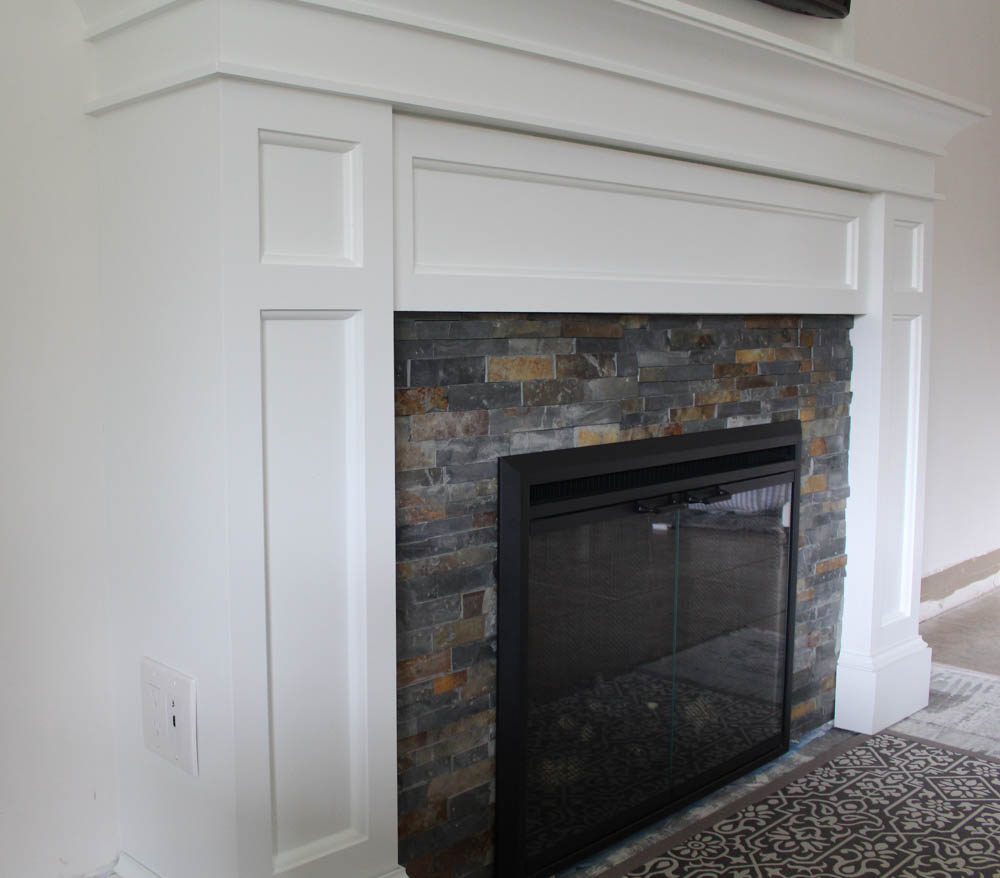
The dark brick background reminds me of a sooted fireplace. And since it’s such a dark background it won’t clash with whatever tile you choose for your fireplace surround!
And what I love most about this model I chose is that it has glass doors that you can open along with chain links that you can close or leave open. I like to close them up to make everything look even more dim and natural.
Not to mention this fireplace has a heater that can actually heat up a small room! So you get the added benefit of a warm and cozy fireplace!
But the best thing about this electric fireplace is the price point! Electric fireplaces can get really expensive really fast! Easily ranging for 1 to 2 thousand or more! This electric fireplace insert is not only beautiful but affordable!
Building On Subflooring VS Over Existing Flooring
Another thing you need to take into account when planning out your DIY built-in fireplace is where you will build it! I’m not talking about deciding what room or wall it’s going to go in. I am referring to what FLOOR you will build it on!
You basically have two options. Build it right over your existing floor. Or rip out the floor where the built-in will go and build it directly on the subfloor. There are a few factors that I will dive into in hopes of helping you decide the best approach for your situation.
Built-Ins Over Existing Flooring
You can build built-ins over your existing flooring. Whether it be tile or wood.
The main reason some people choose to go this route is to avoid having to rip out the existing flooring. Often times, homeowners don’t have extra tile or wood pieces to replace the ones taken out.
So they have to make sure they cut the existing floor to the precise dimensions of the built-in. Then caulk or grout the connecting floor and built-in, depending on whether they have tile or wood or both!
NOTE: I would never recommend building over the carpet! That can easily be cut to size. Plus the built-in would severely lack sturdiness if built on top of the carpet!
Built-Ins Directly On Subflooring
The correct way to build built-ins is directly on the subflooring. Whenever you are building a permanent structure in a home, such as a built-in, it should be built onto another permanent structure. In this case, the subfloor.
Flooring is not a permanent structure. So in the future, if the flooring is replaced the built-in can stay in place without being torn apart.
This is why professionals will always recommend building kitchen cabinets or built-ins on the subfloor.
Plus building it directly on the subfloor will allow the built-in to be a lot more sturdy.
Our Choice
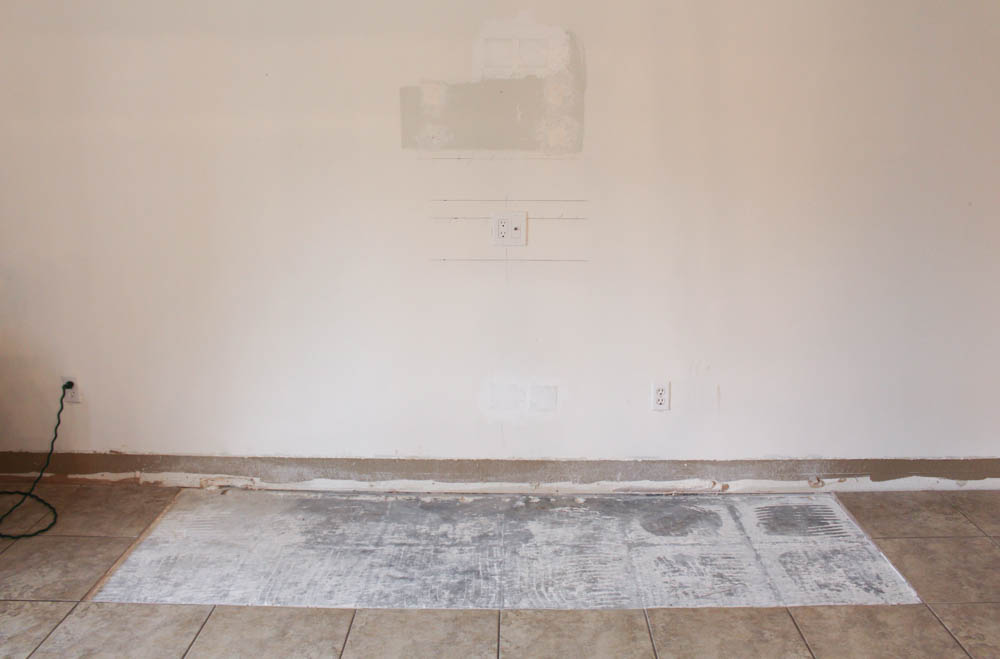
We are in the middle of many renovation projects, which include removing our entire floor and replacing it with wood flooring.
So we ended up removing the flooring where the fireplace would be. But we didn’t do it to the exact measurements of the fireplace built-in since it will all be removed in a few months regardless. In the meantime, we will have some of the subfloor exposed.
Coming Up With A Design
Coming up with a design that worked with our needs was probably the most difficult part of this DIY.
I will include dimensions and pictures of our exact design on the 2nd part of this DIY Faux Fireplace Built-In series. But ultimately you need to measure your space and see what you are working with!
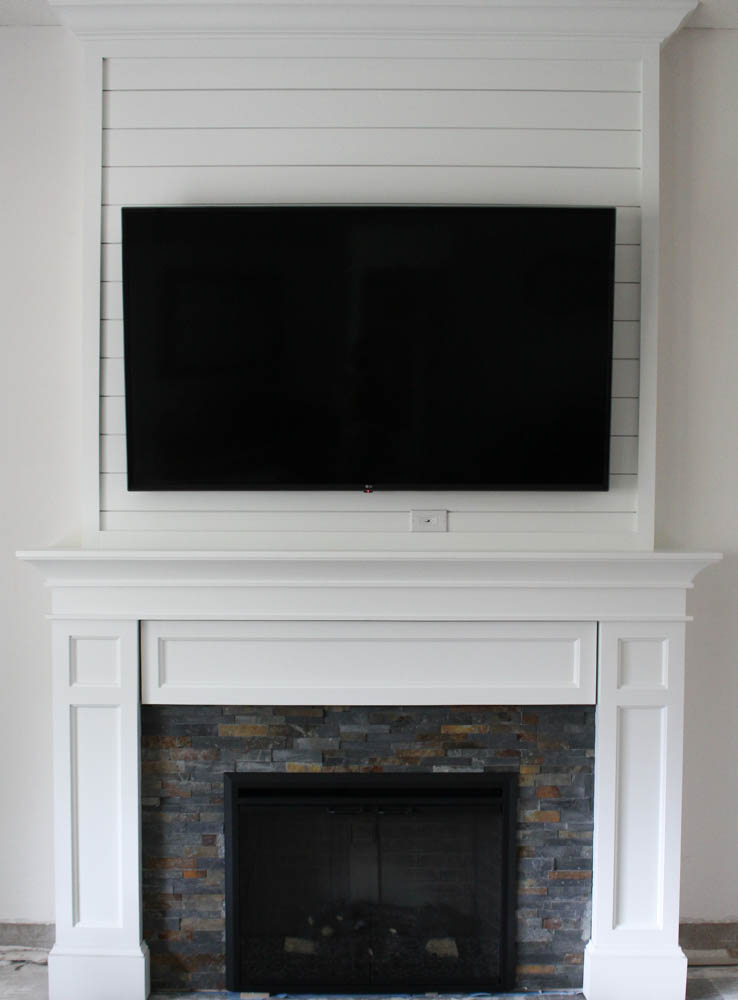
Note: We have a 10-foot ceiling and we built this fireplace built-in on an 18-foot wide wall. Our TV will go above the mantle and it is 65″.
Even though we had a general idea of what we wanted the fireplace to look like, we had to figure out how to make it all come together.
Plus we really wanted to be able to add a hidden storage compartment to hide all the TV boxes and cables! This was crucial to us! We didn’t want anything to take away from our beautiful fireplace!
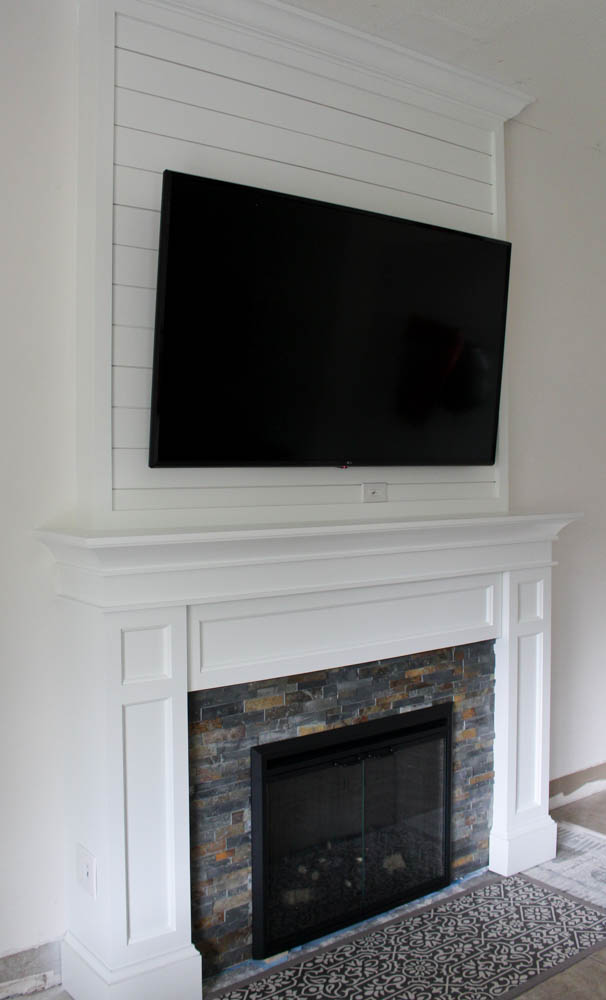
Finally, we came up with this design.
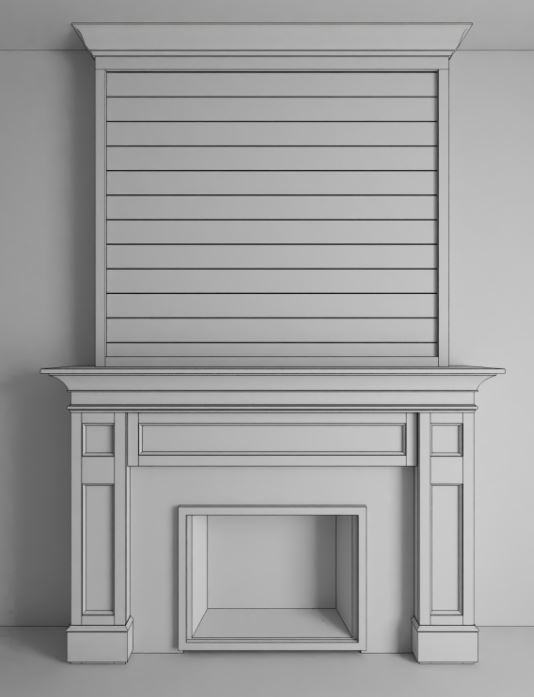
My husband is a 3d artist so he modeled the entire fireplace built-in in 3d Studio Max. This actually helped him figure out the measurements of each individual piece he had to cut (including the framing) since he modeled this to scale!
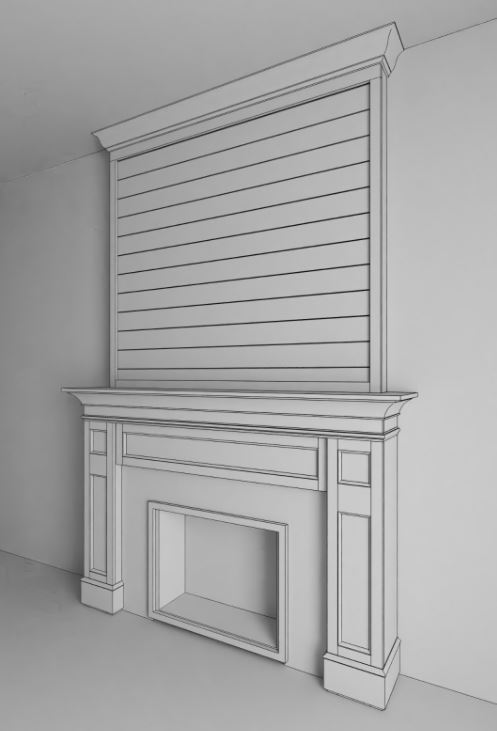
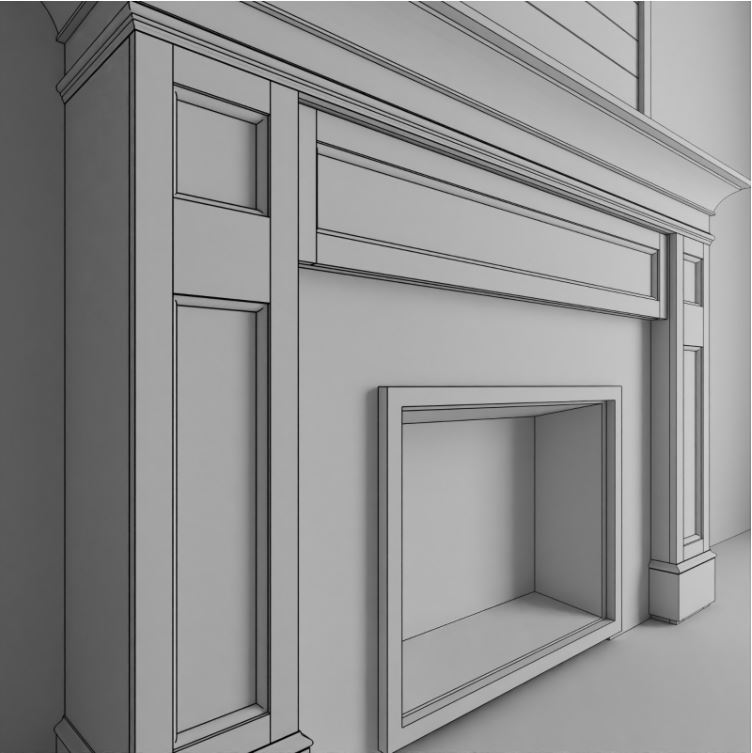
The header above the fireplace surround is actually a door that opens up!
We had to make sure that the door wouldn’t hit anything around it as it went up or down. So the door is slightly smaller than the hidden compartment. But since this entire middle compartment is recessed from the rest of the fireplace, it hides it very well.
I am so happy with this design and how it all turned out!
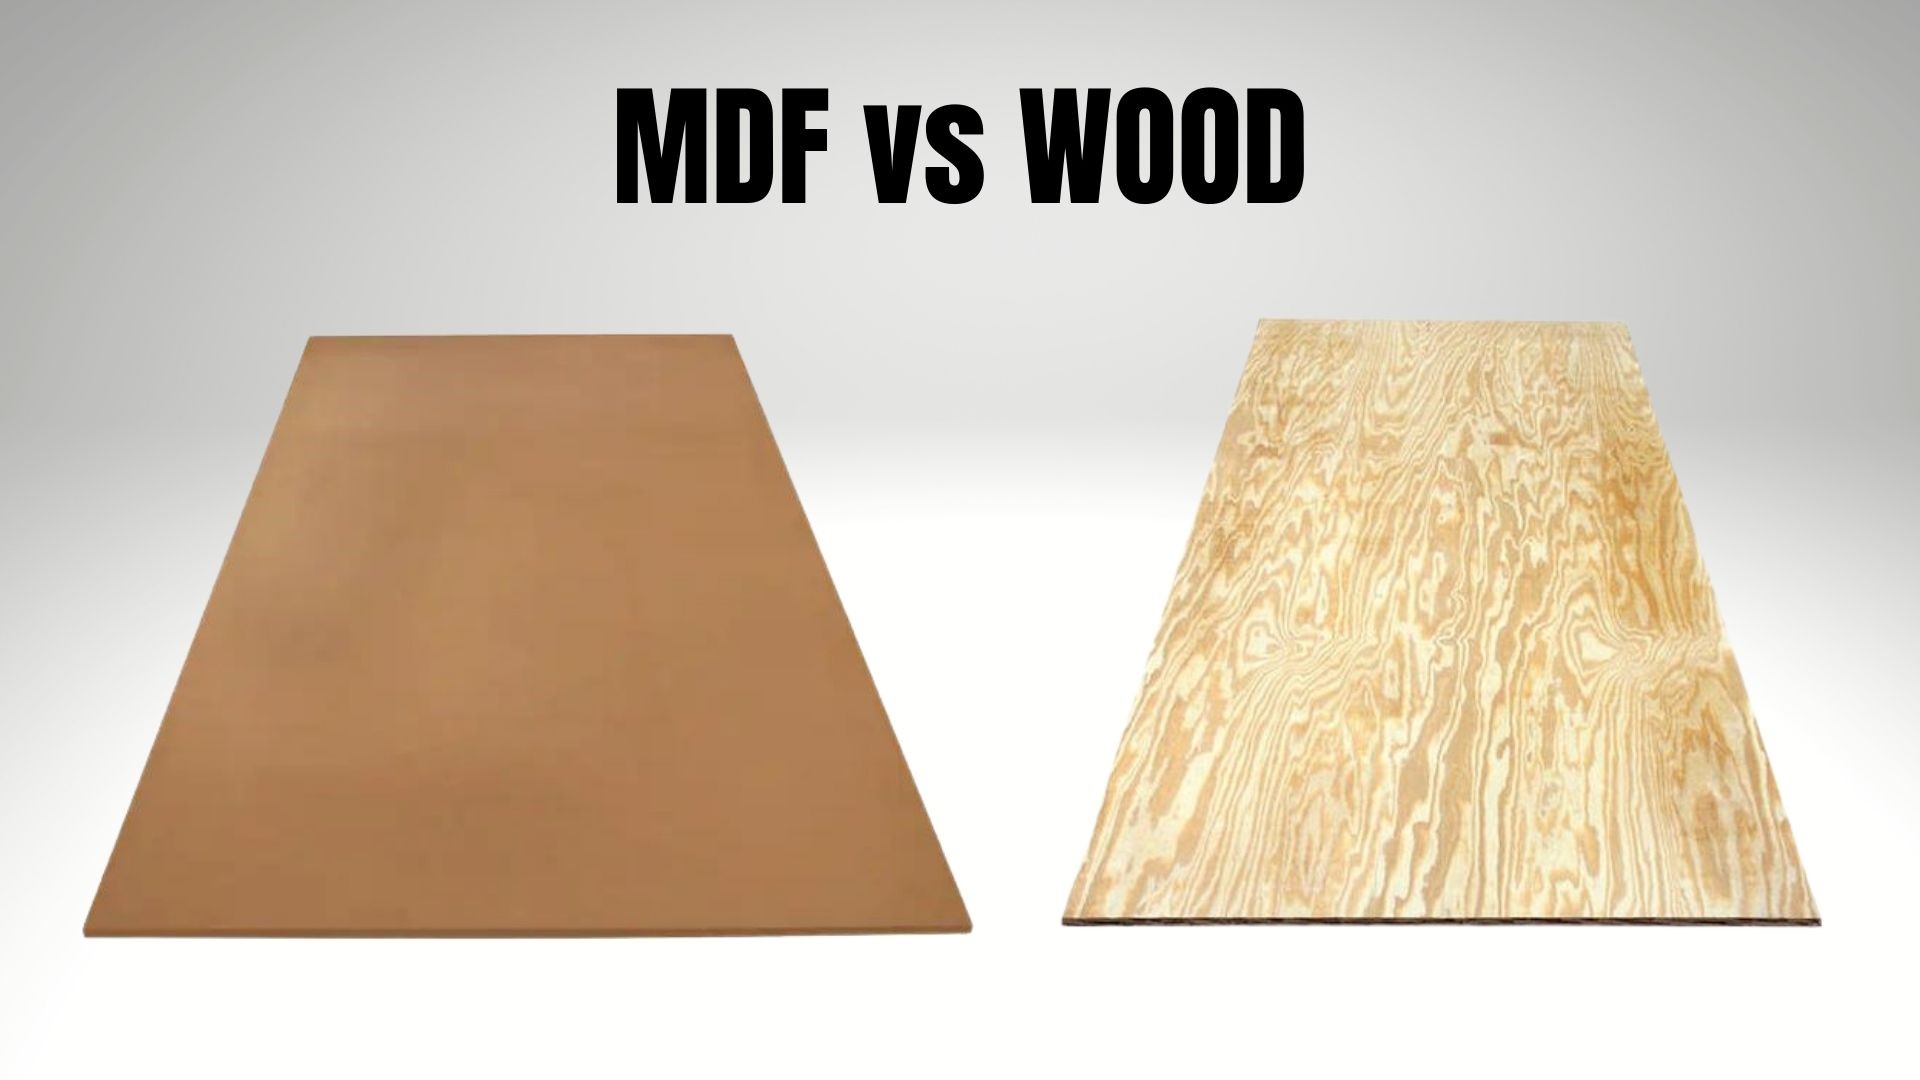
MDF vs Wood Fireplace
Another key factor to consider when doing a DIY built-in faux fireplace is what materials you will use. I’m sure you are thinking wood is the obvious choice. But MDF has come a long way and more and more people are using it to build cabinetry nowadays!
There are pros and cons to building your fireplace built-in with MDF or wood. Let’s dive into them in order to help you decide what material is best for you.
Pros and Cons Of Building With Solid Wood
PROS:
- Wood is more durable than MDF. It won’t get damaged easily.
- Wood can carry more weight.
- Wood can be sanded down and repainted easily.
CONS:
- Wood, especially good quality wood can get very expensive. Not to mention we are currently in a lumber crisis where costs are at an all time high! We are finally seeing prices go down now but that was not the case a few months back when we were buying all of our materials!
- Wood can be very difficult to work because a lot of times you will end up with warped pieces. Plus the grain can be too rough and holey. Even the expensive prime pieces of wood will always have some imperfections in them.
- You have to sand a lot to get it to a perfectly smooth condition everywhere.
- Wood gets raw edges every time you cut it which also has to be sanded down smooth.
Pros And Cons Of Building With MDF
PROS:
- For the most part, MDF will be cheaper than solid wood.
- MDF has a very smooth finish. There are no bumps, holes or bends. It’s the perfect material to work with for beginners or someone who is not used to doing carpentry work.
CONS:
- MDF is super heavy.
- MDF CANNOT get wet. So you need to be extremely careful where you store it. YOU CANNOT PAINT IT WITH A WATER-BASED PRIMER. It needs to be an oil-based paint primer, and then you can use water-based paint over the primer. I suggest giving it two coats of primer to really seal it in.
Our Final Choice:
In the end, we did a bit of a hybrid system. We decided to go with MDF because it is much easier to work with, in the sense that it is perfectly straight and smooth! But we did get a nice solid wood slab for the mantle top.
We chose a solid wood mantel top because I will be placing a lot of decorative items on top of this mantel. Christmas stocking holders, garlands, and such might damage the mantle top a little bit over the years. So I wanted to have a mantel to can be easily repaired.
Note: The framing was done with 2″ by 4″ pieces of wood as well.
We chose MDF because we wanted this fireplace to be completely perfect with no imperfections.
This is the focal point of our entire living area and we felt that working with MDF would minimize the risk of any imperfections in the wood and in the entire built-in.
*As an Amazon Affiliate I earn from qualifying purchases. This comes at no extra cost to you.*
Tools Used For This DIY Faux Fireplace
Now that we’ve covered all of the basics let’s get into the tools and materials you will need for this project!
Cutting Tools
Circular Saw Guide – This thing is worth its weight in gold! You can almost forego having a table saw with this tool! As long as your cuts are less than 2 feet wide! We used it a lot in this project!
Drills And Nail Guns
Brad Nailer And Compressor Kit
Screws
3″ Zinc Plated Construction Screws (for framing)
Tapcon Screws (for framing into concrete floors)
1-1/4″ Rock-On Cement Board Screws (for cement board)
Misc.
Mounting Clips For Hinges (sold separately)
Surface And Paint
60 Grit Sandpaper
180 Grit Sandpaper
220 Grit Sandpaper
Clean Up
Materials Used
2″ X 4″ x 10′ Lumber For Framing
Oak Plywood (for Hidden Storage Back Panels)
Premium Mortar For Tile And Stone
Pin This For Later

Okay now that we have gone over all the essentials and have all of the supplies needed let’s get into the fun stuff! Building our DIY built-in fireplace! Check out How To DIY Built-In Faux Fireplace With Hidden Storage – Part 2 now!
And don’t forget to subscribe to my newsletter and keep up with all the upcoming projects we have coming soon! We are so excited to share our renovation journey with you!
You May Also Like


Leave A Comment