
Building a DIY board and batten wall is a fairly easy project that will instantly upgrade your home. It can also be very useful in a mudroom or entryway. Just add a few hooks and a bench and you instantly create a storage area for your drop zone!
We put board and batten in our entryway and it has completely transformed the space!

There are a million DIY board and batten tutorials out there but hardly any of them are like this one!
Not only do we place a backing for a more paneled look. But we also put the baseboard OVER the trim pieces instead of letting them butt up to the edge like so many tutorials do.
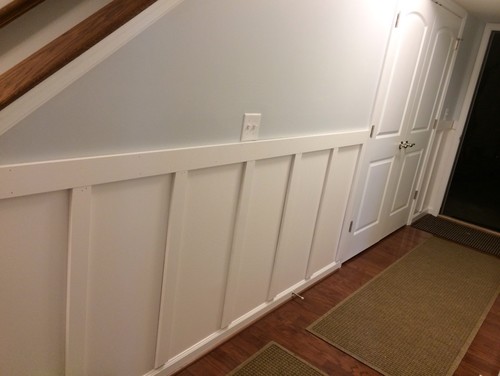
Photo by TraceMachine – Look for home design design inspiration
Plus we added an extra trim piece on top to make a simple picture ledge.
So if you want to see how we DIYed our board and batten wall then keep on reading!
I will link all of the pieces we used! Plus make sure to scroll all the way down to see a step-by-step VIDEO tutorial!
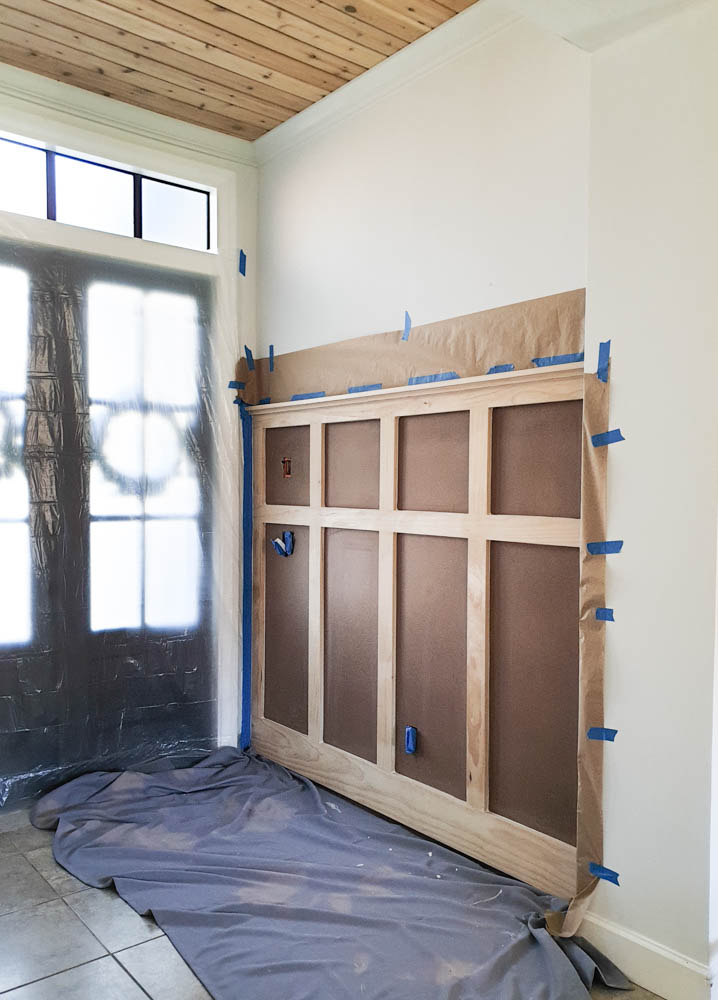
DIY BOARD AND BATTEN – HARDBOARD BACKING
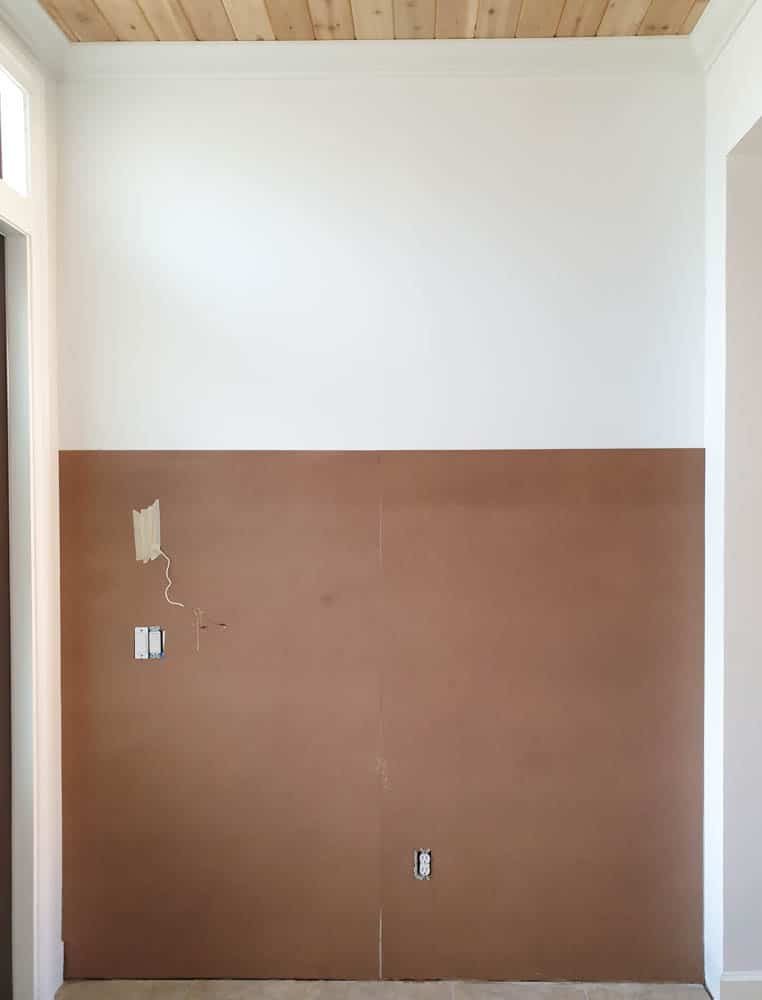
 Even though we recently skim coated our walls giving them a nice smooth finish, we decided to place hardboard backing for our DIY board and batten.
 Not only will this give a uniform wood look to the entire board and batten paneling but it will make it stronger against scuffs and marks.
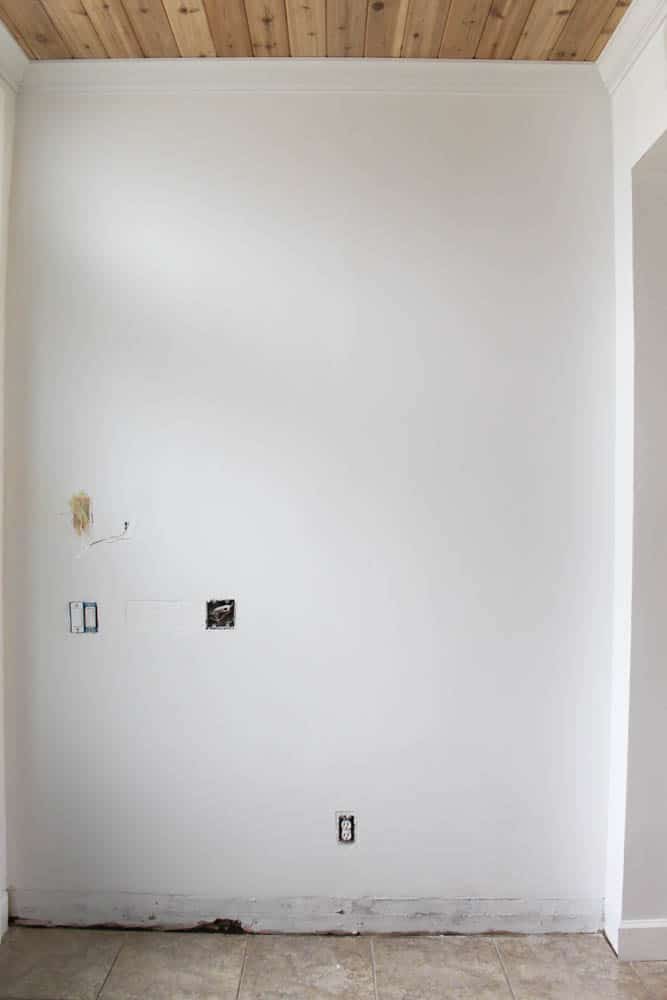
The first step is to decide how big you want your board and batten wainscotting to be. This obviously depends on the space you are working with.
Measure the length of your wall. Then decide how high you want your board and batten to be. A good rule of thumb for this kind of wainscoting is to cover about 2/3rds of the height of your wall.
Our wall is 7 ft wide and we have 10 ft ceilings. We chose to make the top flush with the upper moldings on our front doors which are right around 6 ft.
NOTE: If you want to move any outlets around, now is the time to do so! We moved ours to the left so that it wouldn’t obstruct the view of our board and batten wall or be in the way of whatever decorative pieces we might add on later.
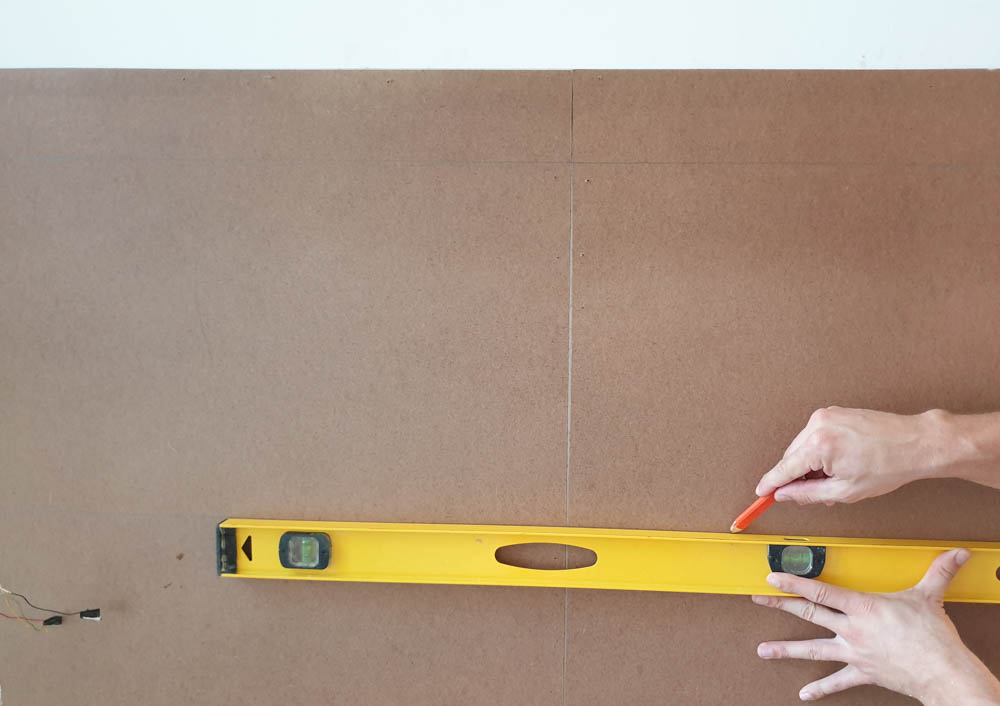
So we cut 2 4×8 wall panels to size for our board and batten backing.
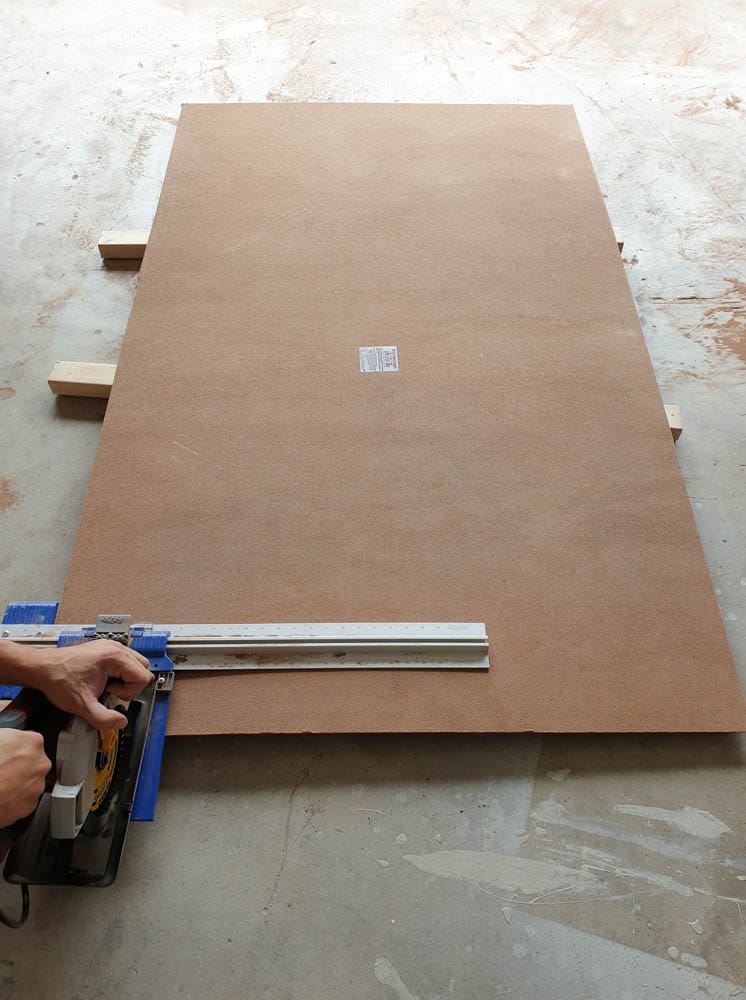
If you need more than one panel make sure to cut them so that they meet where one of the batten pieces will be. That way the batten will hide the seams.
If you have any outlets in the wall where your board and batten will go make sure to cut holes for them on your board as well.
Once your boards are cut apply wood glue to the backside and carefully place it on the wall. You can use your level to make sure it’s nice and straight. Then nail it onto the wall.
Now you are ready to cut your board and batten pieces!
DIY BOARD AND BATTEN – LUMBER
So the board in BOARD AND BATTEN refers to the (typically) wider horizontal pieces. And the batten refers to the thinner vertical pieces.
The dimensions for the trim pieces we used for our board and batten entryway wall are shown below.
NOTE: Links to the specific pieces are all posted below along with a list of all the tools and supplies used for this project!
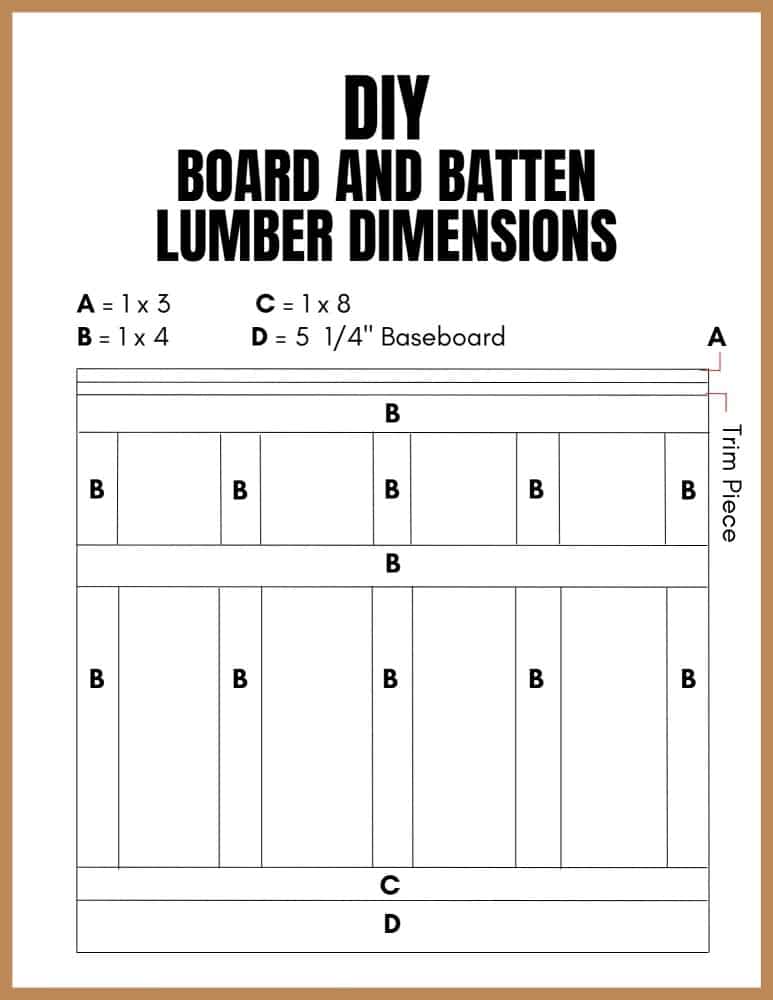
First, we marked the hardboard backing with lines along where each trim piece would go.
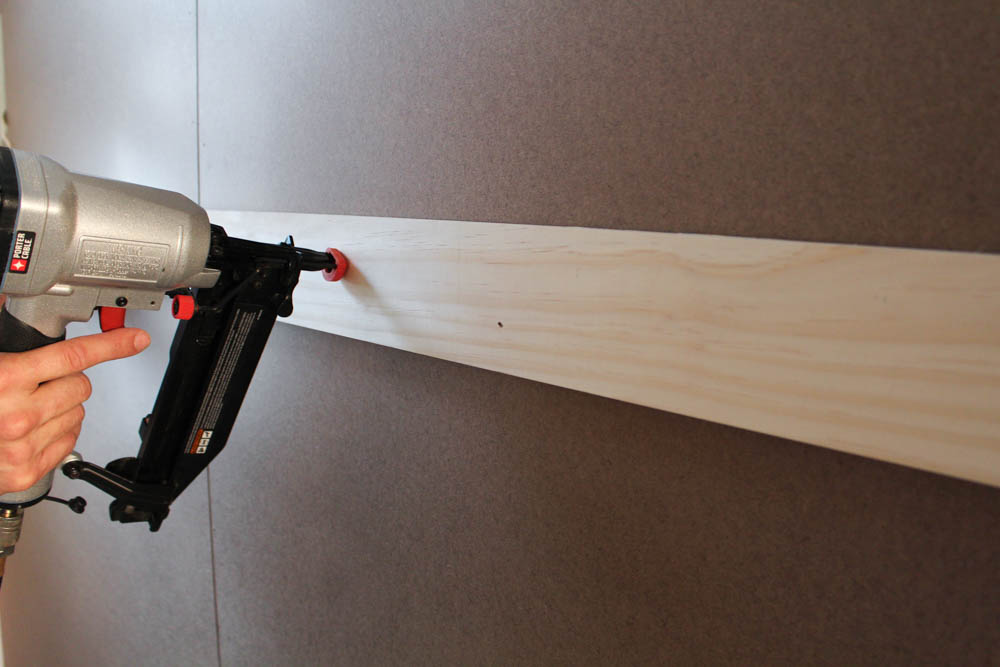
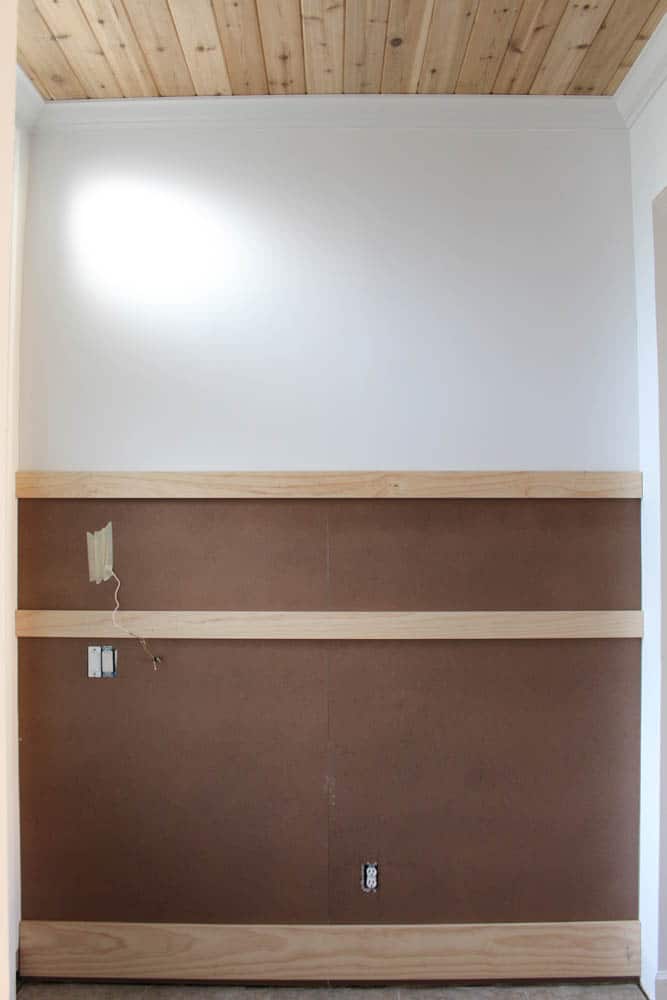
We glued and nailed the horizontal pieces first (sizes B and C).
The top board is 5′ 10 1/4″ from the floor. And the middle board is 4′ 3 1/2″ from the floor.
Notice that the larger board on the bottom is slightly off the ground (about an inch). This is so that enough of it still shows once we put the baseboard over it. It will look like it’s 4″ like the rest of the trim pieces.
Then we glued and nailed all of the vertical (B) trim pieces (spaced 16 1/2″ from each other).

After that, we placed a 1 x 3 (A) trim piece lying flat on the top horizontal (B) piece. This was glued and nailed in from the top.
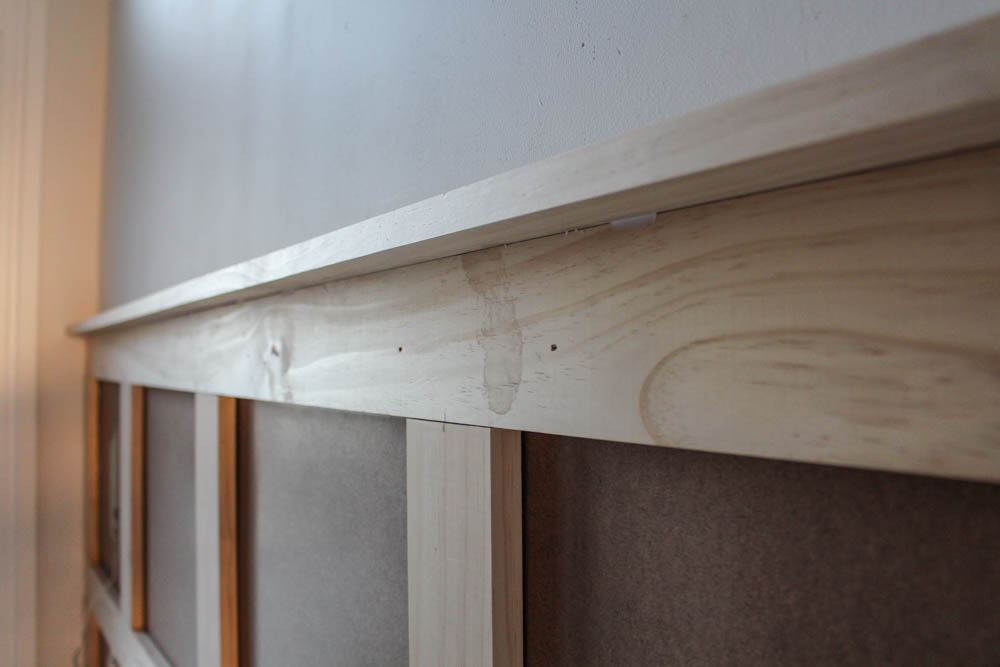
Then we nailed a 3/4″ molding right underneath piece A.
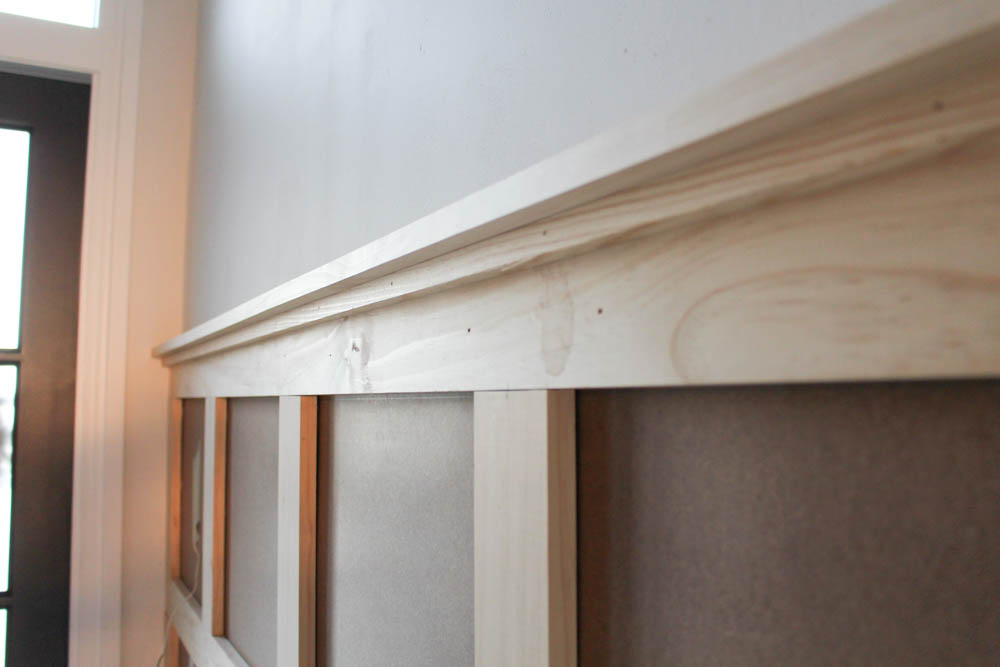
We saved the baseboard which was already painted. It was nailed in after we painted the board and batten. But if you get a new baseboard that needs painting you can go ahead and nail it in now.
DIY BOARD AND BATTEN – SANDING
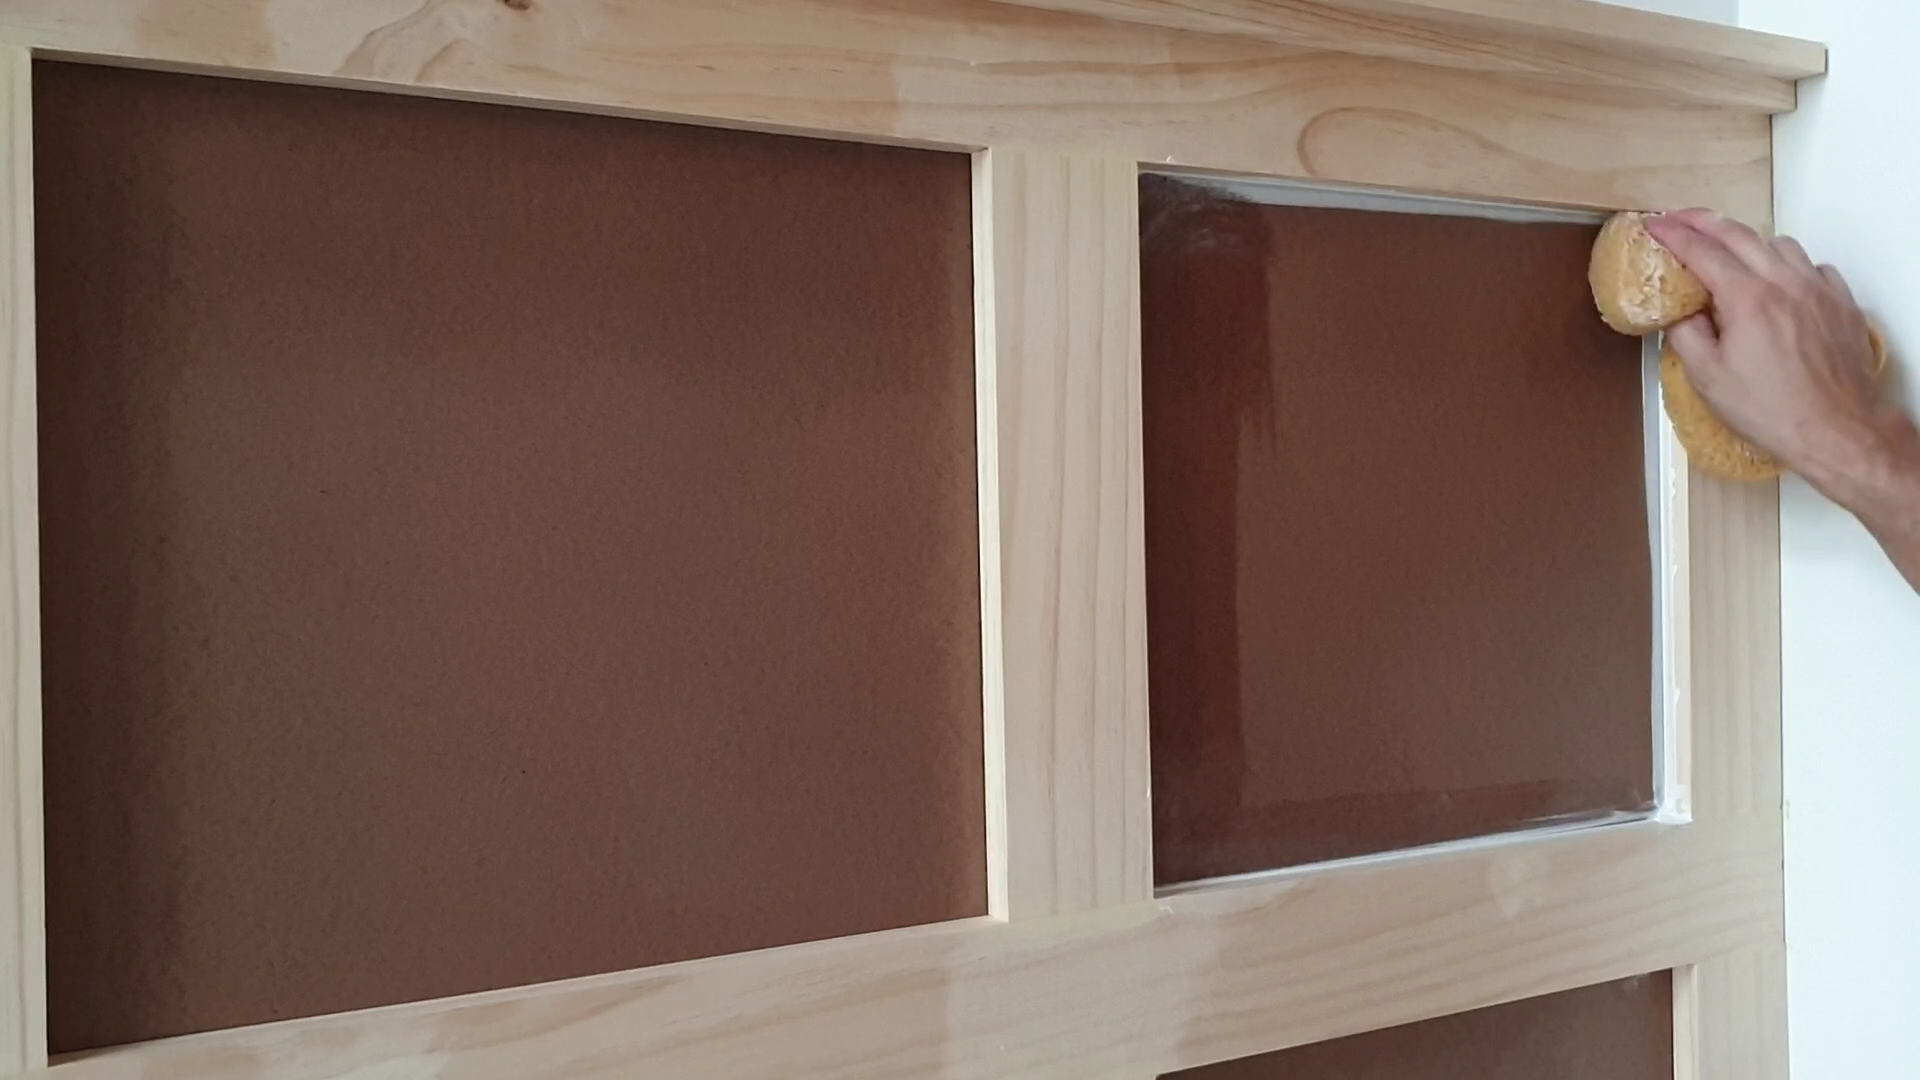
Once all the pieces are glued and nailed in place you need to go back and cover all of the holes and areas where the trim pieces meet with wood filler.
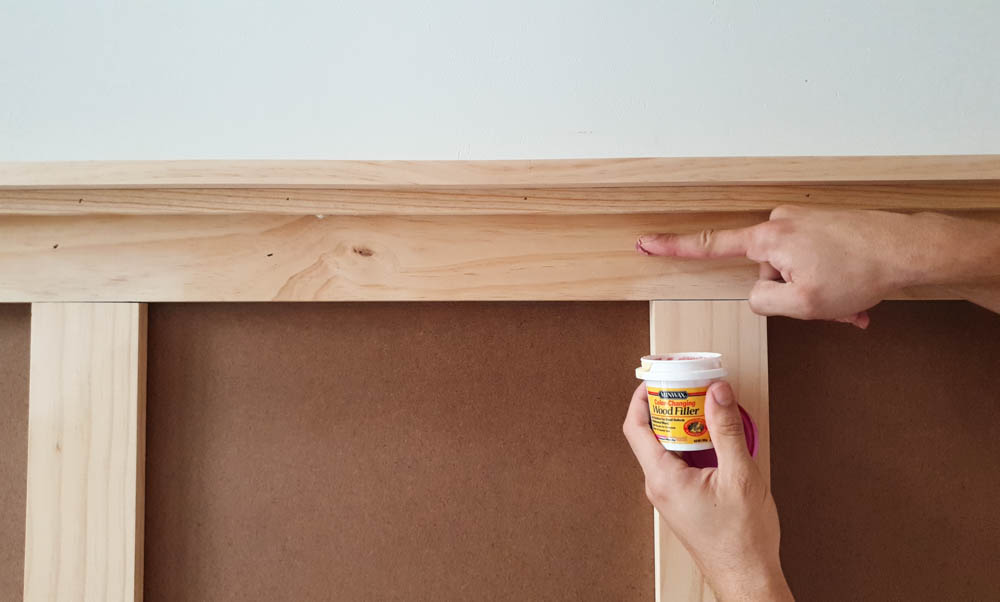
I like this wood filler because it goes on pink and turns a tan color once it’s dry. Once dry we sanded with 60 grit sandpaper (you can use 80 as well).
Make sure to wipe the entire surface of the board and batten to remove all of the dust.
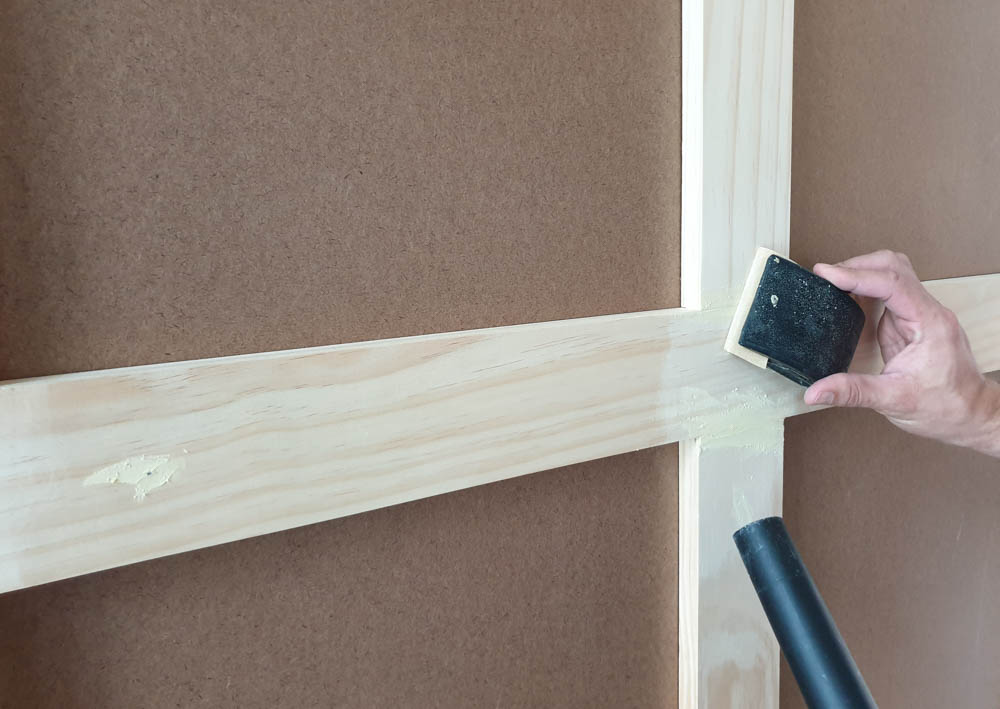
DIY BOARD AND BATTEN – CAULKING
Once the boards are wiped and clean you can caulk all the seams.

Just make sure to wipe the surface well with a moist sponge to smooth out the caulk and let it dry completely before painting!
NOTE: You can always caulk again in areas that may need it after painting. But we didn’t need to!
DIY BOARD AND BATTEN – PREPPING
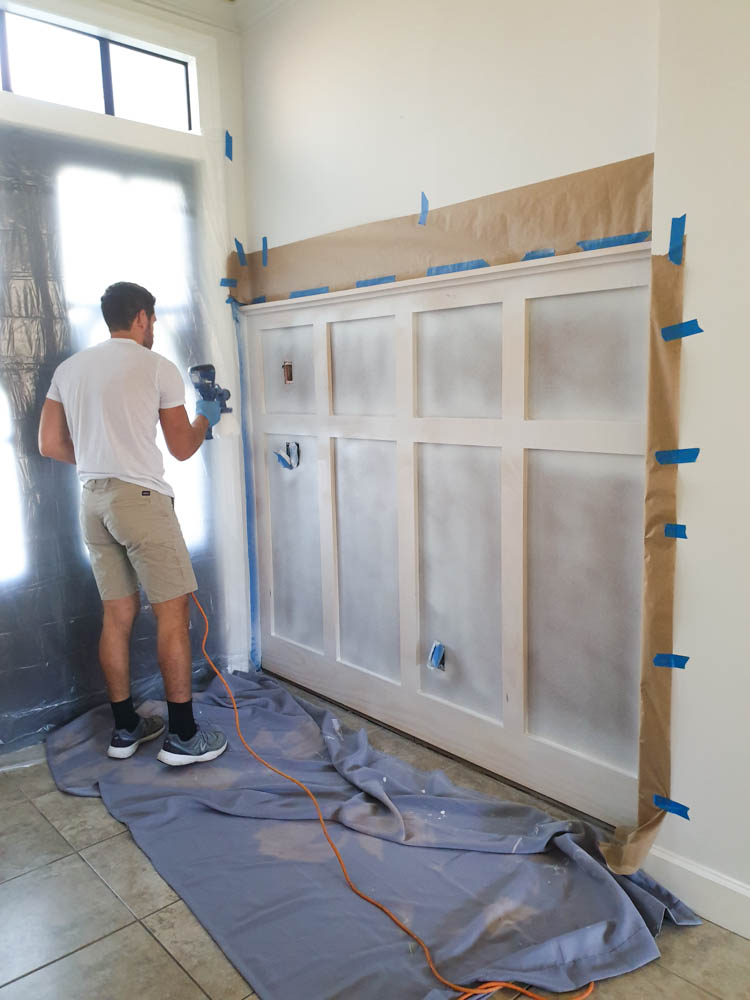
Before you paint you need to prep! We are using a spray gun so prepping is super important to cover all the surfaces nearby!
We put plastic sheeting on our front door to protect it. Then we placed kraft paper rolls all around the board and batten wall. Finally, we placed a drop cloth on the floor.
Prepping might take some time but it will make painting all the faster once you are ready to start!
DIY BOARD AND BATTEN – PAINTING
Painting can make or break your entire project. You could go ahead and paint your board and batten with a roller and brush. But I HIGHLY recommend spray painting!
It gives the paneling a smooth and perfect finish with no brush strokes or roller bubbles.
This spray gun is very affordable and does a great job. We’ve used it a few times already and are very happy with the results.

Don’t be intimidated by having to mix it with water! It’s not difficult at all! We filled the spray gun bottle about 3/4 of the way with paint and added about 3 tablespoons of water. You don’t need a lot! Just enough to make it a bit watery.
And believe it or not, that little bit of paint is enough to last for most of the project! Which is another great reason to spray paint! You save SOOOO much paint and money!
Okay so first, we gave the board and batten 2 coats of primer. This Kilz primer dries within 30 minutes! So we were able to do the first 2 coats in no time at all!
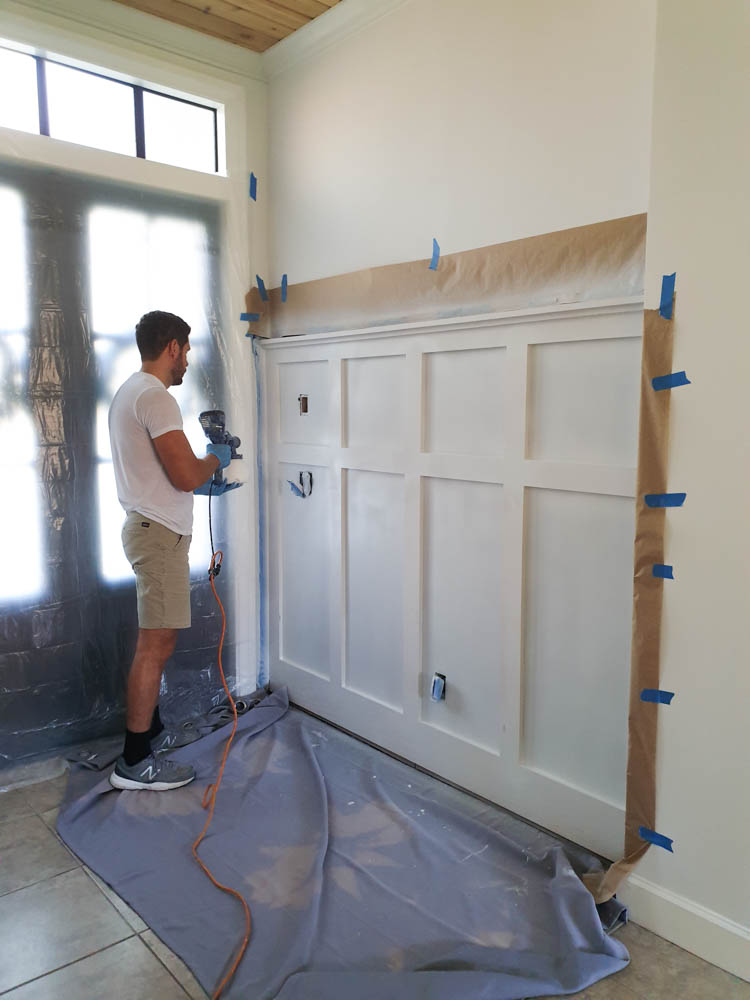
After the second coat of primer, we lightly sanded the surfaces with a 220 grit sanding sponge. Then we wiped away the dust with this tack cloth.
We gave the wall 2 coats of this AWESOME cabinet paint and sanded again with the sanding sponge in between coats.

I highly recommend you get this cabinet paint. It’s a bit more expensive but as I said, a little goes a long way if you spray paint! We have used less than a gallon after 3 big DIY projects (including this one).
This paint will be SURE to give you the best finish on your DIY board and batten wall!
DIY BOARD AND BATTEN – SUPPLIES
Lumber
Tools
Surface And Paint
You May Also Like


Emma Talbot
The house we are buying has this design of wainscoting in the foyer and dining room. I want to continue it throughout the first floor and the upstairs bathrooms. Thank you for showing me how to do this project.
30 . Jan . 2023Lisy
How exciting! And you are very welcome! I’m glad you found it helpful!
31 . Jan . 2023Karla Horne
I saw something like this on Pinterest, and wanted it for behind my front door. With a lot of help from my brother in law, I finally have a place for hanging our coats instead of the chairs and stair railing! I love my batten board wall!
06 . Oct . 2022Lisy
That is so exciting! And yes it’s so convenient if you add hooks for storage! We did this as well!
14 . Oct . 2022Jayne @ Chalking Up Success
I have a space behind the front door which looks exactly like this. I’ve been considering adding board and batten for this space but I want to add some hooks and a shelf above too. Your board and batten wall looks amazing – thanks so much for the tutorial!
01 . Feb . 2022Lisy
I am so glad you liked it! It really makes a great first impression when you walk in. And it’s functional too! I plan to add hooks with a bench and some baskets underneath. And the little ledge on top is perfect for picture frames. I think you should go for it!
02 . Feb . 2022