
When I first saw this technique on Pinterest I was BLOWN AWAY! Who knew you could DIY mercury glass ornaments?! I sure didn’t! But I had to try it! And I absolutely LOVE how they turned out. So today I will be showing you my take on DIY mercury glass ornaments in just 7 easy steps!

PROS OF DIY MERCURY GLASS ORNAMENTS
We all know how expensive mercury glass ornaments can be, so saving money on DIYing them is a definite plus!
Plus you can make AS MANY AS YOU WANT with the same amount of supplies shown below. I could have probably made a hundred of these (I only made 12 but I think I might be making more)!
But the main plus side is that these are SHATTERPROOF. They are not actually glass, even though they look like it! So you don’t have to worry about them breaking!
So without further ado, let’s get into this DIY mercury glass ornaments tutorial!
NOTE: You can check out a mini video of this craft here!
DIY MERCURY GLASS ORNAMENTS


1. GATHER YOUR SUPPLIES
Make sure to gather all of the supplies shown above. You will need clear plastic ornaments, spray paints, water, vinegar, and a spray bottle. Plus, you will also need latex gloves and a hairdryer.
I got my ornaments from Dollar Tree and I love how big they are! I highly recommend these!
2. COMBINE INGREDIENTS
Combine equal parts water and vinegar into a spray bottle. I did 1/2 a cup of each and it was more than enough for this project.
3. PREP
Prepare a clean area OUTSIDE where you can work. You do not want to do this inside! The spray paint can easily float to other areas of your home and stain something. Plus it’s toxic to breathe the fumes indoors. Make sure to lay down craft paper on the surface you are working on. I used my kids’ little picnic table on the back porch and laid an old bedsheet under it for extra coverage.
4. SPRAY PAINT WITH LOOKING GLASS
The key to getting a mercury glass look is to use this Looking Glass Spray Paint. Just add about 3 sprays in the ornament and immediately start rotating the ornament so that it goes all around and doesn’t settle in one place. Then blow dry the inside until completely dry, making sure to keep rotating as you do this.
5. SPRAY MIXTURE
Next, you will spray the water/vinegar mixture about 2-3 inside the ornament and continue to rotate it. As soon as you do this you can go on to the next step.
6. SPRAY PAINT GOLD
Now spray the ornament with 2-3 sprays of your gold spray paint (it can be any gold color that you like) and continue to rotate the ornament around. Dry the paint completely with the blow dryer while rotating the ornament.
7. REPEAT STEPS 3-5
For a better look, I suggest you repeat steps 4-6. This way the ornament will be fully saturated with that mercury glass look.
DIY ANTIQUE TOPS
I definitely suggest doing something a little extra with the tops of the ornaments to give it a more high-end finish. I wanted to give these tops an antique look and it was very easy to do!
All you need is black spray paint and some rub-and-buff.
First, I sprayed my tops with black spray paint. First on the inside and then I turned them over carefully and sprayed the top.

I did this inside a cardboard box because they tend to fly around with the pressure of the spray paint. This kept them safe and also protected my surroundings from the residual spray.
Once they were completely dry I added this Gold Leaf color Rub-And-Buff with my fingers. Make sure to use gloves though!

NOTE: If you don’t have rub-and-buff you can very lightly/quickly spray them with the same gold spray paint after the black paint has dried. I tried this technique as well and it was just as beautiful. But the rub-and-buff definitely adds a more antique look.
RIBBON INSTEAD OF HOOKS
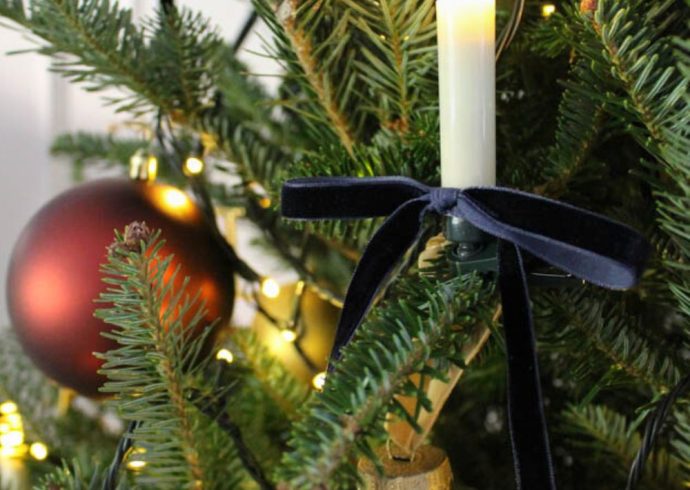
To top off this already amazing ornament, I suggest you use velvet ribbon to hang them on your Christmas tree instead of regular hooks.
Again this just gives it that extra high-end touch and it’s so simple to do! I used this khaki-colored velvet ribbon and I love how it looks! A red ribbon would look great as well! Just cut the ribbon the same length (I did 11″ each) for each ornament and tie them.


PIN IT FOR LATER! DIY MERCURY GLASS ORNAMENTS

I hope you found this DIY Mercury Glass Ornament Tutorial helpful!
If you would like more Christmas inspiration and home decor tips, make sure to subscribe to my NEWSLETTER where you will receive this and more straight to your inbox!
Happy Holidays!
You May Also Like
Leave A Comment