Easy DIY 4th of July/Patriotic Wreath -Under 20 Dollars!
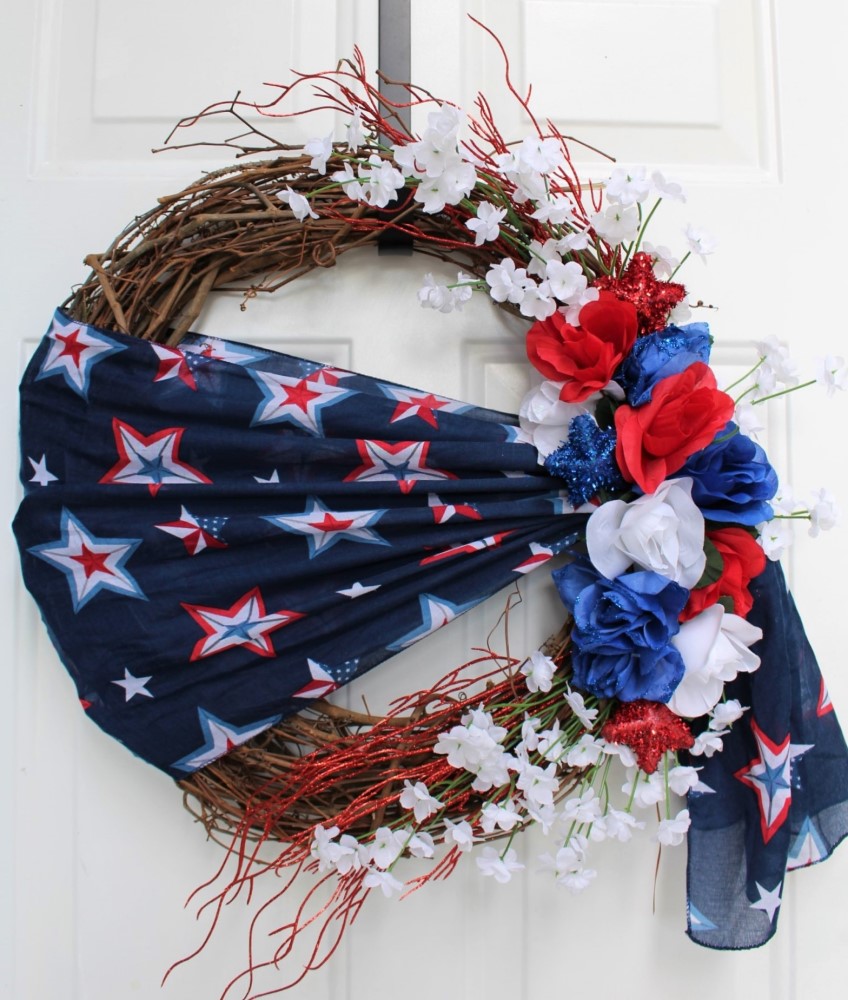
Summer is almost here and along with it, one of my favorite holidays! Independence Day! So today I am sharing a super easy DIY 4th of July/Patriotic wreath that costs less than 20 dollars with supplies from Dollar Tree!
The best part about this DIY is that it doesn’t require using a hot glue gun! So literally ANYONE can do this! Just follow these easy steps and you’ll have a beautiful patriotic wreath to show off to all your friends this Independence Day!
Step 1 – Start with a Grapevine Wreath
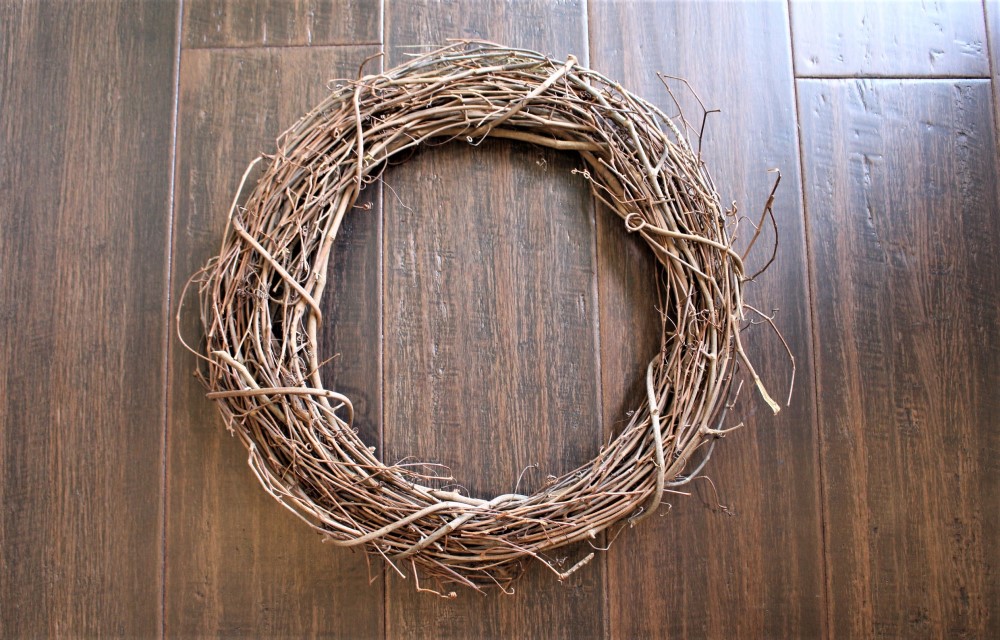
Find a low-cost grapevine wreath at a craft store or department store near you.
I got mine at Michaels because I know they have grapevine wreaths year-round for DIY crafts and they are only $4.99! Walmart also has low-cost grapevine wreaths in their floral/craft aisle.
Step 2 – Gather Your Dollar Tree supplies!
I purchased the rest of my supplies for this easy DIY 4th of July holiday wreath at Dollar Tree.
They have a large patriotic flower selection right now! So you can choose different flowers from the ones I used for a similar look or you can get the exact flowers I did, it’s up to you!
First, I picked my main flowers which are the red white, and blue rose bushes (1 of each). They also come in assorted bushes of red white and blue.
Whichever one you get, just make sure you have at least 3 roses of each color. I also got 2 rose glitter bouquets (the blue and white rose) which come with red or blue glittery stars.
I don’t know about you, but I think everything looks prettier with some glitter! And this little extra sparkle effect turned out to be very pretty indeed!
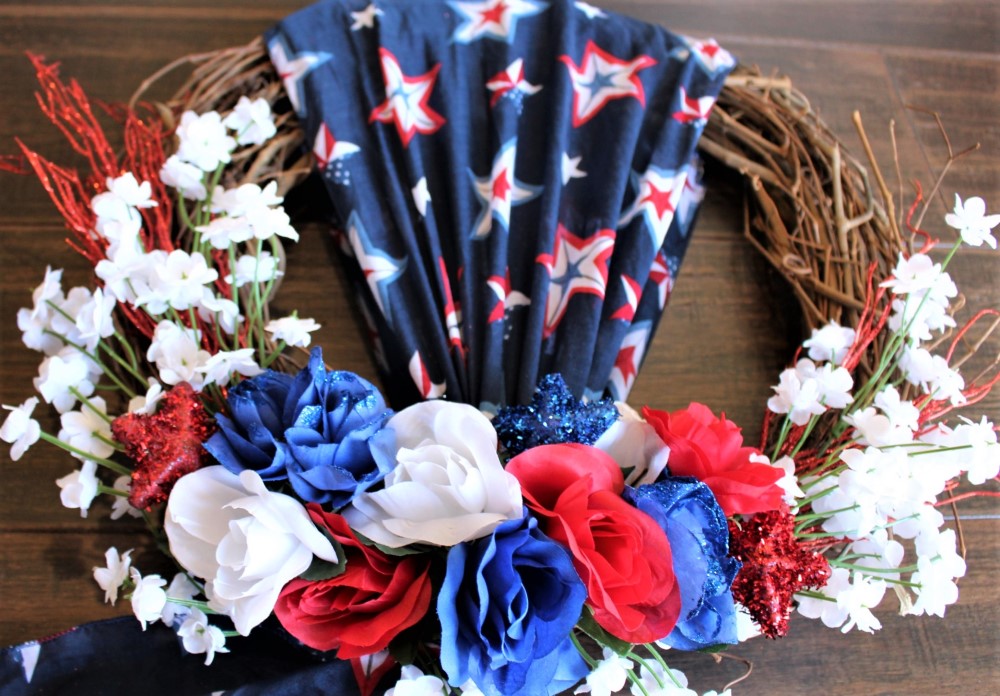
Next, I also got 2 red glitter stems and 3 white baby’s breath bushes for a layered look.
The last item on the list of Dollar Tree supplies is the 63 x 13.75 patriotic fashion scarf of your choosing. I got the navy scarf with the patriotic stars.
Step 3 – Wrap The Patriotic Scarf Around The Wreath
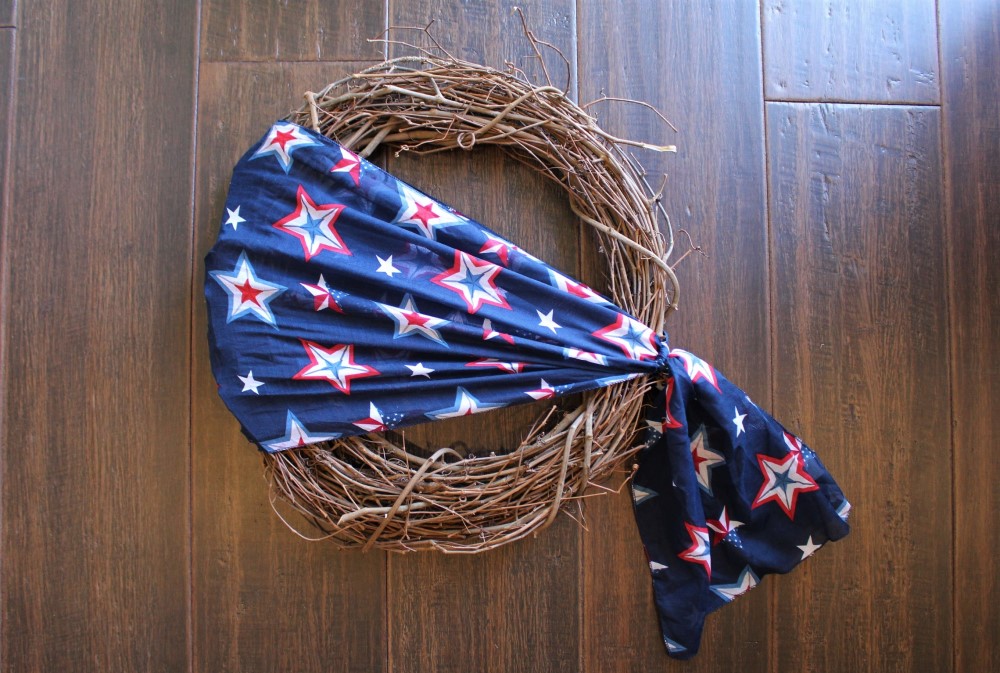
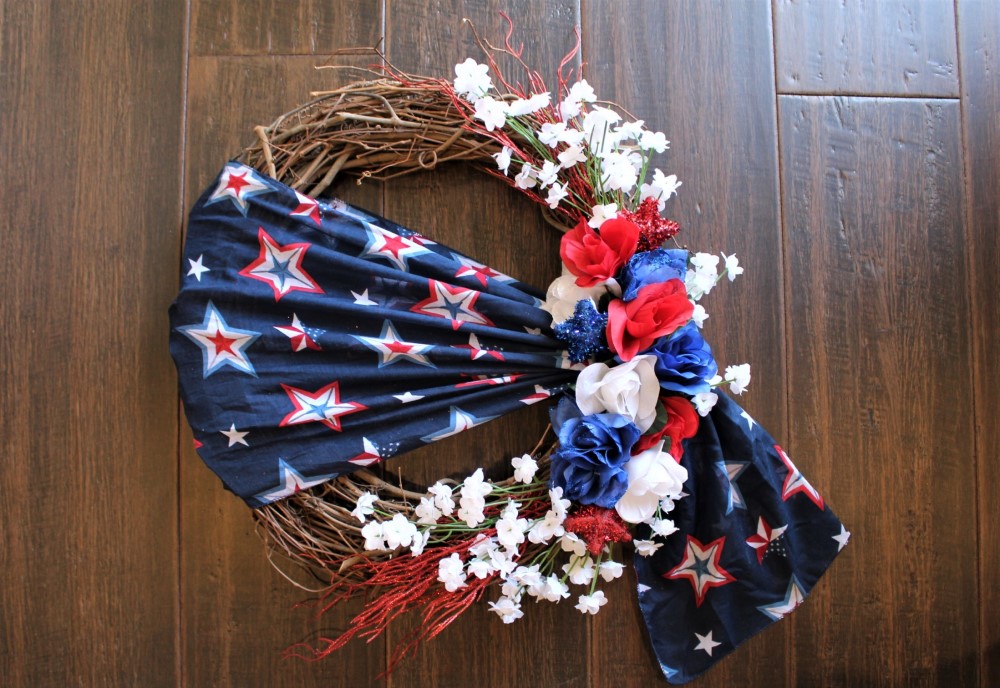
Grab the middle section of the scarf and place it around the left side of your wreath as wide as it goes. Then grab the two loose ends on the lower right side of your wreath and tie a double knot.
It’s as easy as that! Don’t worry, you won’t see the knot once it’s all finished!
Note: Make the knot nice and tight so that the scarf stays in place, but make sure the vines from the wreath don’t poke through the fabric on the other side.
Tip: Place the wide part of the scarf on the side that has the least amount of vines poking out from the wreath.
Step 4 – Prepare Your Florals
Cut all the stems from your floral bushes about 2 to 3 inches below the flowers.
For this, you will need a nice pair of shears. Make sure to raise the green leaves to the bottom of your flower before cutting the stems for an extra pop of green on your DIY wreath.
Cut the baby’s breath and glitter stems as close to the bottom as possible so that you have enough space to put it through the wreath vines without losing its length.
Step 5 – Place Your Flowers
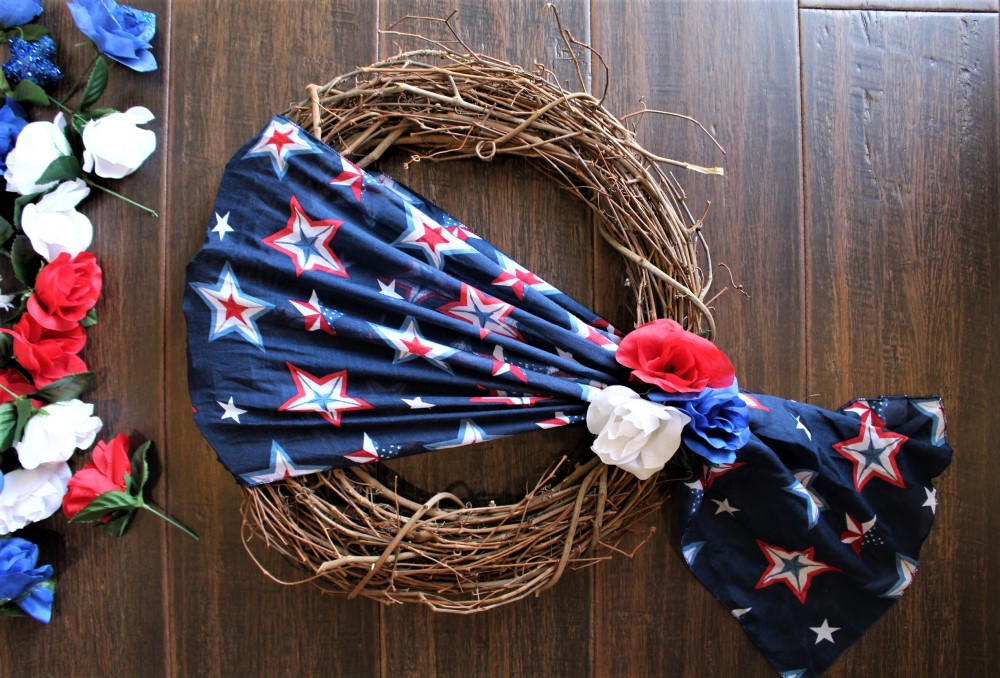
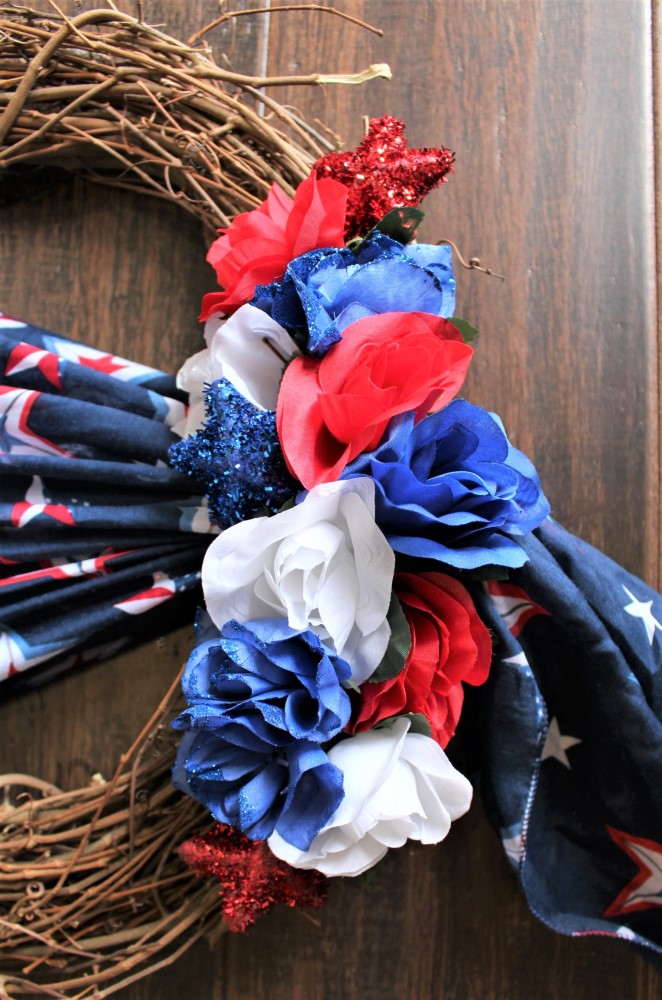
Now we’re getting into the fun part! Arranging your flowers on your wreath! I started with my first 3 main flowers, my red, white, and blue roses, right on top of the knot.
How did I do this? Remember there is no hot glue gun required for this tutorial! I simply poked the flower stems at an angle through the open spaces of the grapevine wreath! So easy!
After I had my first 3 main flowers I started to incorporate the glitter roses around those, trying to keep a pattern of red, white, and blue.
Then I added a couple more of my main flowers. And finally, I placed the star picks that came with the glitter rose bush.
I had 2 red stars and 1 blue star, so I did and pattern of red, blue, red going down the side of the wreath.
Step 6 – Add Your Picks
So normally, when you decorate a wreath you have to layer backward. Meaning the background elements have to be glued on first. Then the middle ground, and lastly the top/foreground.
This is hard to do because you have to know exactly where everything will go before you glue it on and hope you did it right by the time everything is on!
But not for this easy DIY wreath! We can work on the top pieces first and figure out where we like them as we go!
It’s easy to move things around since we are not gluing anything down. And it’s easy to apply the stems and picks behind the flowers using the same method of just poking them through the vines of your wreath!
Now that you’ve got your stems/picks placed, it’s time for the last step!
Step 7- Hang Your Wreath!
Now it’s time to display this beauty! Find a wreath hanger that works well with your door and put up your masterpiece for the world to see!
You’ll be sure to get lots of compliments on this easy DIY 4th of July/Patriotic wreath! And they don’t have to know how easy it was to make it!
Share This With A Friend!
If you enjoyed this easy DIY 4th of July/patriotic wreath tutorial make sure to hit that share button! And if you want more FUN DIYs and INSPIRATIONAL HOME PROJECTS straight to your inbox click here to subscribe!








Leave A Comment