
Dollar Tree is a great place to find affordable holiday decor. And I love turning Dollar Tree finds into beautiful decorative pieces for my home. So today I am sharing 8 super easy 4th Of July Dollar Tree crafts with you!
These crafts are so pretty, your guests won’t believe they’re from Dollar Tree! Let’s get right into these DIY crafts!
BONUS!! MAKE SURE TO SCROLL DOWN FOR A FULL-LENGTH VIDEO AS WELL!
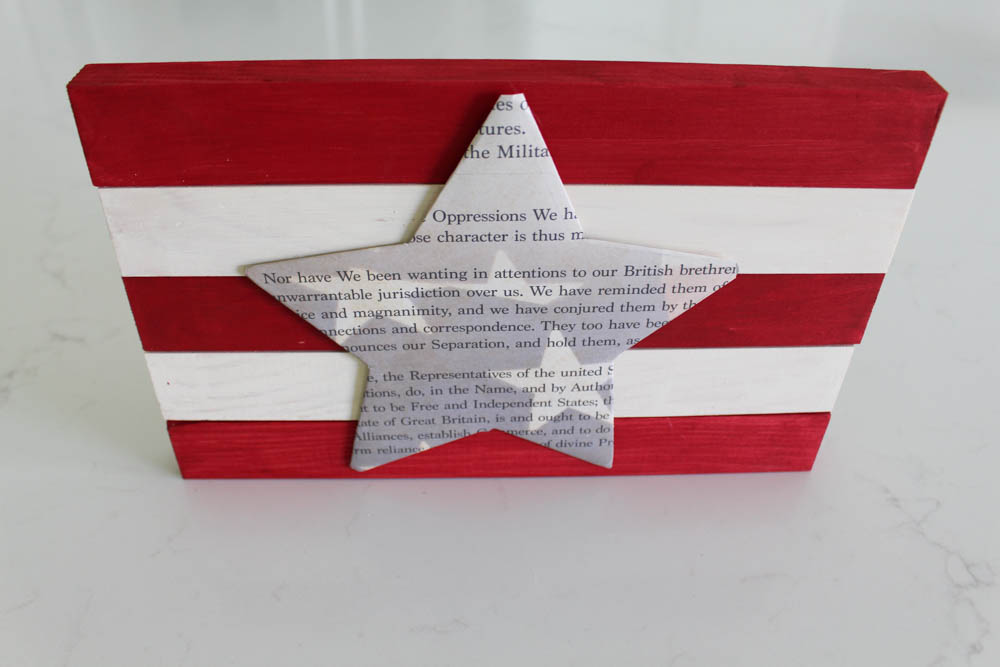
1. WOODEN FLAG CRAFT
For the first 4th Of July craft, you will need 5 12″ wooden slats, a metal star, and patriotic posters from Dollar Tree.

You will also need red and white acrylic paints. I used a mixture of this Bright Red paint and this Cardinal Red Paint for the perfect red color. And I used this Antique Parchment paint for my white color.
Paint 3 wooden slats with your red paint mixture and 2 wooden slats with the white paint. Once dry, glue them together (using hot glue of Gorilla Wood Glue) in a red and white stripes pattern.
Next, place the metal star on top of the patriotic poster and trace it. Then make lines about half an inch away from the star you traced and cut along those lines.
Now cut tiny slits on the inner corners of the star, to help the paper fold around the star. Make sure not to cut past the original star you traced, only that extra half-inch away from the star.
Cut the tips of the star horizontally, to avoid excess folding. Again, make sure not to go past the original traced star lines.
Fold all 10 sides of the star over the metal star along the original tracing and glue them down with hot glue.
Once dry, glue your star to the wooden slats, and you are done!
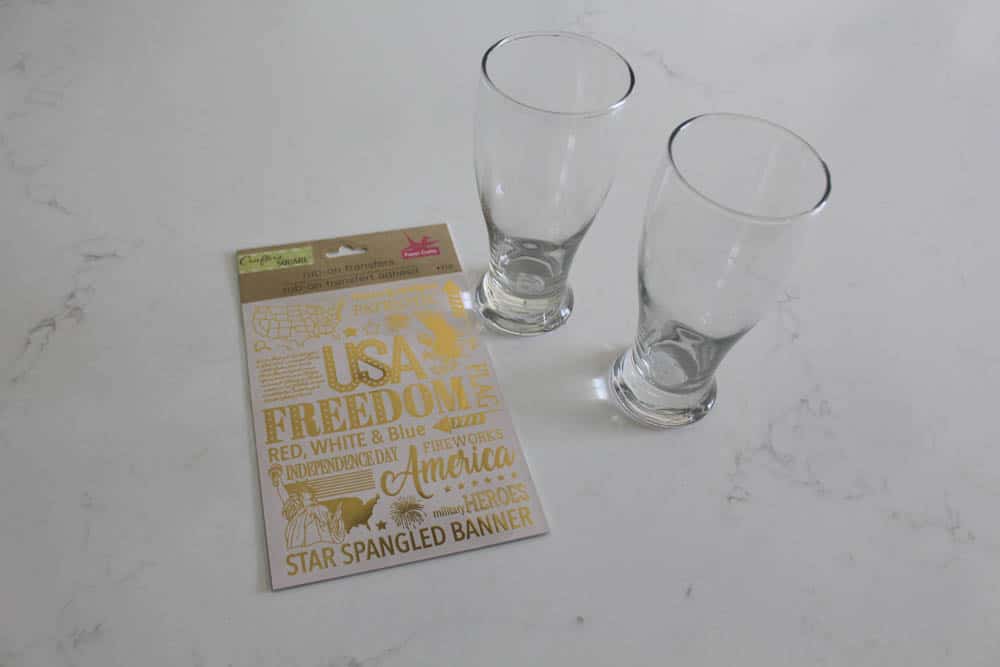
2. 4TH OF JULY GLASSES
For this 4th Of July Dollar Tree craft, you will need Pub glasses and these patriotic rub-on transfers. If you already have pub glasses, you can use those!
I have used the rub-on transfer on glass cups before for my DIY Dollar Tree Halloween Crafts and my DIY Dollar Tree Christmas Crafts.
So I can say that as long as you wash them carefully, making sure not to scrub the rub-on itself, they will stay on as long as you need!
With that said, these rub-on transfers were dificult to apply. I normally cut out one letter at a time, not full, intricate pictures.
It was a bit of a challenge to lay the entire piece flat on the rounded glass and rub it on evenly. Also, the flag on the Statue of Liberty rub-on had very tiny stripes that were close together so some of it did not stick.
So I simply removed a bit more of the stripes to make it look a bit more even. And the imperfect look of it kind of gives it a washed-out rustic feel that I actually like.
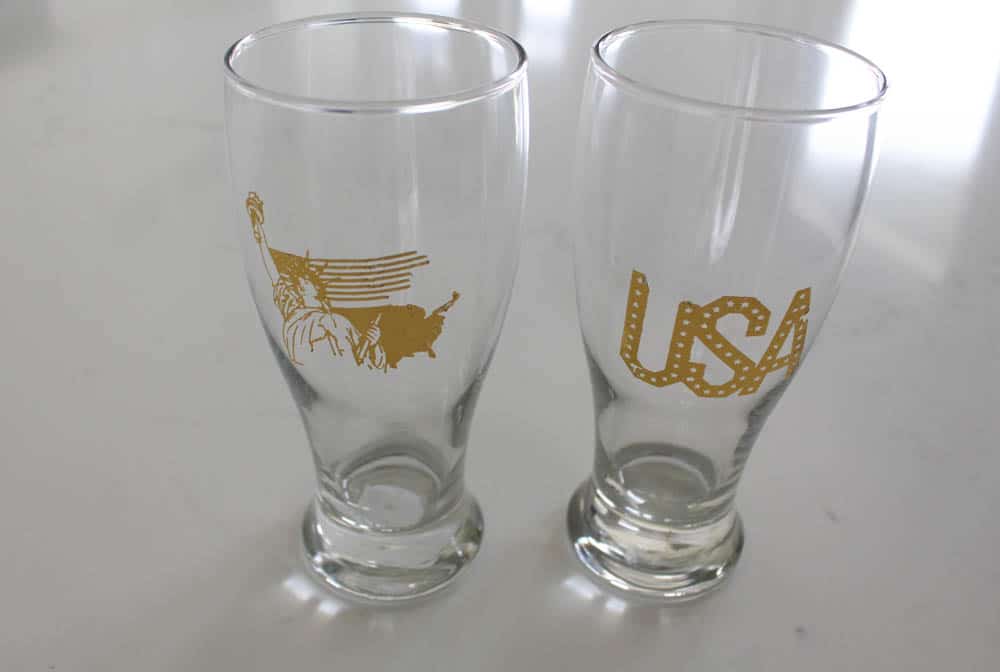
I would also recommend placing the rub-on a little higher on the glass where the round curve is more uniform for an easier application.
All in all, for the value, you get a beautiful holiday theme glass to drink your favorite beverages in! I have loved every one I’ve made so far and so have my guests!
3. RED WHITE AND BLUE CENTERPIECE
This 4th of July Dollar Tree craft is not really a craft at all! We are going to combine some Dollar Tree finds to make a super simple patriotic centerpiece!
All you need is a pack of flags, some jars, and a red, white, and blue carnations bouquet!
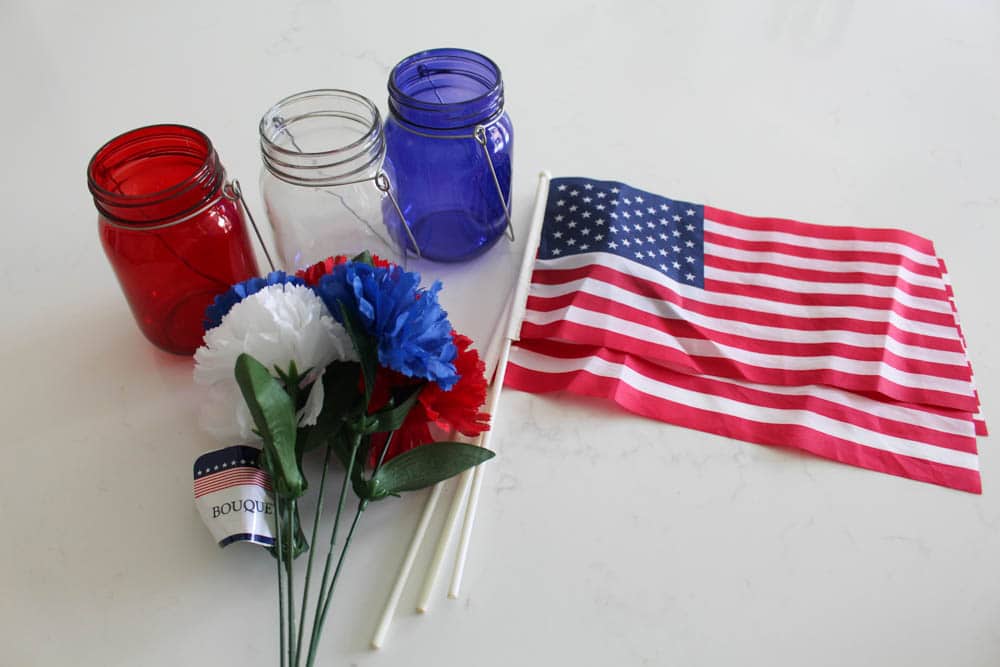
I got these colorful jars from Dollar Tree a couple of years ago so I’m not sure if they still have them. Otherwise, you can use these jars or these!
The carnations bouquet very conveniently has all the colors I needed in one bouquet so I didn’t have to buy one of each color! All I had to do was separate the stems and place each color florals into the corresponding jars.
Then place a flag in each jar and you have a beautiful and super simple patriotic centerpiece!

4. PATRIOTIC DECORATIVE CANDLE
This next craft has a bit of a nautical feel, so if you have a nautical theme anywhere in your home, this 4th of July craft is perfect for you!
All you need is an LED wax pillar candle, a rope, and foam glitter stars.
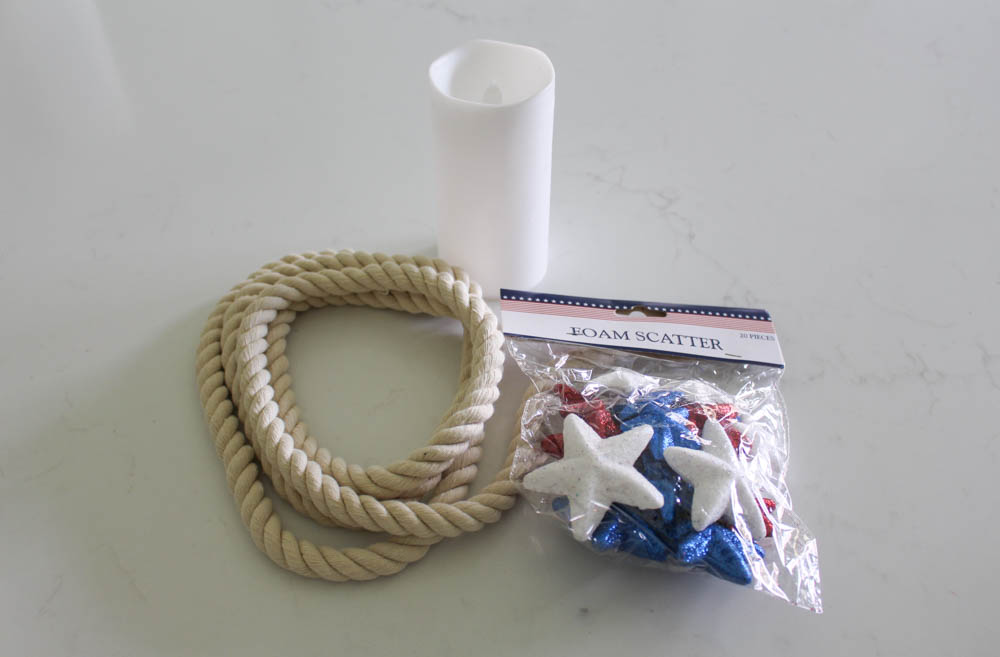
The candle itself is a great find, especially for the value! Not only is it battery powered but it has a very realistic wax feel to it. In this case, we will be covering most of it but it’s still worth mentioning if you need realistic faux candles!
Okay so first wrap the rope around the candle, hot gluing it as you go around. The length of the rope is just the right size to cover the candle.
Then hot glue the foam glitter stars on the rope. Make sure to cover up the ends of the rope with a star to hide them!
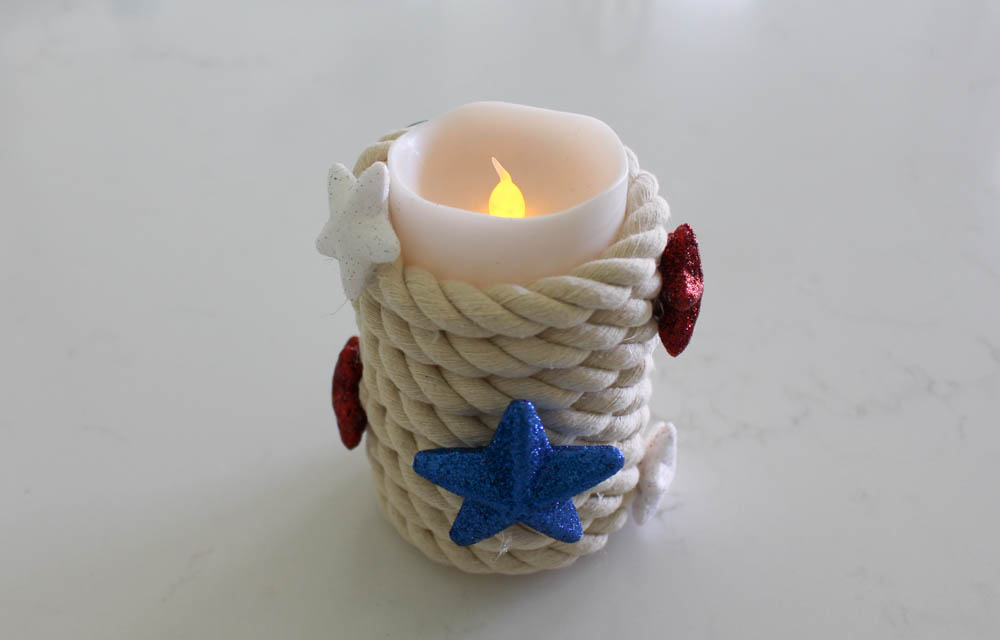
And there you have it! A super cute and simple decorative candle for your 4th of July celebrations!
5. 4TH OF JULY WREATH
I actually made this exact wreath last year. You can see the full-length tutorial here!
The grapevine wreath is from Michaels but it’s a very affordable price. And the best thing about this DIY is that there is NO HOT GLUE required!
I have repurposed this same exact grapevine wreath OVER AND OVER using this NO HOT GLUE method.
NOTE: Check out my DIY Fall Wreath and my DIY Spring Wreath, all using this same exact grapevine wreath!
So once you have your grapevine wreath, head on over to Dollar Tree and grab some patriotic rose bouquets, some red white, and blue glitter bouquets, some white baby’s breath bouquets, a red glitter coral bouquet, and a patriotic scarf.
If you find other florals that you love go ahead and get those! Don’t be afraid to do your own thing!
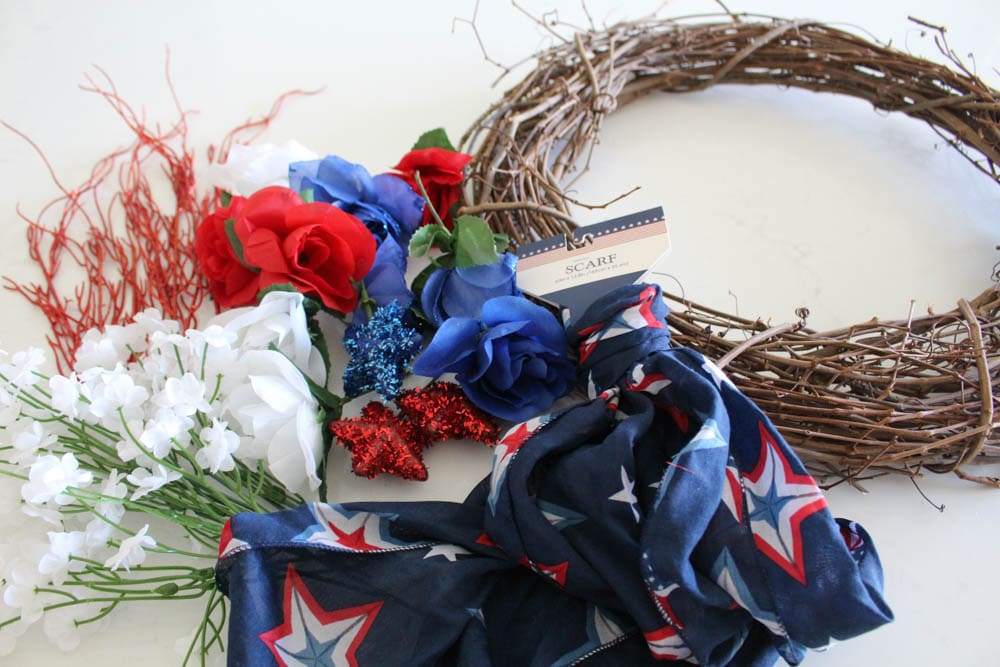
First, start by wrapping the scarf around the grapevine wreath and tying a knot on one end.
Then apply your florals! Cut the stems of each floral at about 2 1/2 inches in length to give you enough slack to stick them through the vines in the grapevine wreath. NO HOT GLUE! They stay put!
NOTE: You can see read the full-length DIY 4th of July Wreath tutorial here or watch the video to see exactly how I applied the flowers.
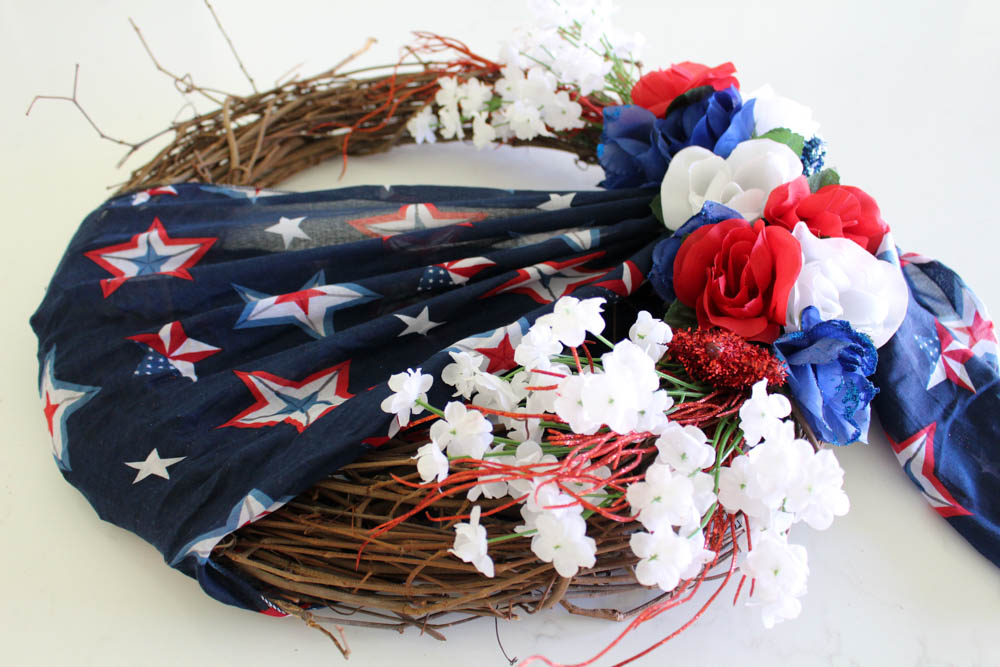
Once all your florals are in you are ready to display your beautiful patriotic wreath!
6. U.S.A SHADOWBOXES
Next, we will be using these wooden trays and this USA sign to make super easy patriotic shadowboxes!
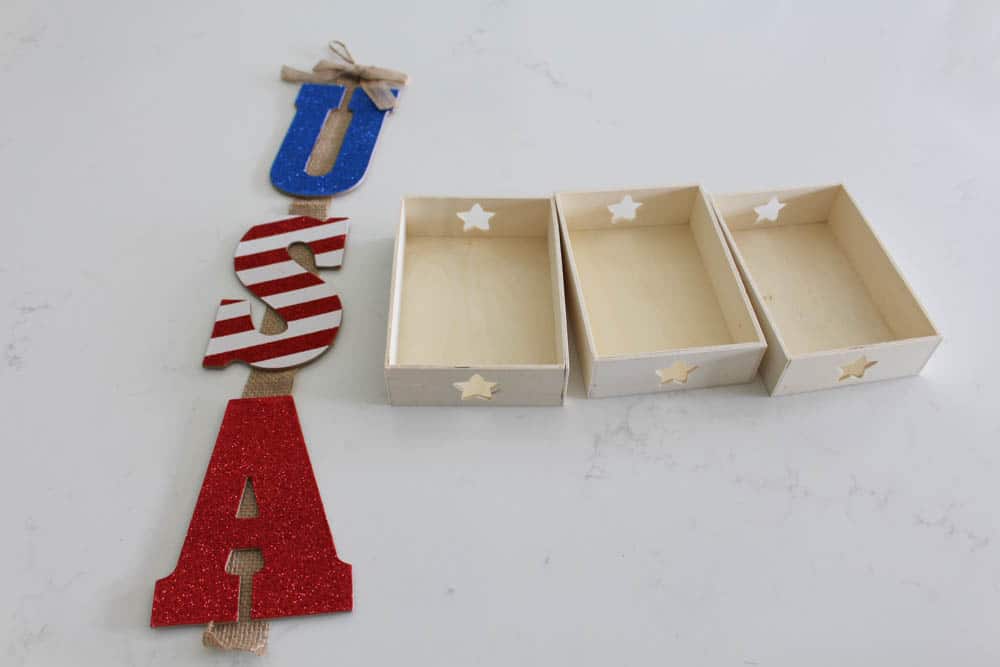
All you have to do is remove the letters from the ribbon and hot glue them to the inside of the wooden trays!
NOTE: The bottom of the letter A was a bit too big so I had to trim off a little on each side for it to fit in the box. For this, I used a serrated knife to make a dent on each side and a blade to cut through it. Be sure to use caution if you do this!

Make sure to KEEP the ribbon you removed from the letters because you will need it for another craft!
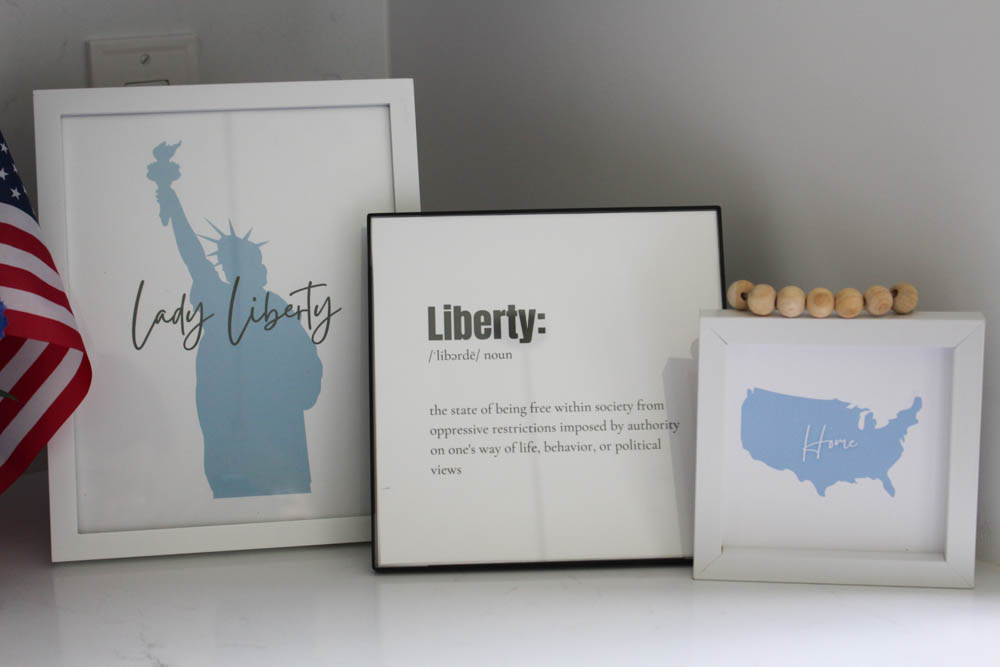
7. 10 FREE 4TH OF JULY PRINTABLES
This 4th of July craft is the easiest by far! All you have to do is print out my 10 FREE 4th of July printables and place them in a frame!
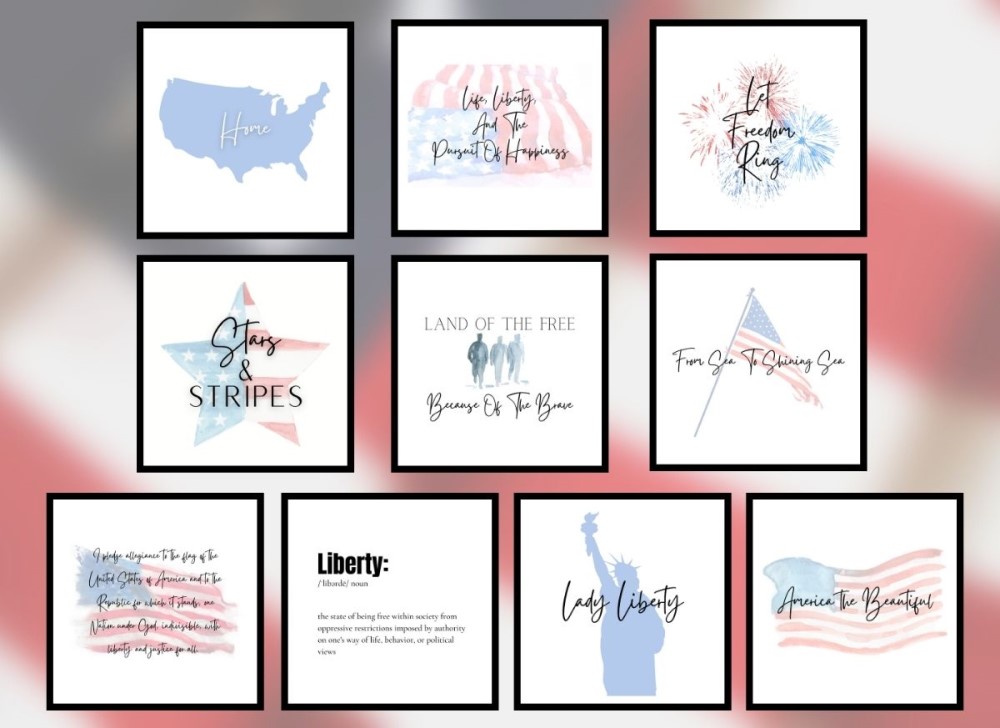
The best thing about these beautiful printables is that they come in 2 sizes, 8×8 and 8×10! The 8×8 prints are made to fit a square frame better.
I was even able to re-size it in photoshop to a 4 3/4″ size so that it could fit this super cute Dollar Tree frame!
CLICK HERE to download your FREE patriotic prints NOW!
8. STAR BELL WIND CHIME
Last but not least, we will be making a wind chime with this star bell, a small wreath form, a patriotic bandanna, and the extra ribbon we got from the USA letter sign (from craft #6).
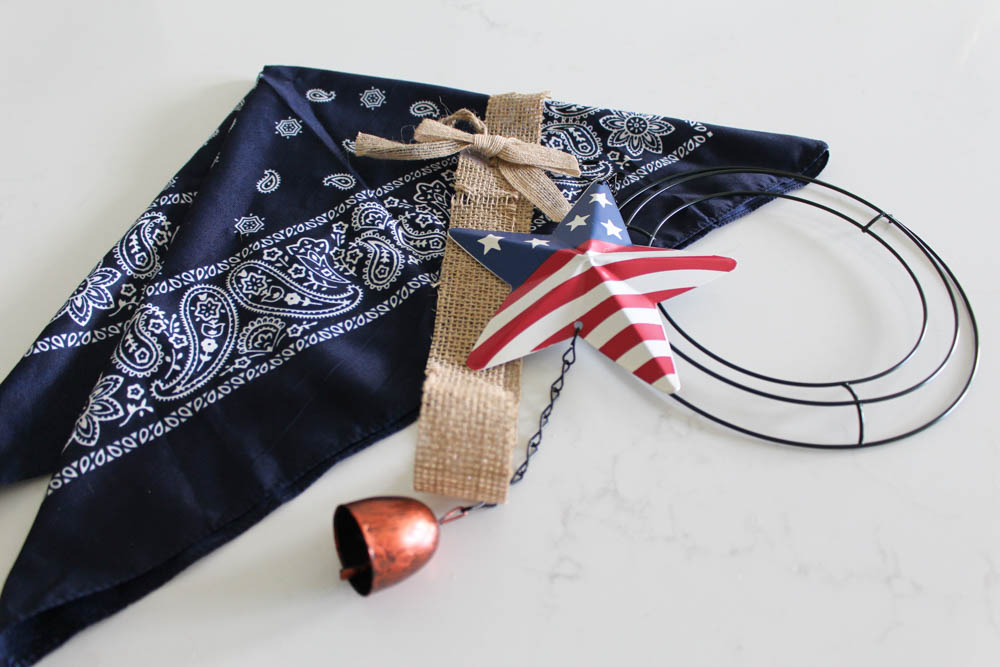
First, fold the bandanna in half (at an angle) to make a triangle shape. Then wrap the bandanna around the wreath, making sure to not wrap too tightly so that it wraps around the entire wreath. Hold it there for a second to allow for the next step.
Use a small opening at the top (where the bandanna ends meet) to hook the bell onto the wire of the wreath form. Once the hook is around the wreath wire and hooked to the bottom wire (facing down) you can glue the bandanna ends to each other to keep them in place.
Then just cut the left over ribbon to size and hot glue it around the top. This will not only cover the seams but also make use of the top loop so that you may hang it!

WATCH THE FULL VIDEO TO SEE EXACTLY HOW I MADE THESE CRAFTS!
PIN IT FOR LATER! – DIY 4th Of July Dollar Tree Crafts

I hope you found some inspiration for your 4th of July Decor this year. Let me know in the comments below which craft was your favorite!


Happy Independence Day everyone!
You May Also Like


Leave A Comment